
The fern (polypodiopsida) is rumored to be one of the oldest plants in the world, with fossils dating back over 100 million years making them thought to even have been around before dinosaurs!
This ancient plant is still ever popular today, with over 10,000 species being grown across the world.
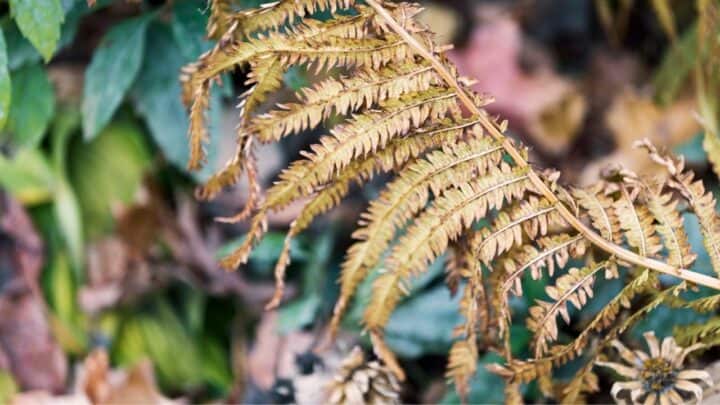
They are most known for their trademark green fronds, and when a fern is unwell is it the leaves that often take the hit.
A dying fern can look very unsightly, so if you’re looking to diagnose the issue and nurse your plant back to health – read on!
How to revive a dying fern
If your fern is dying, it might be due to root rot, fungus gnats or a lack of humidity. If root rot is the problem, cut back the dying roots and repot your plant. If you are dealing with fungus gnats, use rubbing alcohol. If a lack of humidity is responsible for the decline of your fern, increase the humidity (change of location, pebble tray or regular misting might help).
Create a fertilization schedule
If your fern has been affected by disease or pests, it has likely had some of its nutrients stripped from the soil and leaves.
Fertilizing your fern should be a regular part of your care schedule, but it also helps to add fertilizer to the soil of your fern when it is in its recovery process.
Normally, your fern should be fertilized once a month.
You could choose to use a standard liquid houseplant fertilizer, but I prefer to use a fertilizer with slow-release properties on my fern.
This reduces the chance of your fern becoming over-fertilized, which can lead to yellowing of the leaves and brown crispy edges.
Ferns should only be fertilized during the warmer months when their growing period will be active.
There is no need to fertilize your plant during the winter months unless you live in a climate that is warm year-round, as it will be growing much less.


Repotting your fern
If you have exhausted all other options to revive your fern, or you believe it is too far gone to benefit from them, you can choose to repot your fern into new soil entirely.
This is especially needed if your plant is suffering from extensive root rot, or your fern has been affected badly by a disease that could live in the soil.
To repot your fern, start by carefully removing the roots from the soil. Gently remove any excess soil with your hands, and use a stream of water to remove any
Don’t panic if parts of the roots start to fall off whilst you are washing them. Many diseases, including root rot, can damage the roots to become damaged and weak.
It is best to remove any damaged or mushy parts of the roots with a sterilized pruning tool, as these parts will no longer be providing nutrients to your fern.
If you do find that you need to remove any infected roots, you should be sure to clean the rest of the roots with a liquid fungicide. This will hopefully prevent any disease from spreading to the remaining healthy roots.
Caring for your fern
Above anything, ensuring that you are giving your fern adequate care will give you the best results when trying to revive it.
Plants that are unhealthy and neglected are going to be much more susceptible to disease and illness, so your fern must get the required amount of sunlight and water.
As I previously mentioned, root rot is one of the leading causes of death in ferns. Just water your fern as and when it is needed.
Ferns enjoy having moist soil but dislike when their soil gets too wet or is continuously soggy.
I only water my fern every 3 days, but you may have to adjust this depending on the climate and location that you live in.
I test the soil a few days after watering with a simple touch test to feel the level of moisture. Water your fern when the soil feels slightly damp, but not completely dry.
Ensuring that your fern gets the right amount of sunlight is another key point in its care schedule.
Ferns enjoy lots of indirect sunlight but can be damaged if their leaves come into contact with direct sunlight.
They need to receive at least 4 hours of natural light a day to thrive. I keep my fern on a windowsill at the back of my house, as this area receives lots of bright light that isn’t direct.
Common causes of death in ferns
Root rot
Ferns love to have moist soil, but often fall victim to overwatering due to their owners overestimating the amount of water that they need.
It’s oftentimes hard to diagnose root rot in ferns because of their dark-colored root system. This can make it hard to visibly spot signs of decay or rot.
The only sure way to know if your fern is affected is by removing your plant from the soil and feeling the roots for signs of mushiness.
A foul smell can come from the infected roots, and the odor could eventually spread to the soil.
When the roots become wet and water-clogged, it will also affect the leaves of your fern. The leaves will start to slightly wilt, and the leaves may feel thin and weak to touch.
It is likely there will also be signs of discoloration, in which the leaves go from healthy green to a dull yellow.
A fern affected by root rot will not be receiving any nutrients from the soil, which will also mean that the growth of your plant will be stunted.
If root rot is left untreated, the leaves of your fern may even fall off completely.
If your fern is only in the early signs of root rot, I would suggest that you let your plant dry out instead of taking any drastic action.
Just allow the soil to dry out completely. Before watering again, I would suggest using a popsicle stick to test the true moisture in the soil.
This process is fairly easy, and all you need to do is push the stick into the soil and feel for any residue.
If the soil is still damp, wait a few more days and test it once again.
Ferns that have been unfortunate to suffer from extensive root rot should be repotted into new soil, and the old and infected soil should be discarded immediately.
Read further on in this article to find out what the perfect watering schedule for a fern is, and how to go about repotting it.
Fungus gnats
Fungus gnats originate from the Sciaroidea family and are small dark-colored mosquito-like creatures that live and lay eggs on fern leaves and soil.
Typically, they are harmless to both humans and plants, but if an infestation is left to progress, it can lead to larvae burrowing into the soil and feeding on the roots of your fern.
Ferns are particularly susceptible to fungus gnats due to their moist soil, which is a perfect home for them.
A method that I have found particularly effective in the case of getting rid of fungus gnats is creating a trap for them made out of apple cider vinegar and liquid soap.
This is a very simple method, and I’ve had great results from it.
Start by filling a bowl with 2 cups of apple cider vinegar. Next, place a few drops of liquid soap on a small dish or saucer. Then, place the dish into the bowl of vinegar so that it floats on the top.
Place the bowl near your infected fern, and over a short time, the gnats should start to move from your plant and towards the bowl, in which they should become trapped in the dish soap.
Clean and empty the bowl and saucer every few days, and replace with fresh ingredients.
After a week, you should start to see signs of improvement in your fern and within a month, your fern should be free of fungus gnats.
Not enough humidity
Ferns grow naturally in very tropical and warm areas, often found in forests in Mexico and Asia.
Depending on the variety of fern, the consequences can be quite drastic if they don’t receive the level of humidity that they desire.
The leaves may become dry and the edges may start to turn a brown color. If this progresses, the rest of the leaves may drop and turn yellow.
Simply misting the leaves of your fern daily can help to recreate these humid conditions that they long for.
Similarly, placing on a windowsill or in an area where it can receive lots of warm and indirect sunlight will also improve this.
Some fern owners have even gone as far as to use an electric humidifier to aid their fern. This could particularly be handy if you’re living in an area with quite dry air or the seasons are rather cold.


Daniel has been a plant enthusiast for over 20 years. He owns hundreds of houseplants and prepares for the chili growing seasons yearly with great anticipation. His favorite plants are plant species in the Araceae family, such as Monstera, Philodendron, and Anthurium. He also loves gardening and is growing hot peppers, tomatoes, and many more vegetables.