
Your plants are fed. The sun is out. You’ve watered like you always do. And yet — your pots dry out fast. Too fast. The topsoil cracks. The basil sulks. By mid-afternoon, it’s survival of the thirstiest.
But there’s a trick. One quiet trick that’s been passed around gardening forums, whispered at potting benches, and tested in planters from coast to coast. It’s simple. It’s strange. And it’s probably already in your kitchen drawer.
Stick around. Because once you know what it is — and how to bury it — you might never pot the same way again.
The Secret Ingredient That Holds Water Like a Pro
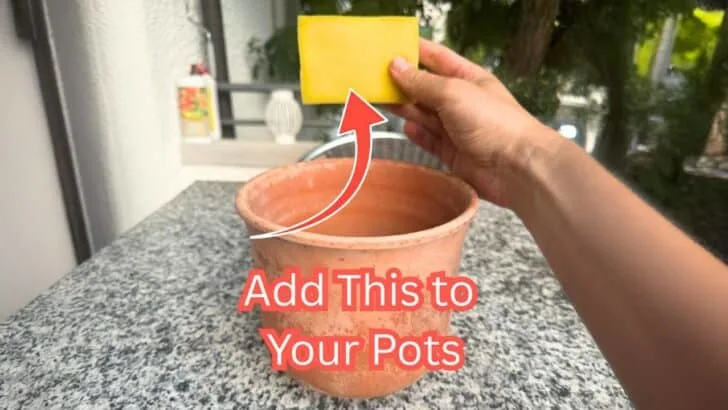
It’s not a gel. It’s not a fancy soil additive. It’s a plain old kitchen sponge.
Yes, the same kind you wipe your counters with. Hidden beneath the soil, it acts like a reservoir — soaking up water during watering or rainfall, then slowly releasing it as the soil dries out. Think of it as a tiny backup tank that kicks in when your pot starts to bake in the afternoon heat.
And the best part? You probably already have a few hiding under your sink. No shopping. No setup. Just snip, sink, and let the sponge do its thing.
Where the Sponge Trick Shines (and Where It Doesn’t)
This isn’t a one-size-fits-all hack. Like most things in gardening, it depends. Here’s when it’s pure gold — and when you might want to skip it.
✅ Best Use Cases
- Hot balconies and patios: Perfect for pots that bake in full sun or dry out daily.
- Hanging baskets: Keeps moisture available longer in windy, sun-exposed positions.
- Small pots: Slows the dry-out cycle in containers under 12 inches.
- Water-loving plants: Especially helpful for basil, mint, lettuce, impatiens, and fuchsias.
🚫 Where to Avoid It
- No drainage pots: Trapped water = soggy roots = plant meltdown.
- Cactus or succulent pots: They hate extra moisture and prefer fast-draining soil.
- Outdoor pots in rainy zones: If your container already stays wet, this might overdo it.
- Clay pots in shade: These already retain water well — the sponge might tip them into soggy territory.
In short, if your container is small, hot, and quick to dry out — sponge it. If it’s cool, moist, and heavy — skip it. This is one of those tricks that’s simple, but surprisingly powerful when used with intention.
How to Use a Sponge in Potted Plants (The Right Way)
Done right, this is one of the easiest low-cost upgrades you can make to your container garden. But a few things matter — like the type of sponge, where you place it, and what kind of pot you’re using.
🧽 Step-by-Step Instructions
- Pick the right sponge: Use a clean, unscented kitchen sponge — no soap additives, scrubby layers, or antimicrobial treatments. Plain cellulose or plant-based sponges are best.
- Size it right: For 6–10 inch pots, cut a standard sponge in half. For larger pots, use one full sponge or even two layered slightly apart.
- Placement matters: Put the sponge flat at the bottom of the pot, above the drainage layer (like gravel or pot shards), but below the root ball. This keeps it from staying too soggy and ensures roots reach it when they need water.
- Don’t block drainage: Never place the sponge over the drainage hole — it’ll plug the exit and cause root rot. Water must still be able to flow out freely.
- Fill and plant as usual: Add soil over the sponge, tamp gently, and plant as you normally would. The sponge will begin absorbing water with the first watering.
🙈 Too Lazy to Dig It Out?
We get it — nobody’s excited to excavate a soggy sponge from the bottom of a container once the plant’s in full swing. Roots get tangled, soil compacts, and suddenly that clever little trick feels like surgery. But you don’t have to go all-in on the deep-dive method. Two lazier — and perfectly legit — approaches exist. First, the mid-layer method: place the sponge about one-third of the way down when planting. It still absorbs excess water and helps distribute moisture upward, but it’s easier to reach later if needed. Second, the side pocket trick: take a small sponge or cut one in half, and slide it vertically into the side of the pot about 2 to 4 inches down. It’ll soak up runoff and can be pulled out, swapped, or dried without disturbing your plant at all. Both tricks save your nerves and your back — and in most pots, they’re more than enough.
⚠️ Pro Tip
Always use pots with working drainage holes. A sponge in a sealed container is a disaster waiting to happen — trapped moisture + hot sun = root rot city.
This method works beautifully for thirsty summer annuals, herbs, and shallow-rooted veggies like lettuce or basil. It’s especially helpful in hanging baskets, small patio pots, or anything that tends to dry out faster than you can refill your watering can.
How Long It Lasts and When to Replace It
The sponge trick isn’t forever. While it’s low-effort, it’s not set-it-and-forget-it either. Here’s what to expect.
⏳ Lifespan of a Buried Sponge
If you’re using a clean, synthetic sponge (like a dish sponge with no soap or scrubbing surface), expect it to last one full growing season. That’s roughly 3–5 months of regular use in spring and summer. After that, it starts to break down or grow moldy — especially in humid climates or tightly packed soil.
🔁 When to Check or Replace
- Smell check: If the pot smells funky after watering, the sponge is probably past its prime.
- Mold alert: If you spot mold on the soil surface or around roots, it’s time to dig and ditch the sponge.
- No more soak: If the sponge feels dry after watering or doesn’t seem to retain moisture, it’s degraded.
Want to be safe? Replace the sponge every season — early spring or late fall is perfect timing. It’s cheap insurance against root rot and keeps your watering game strong.
The Sponge Trick You’ll Actually Use
Gardening hacks come and go, but the sponge trick? It’s one of the rare ones that actually holds water — literally and figuratively. It doesn’t need a shopping trip, it doesn’t involve math, and it works in every zone, with every plant, on every porch or patio. Whether you go all in with a full base layer or sneak in a sideways sponge for lazy-day maintenance, the result is the same: happier plants, fewer drought meltdowns, and a little less guilt when you miss a watering day.
No, it won’t replace good soil or rescue a dying tomato. But it might just buy you (and your basil) some breathing room this summer. And for something that probably came from the back of your kitchen drawer? That’s a win.
🌿 Key Takeaways
- 🧽 A sponge in the pot acts like a mini water reservoir, keeping roots hydrated longer.
- 🌞 Perfect for heatwaves — it slows down evaporation and reduces watering stress.
- 🪴 Use it smart — base-layer sponges for long-term pots, side sponges for quick retrofits.
- 🚫 Always use pots with drainage — no sponge can save roots from a waterlogged pot.
- 💧 It won’t fix everything, but it’ll give your plants a better shot during summer slumps.


Daniel has been a plant enthusiast for over 20 years. He owns hundreds of houseplants and prepares for the chili growing seasons yearly with great anticipation. His favorite plants are plant species in the Araceae family, such as Monstera, Philodendron, and Anthurium. He also loves gardening and is growing hot peppers, tomatoes, and many more vegetables.