
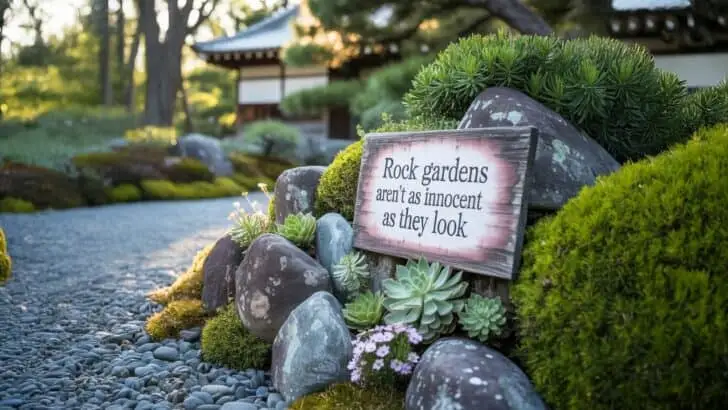
It starts with a picture. Smooth stones, tidy gravel paths, a few artfully placed succulents, and the promise of zero maintenance forever.
But here’s the thing no one puts in the caption — rock gardens can go wrong fast.
They’re not all bad. In the right spot, with the right prep, they can be beautiful, tough, and surprisingly lush. But if you skip a step or trust the wrong tutorial, you could end up with a scorched patch of regret that eats plants and grows weeds like it’s mad at you.
Thinking of going rocky? Read this first. It might save you a few thousand pounds of trouble — literally.
🪨 Key Takeaways
- 🌱 Rocks don’t block weeds. Prep the soil or get ready to weed forever.
- 💧 Bad drainage = plant rot. Amend soil or build raised mounds.
- 🔥 Wrong rocks overheat roots. Use with care, and plant accordingly.
- 🧽 They’re not maintenance-free. Dust, weeds, and shifting stones are real.
- 🧵 Weed fabric turns into weed sponge. Use cardboard or skip it altogether.
- 🎨 All rock, no plants = sad. Mix colors, textures, and greenery for balance.
- 🦋 Wildlife won’t visit bare rocks. Add native blooms and pollinator zones.
- 💸 They’re more expensive than they look. Start small and use local stone.
- ☀️ Some plants hate the heat. Shade sensitive ones or mulch their base.
- ⛏️ Rock gardens are hard to reverse. Plan carefully — they’re here to stay.
1. They Don’t Kill Weeds (Unless You Do the Work First)
Rocks don’t magically block weeds. Without proper prep, you’ll be weeding gravel forever.
Weeds love rock gardens — especially the neglected kind. Wind blows in seeds, dirt settles into gaps, and next thing you know, dandelions are thriving in your crushed granite. And once they’re in, pulling them out without disturbing everything else is a slow form of punishment.
If you think rocks = weed control, you’re setting yourself up for gravel-flavored disappointment.
🌿 How to Keep the Weeds Out
- Start with a deep soil clean-up — remove roots, rhizomes, and existing invaders.
- Use 2–3 inches of compacted crushed rock, not loose pea gravel.
- Add pre-emergent herbicide seasonally, or top with fine gravel that locks seeds out.
- Be realistic: you’ll still need occasional weeding, especially in spring.
2. Drainage Can Be a Disaster
Poor soil + rock layering = water pooling where you least want it. Some plants rot, others bolt.
Rock gardens are supposed to drain fast — that’s the whole appeal. But if your native soil is heavy clay or compacted hardpan, the water doesn’t drain away. It just sits there, stewing your succulents and drowning your drought-lovers in confusion and root rot.
Stacking rocks on top of bad drainage doesn’t fix the problem. It just hides it better — until everything starts to die off like a soggy domino line.
💧 Better Drainage Starts Below
- Test your soil first — dig a hole, fill it with water, and see how fast it drains.
- If it’s slow, amend with sand, compost, and crushed gravel before placing rocks.
- Consider using raised berms to keep water moving and roots happy.
- Skip plants that hate wet feet — think thyme, sedum, or ice plant instead.
3. The Wrong Rocks Bake Your Plants
White gravel reflects, black absorbs. Both can overheat nearby roots if placed wrong.
Rocks mess with microclimates. Bright ones bounce sunlight onto nearby stems like little solar mirrors. Dark ones trap heat and slowly roast anything growing next to them. On a hot day, you can cook an egg on some of these setups — and your plants are the yolk.
It’s not just surface heat, either. Rocks hold warmth into the evening, which sounds great until your plant is trying to rest and can’t stop sweating.
🌞 How to Chill the Heat
- Use light-colored rocks in small doses — not wall-to-wall coverage.
- Group heat-tolerant plants near darker rocks (like agave or rosemary).
- Space out rocks to allow airflow and mulch around plant bases.
- Add a few shade-casting plants to break up heat pockets.
4. You Still Have to Maintain It
Dust, moss, weeds, shifting rocks — it’s not the maintenance-free haven Instagram promised.
Over time, everything shifts. Weeds creep in. Dirt settles between stones and becomes a perfect seedbed for whatever’s floating through the wind. That gorgeous gravel? It’ll need raking, refilling, or outright replacement. And don’t forget the moss and algae that show up after a rainy week.
Rock gardens may be *lower* maintenance than lawns, but they are definitely not zero-maintenance. The fantasy ends somewhere between the third weed sprout and the twelfth rock that rolls downhill every time it rains.
🧽 What You Can Do
- Edge your rock garden to keep gravel contained.
- Use a blower or stiff broom to clear debris regularly.
- Weed early and often — don’t wait until they’re rooted deep.
- Add new gravel or reposition stones as part of seasonal cleanup.
5. Weed Barrier Fabric Can Backfire
It works at first. Then weeds grow on top of it. And removing it later? A nightmare.
Weed barrier fabric seems like a great idea — until soil and organic debris build up over it. Suddenly, you’ve got weeds rooting into the fabric, turning it into a tangled, semi-permanent mess. It’s like Velcro for unwanted plants.
And when you try to remove it a few years later? You’ll need gloves, patience, and maybe a support group. Meanwhile, the soil underneath stays compacted and lifeless — cut off from airflow and nutrients.
🧵 A Smarter Way to Block Weeds
- Skip the synthetic fabric — use thick layers of cardboard or newspaper as a biodegradable base.
- Top it with at least 3 inches of crushed gravel or stone.
- Use living groundcovers (like creeping thyme) to crowd weeds out naturally.
- Spot weed early before roots settle into the new surface layer.
6. It Can Look Harsh Without the Right Plants
Just rocks = sad. A good rock garden needs the right texture, color, and shape balance — and plants that can handle it.
Without greenery, most rock gardens end up looking like a construction site or a drainage ditch. And if everything’s the same shape and size? It just reads as flat and lifeless. The visual interest disappears, and suddenly you’re explaining to neighbors that it’s “intentional minimalism.”
Rocks should frame the plants — not replace them. Without soft foliage, contrasting textures, or seasonal color, the whole thing starts to feel dry, hot, and weirdly aggressive.
🌸 How to Make It Look Intentional (and Not Abandoned)
- Use a mix of plant shapes: low creepers, upright bloomers, and clumping grasses.
- Contrast soft textures (like lamb’s ear) with sharper forms (like yucca).
- Add pops of color — even muted flowers break up the rock monotony.
- Use irregular rock sizes and scatter them asymmetrically for a natural look.
7. It’s Not Always Wildlife-Friendly
Bees, butterflies, and birds don’t care about your rocks. No blooms? No visitors.
Rock gardens may be trendy, but to most pollinators, they’re a barren wasteland. No nectar, no shelter, no reason to hang around. Even native birds will skip over your setup if there’s nothing but stone and gravel. You might get a lizard or two, but that’s about it.
And if you’ve removed a former flower bed or meadow to make room? You’ve just downgraded your yard’s ecological value by about 80% — even if it *looks* nice to humans.
🦋 Make It Pollinator-Friendly
- Include native flowering plants like penstemon, yarrow, or goldenrod.
- Leave some bare, sandy patches for ground-nesting bees.
- Add a shallow water dish with pebbles for butterflies and bees to land on.
- Skip pesticides — rock gardens don’t need them anyway.
8. They’re Surprisingly Expensive
Those “natural” stones come at a very unnatural price — especially when delivered in bulk.
Rock gardens might look like the frugal alternative to landscaping, but start pricing out granite boulders, river stones, pea gravel, and delivery fees — and suddenly your budget needs a cold compress. One cubic yard of rock doesn’t go as far as you think, and rearranging them later? That’s chiropractor money.
And don’t forget the hidden costs: edging, soil amendments, hauling, weed barrier (if you’re using it), and the plants themselves. That Pinterest look? It wasn’t free.
💸 Rock Garden, Not Wallet Graveyard
- Use local stone — it’s often cheaper and looks more natural in your setting.
- Mix sizes: small gravel + medium rocks = more coverage for less cost.
- Scout free rock piles from construction sites (ask first).
- Start small — one feature area beats a full-yard overhaul.
9. Some Plants Hate Rock Heat
Even drought-tolerant plants can fry if the heat reflects too strongly. Succulents ≠ invincible.
Rocks absorb heat during the day and radiate it back all night. For some plants, that’s great. For others, it’s a slow roast. Even so-called heat-lovers like lavender or sedum can crisp up if the sun’s intense and the rocks are radiating like they’re part of a pizza oven.
And once the roots overheat? No amount of water will bring them back. You’ll just get sad, sunburned foliage and crunchy stems by mid-July.
🔥 Keep Plants Cool (Even in a Rock Bed)
- Plant heat-sensitive varieties in partial shade or behind taller rocks for cover.
- Use mulch at the base — even a thin layer helps buffer soil temps.
- Water early in the day to prevent moisture loss and leaf burn.
- Don’t overcrowd — airflow keeps heat from getting trapped.
10. Once It’s In, It’s Hard to Undo
Want to switch back to grass or veggies? Hope you like digging out 2 tons of regret.
Rock gardens aren’t easy to reverse. Once the stones are down, the soil underneath gets compacted, stripped of nutrients, and shaded out. If you change your mind in two years, you’re not just moving rocks — you’re rebuilding your yard from scratch.
And let’s not even talk about the back pain, the wheelbarrows, or the “Did we really spend this much on pea gravel?” moment. It’s a commitment. And not one that breaks up cleanly.
⛏️ Think Long-Term Before You Dig
- Start with a small trial area before going full-yard rocky.
- Avoid mixing rocks and soil too deeply — keep layers easy to separate.
- If unsure, use containers and raised beds over gravel for flexible design.
- Map your irrigation and shade before you place the first stone.
Rock Gardens Aren’t a Shortcut
They might look easy, but rock gardens are less “set it and forget it” and more “hope you enjoy heat management, weed strategy, and creative stone logistics.”
Done right, they can be stunning, low-water, and genuinely rewarding. Done wrong, they become a slow-moving landscaping mistake with a gravel budget you’d rather not explain.
If you’re still in? Good. Just go in with your eyes wide open — and maybe keep a shovel nearby.


Daniel has been a plant enthusiast for over 20 years. He owns hundreds of houseplants and prepares for the chili growing seasons yearly with great anticipation. His favorite plants are plant species in the Araceae family, such as Monstera, Philodendron, and Anthurium. He also loves gardening and is growing hot peppers, tomatoes, and many more vegetables.