
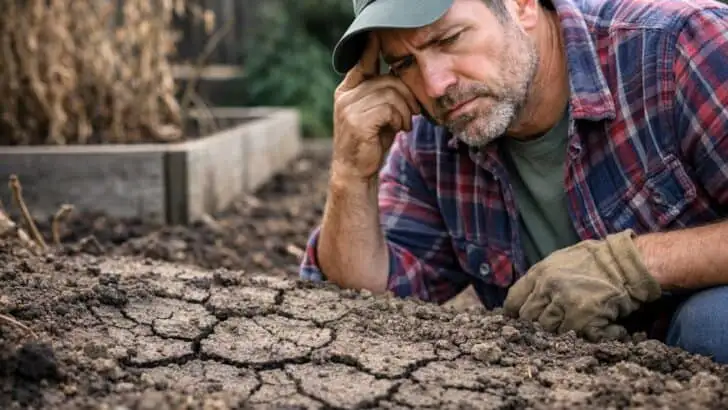
Your soil talks long before your plants give up. In late winter, it shows quiet clues that many gardeners miss, even experienced ones. We are going to spot the most common soil trouble signs you can fix now, so spring growth starts strong.
A few small changes, like improving drainage or loosening compaction, can make a bigger difference than any fertilizer.
1. Water Puddles for Hours After Rain: Drainage Is Failing
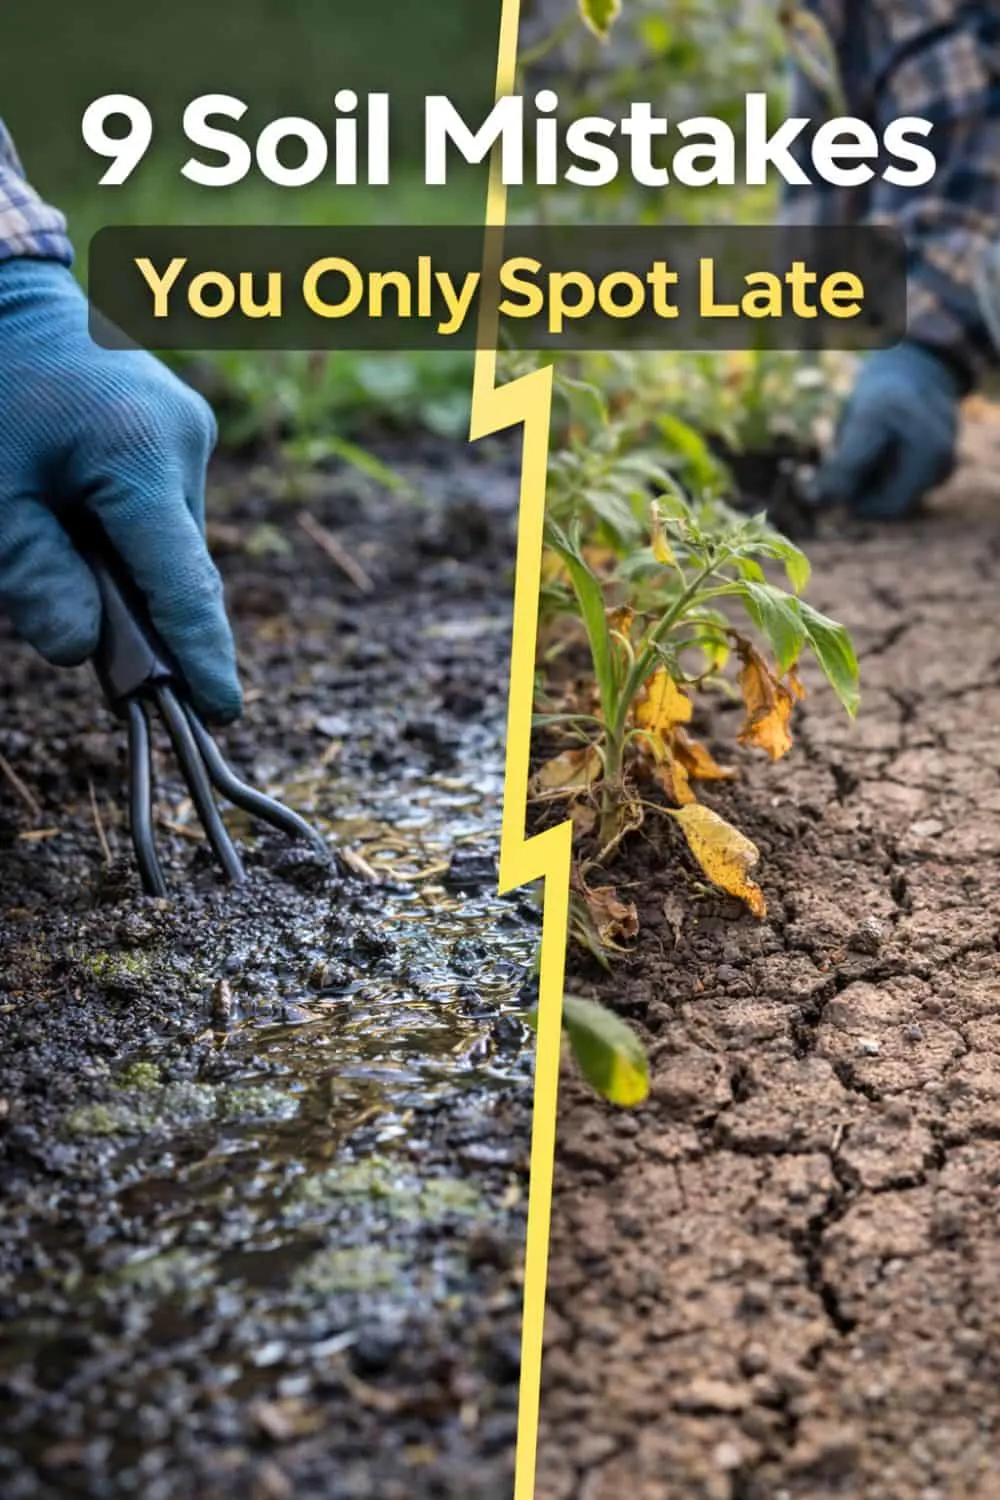
Puddles that stick around for hours mean water cannot move through your soil fast enough. Roots can suffocate in that soggy zone.
Check the spot the next day. If the soil still feels sticky and shiny, it is likely compacted or heavy clay. Try a simple jar test, shake a sample with water, then let it settle to see how much clay you have.
Start with the easiest fixes first. Redirect downspouts, refresh low areas with a few inches of topsoil, and keep foot traffic out when the ground is wet. For beds, mix in compost to improve structure, and consider a raised bed if standing water is common.
💧 Quick drainage detective work
- Do the boot test: Step on the wet spot. If you leave a deep print that fills with water, the soil is staying saturated.
- Check for a hidden “pan”: Push a long screwdriver into the soil. A sudden hard layer a few inches down often signals compaction.
- Know what “slow” means: If puddles last more than a few hours after a normal rain, roots can sit in low oxygen.
- Start with the water source: Make sure gutters and downspouts send water away from beds, not into them.
- Protect wet ground: Avoid walking and wheelbarrows on soggy soil. It squeezes out air and makes compaction worse.
Bonus Tip: If you need plants right away, choose moisture tolerant picks (like iris, cardinal flower, or sweet flag) while you improve the soil over time.
2. Soil Turns Rock Hard When Dry: Compaction Is Choking Roots
Soil that dries into a hard crust is usually compacted below the surface. Roots cannot push through, so plants stay small and thirsty.
Check it with a simple screwdriver test. If you cannot push a screwdriver 6 to 8 inches down after a good watering, the soil is packed tight.
Fix it by loosening the top 8 to 12 inches with a garden fork, lifting and rocking the handle without flipping layers. Mix in 2 to 3 inches of finished compost, then cover with mulch to soften future drying and stop new crusts.
🧪 A quick compaction check, plus a gentle fix
- Screwdriver test: Water well, then try to push a screwdriver 6 to 8 inches down. If it stops early, compaction is likely.
- Fork, do not flip: Use a garden fork to lift and rock the soil. Keep the layers in place so you do not bury the best biology.
- Compost layer: Spread 2 to 3 inches of finished compost on top. It feeds soil life that helps keep the ground open.
- Mulch to prevent crust: Add 2 to 4 inches of mulch after compost. It slows drying and stops that hard surface seal.
- Foot traffic rule: Stay off beds when they are wet. Use stepping stones or a path so you do not recompact the same spot.
Bonus Tip: If your soil is clay-heavy, mix compost into the top layer over a few seasons. Avoid adding sand, it can make a concrete-like mix.
3. A Crusty White Layer Appears: Salt Buildup or Overfertilizing
A crusty white layer on the soil surface is usually mineral salts left behind after water evaporates. It often shows up in pots, raised beds, and spots watered with hard tap water.
Scrape off the top 1/4 to 1/2 inch of crust and discard it, since those salts will keep dissolving back into the root zone. Then flush the soil with plain water, water until it runs freely out the bottom, and repeat once more after 10 minutes.
Pause fertilizer for 2 to 3 weeks, especially any water soluble feeds, and switch to half strength when you start again. If you see leaf tips turning brown or curling, that is a classic burn sign, and it means the roots need a gentler mix and steadier watering.
🧂 Quick salt check, before you panic
- Look closer: Salt crust is usually white, gritty, and sits on top. Mold looks fuzzy and can be gray or green.
- Tap water clue: Hard water leaves more minerals behind. A white ring on pots is a common hint.
- Flush method: Use room temperature water. Water until it drains well, wait 10 minutes, then water again.
- Fertilizer pause: Stop feeding for 2 to 3 weeks. Restart at half strength, especially with water soluble products.
- Watch the leaves: Brown, crispy tips or curled edges often mean fertilizer burn. New growth should look cleaner after flushing.
Bonus Tip: If crust keeps returning, switch to rainwater or filtered water for a few weeks. It can make a fast difference in containers.
4. You Find Very Few Earthworms: The Soil Food Web Is Struggling
Few or no earthworms usually means the soil is too dry, too compacted, or low in fresh organic matter. It can also happen after heavy chemical use or frequent tilling.
Do a quick check after a mild rain or after watering. Dig a small plug of soil about 6 inches deep and look for worms, worm channels, and crumbly texture.
If you come up empty, focus on steady, gentle improvements. Top-dress with 1 to 2 inches of finished compost, keep the surface covered with shredded leaves or straw, and water deeply but less often. Avoid digging and rototilling, since it breaks up tunnels and exposes worms to drying and birds. If the soil is tight, use a garden fork to loosen it without turning, then let mulch and roots do the rest.
🪱 A quick worm check that actually works
- Best timing: Look 24 to 48 hours after a gentle rain, or the day after a deep watering.
- Where to dig: Check under mulch, leaf litter, or the drip line of plants. That is where moisture and food collect.
- How much to sample: Lift a small plug about 6 inches deep. Try two spots, since worms cluster.
- What to look for: Worms are great, but so are tiny tunnels, crumbly aggregates, and dark, sweet smelling soil.
- Big red flags: Dusty soil, hard clods, or a sour smell. Those point to dryness, compaction, or low oxygen.
Bonus Tip: If you want faster results, add compost and keep soil covered. Skip “adding worms” until the bed stays moist and mulched, or they often disappear.

5. Plants Look Yellow Even After Feeding: Nutrients Aren’t Available
Yellow leaves after fertilizer often mean the nutrients are in the soil, but the plant cannot take them up. Cold, soggy soil and the wrong pH are common reasons.
In late winter and early spring, roots stay sluggish in chilly ground. If beds stay wet, oxygen drops and roots cannot “drink” nutrients, especially nitrogen.
Check soil pH with a simple test kit, many garden nutrients lock up when pH is too high or too low. For most vegetables and flowers, aim for about 6.0 to 7.0. If pH is off, adjust slowly with lime (to raise) or sulfur (to lower), and follow the label rates.
Also look for compaction, a trowel should slide in without heavy force. Loosen the top few inches, add compost, and avoid working soil when it is sticky. For a quick fix on cool days, use a light liquid feed and water in the morning so roots warm up sooner.
🧪 The “lockout” checklist
- Quick clue: Yellowing that does not improve after feeding often points to cold roots or a pH problem.
- Soil feel test: Grab a handful. If it stays shiny and sticky, roots are short on oxygen.
- pH target: Most veggies and flowers do best around 6.0 to 7.0, outside that range nutrients can “lock up.”
- Compaction check: Push in a trowel. If you must force it, loosen the top few inches and add compost.
- Gentler feeding: On chilly days, use a light liquid feed. It is easier for sluggish roots to take up.
Bonus Tip: Water in the morning, not late afternoon. Morning moisture warms sooner, which helps roots start working again.
6. Seedlings Stall or Die Early: Poor Seedbed Texture and Contact
Seedlings often stall because the seed never made firm contact with moist soil. A lumpy, fluffy, or crusty seedbed leaves air gaps that dry out tiny roots.
Run your fingers over the row, if it feels like marbles, clods, or powder, fix the texture before reseeding. Break clumps with a rake, remove pebbles, then press the surface so it is firm but not packed. A simple test helps, push a finger in, if it crumbles into chunks it is too dry, if it smears it is too wet.
After sowing, lightly tamp the row with a board or the back of your rake, then water with a gentle shower. Keep the top half-inch evenly moist until sprouts are up, because one dry day can kill a just-germinated seed. If heavy rain forms a crust, scratch the surface gently with a hand fork so the seedlings can break through.
💧 The “thumbprint test” for perfect seed contact
- Feel first: If the row feels like marbles or clods, roots will dry out in the air pockets.
- Crumbles: If your finger poke breaks into chunks, the soil is too dry. Moisten, then mix and smooth.
- Smeary: If it smears like putty, it is too wet. Wait a day, then rake lightly before you reseed.
- Firm, not hard: After sowing, press the row so seeds hug the soil. Use a board or the back of a rake.
- Gentle watering: Use a soft shower to avoid washing seed out of place. Keep the top half-inch evenly moist.
Bonus Tip: If a hard crust forms after rain, lightly scratch the surface in the morning. A hand fork works well and helps seedlings pop through.
7. A Sour or Rotten Smell Lingers: Oxygen Is Low and Roots Will Suffer
A sour, swampy, or rotten-egg smell is a red flag for low oxygen in the soil. Roots can suffocate fast in these conditions.
This usually happens after repeated heavy watering, tight clay, or pots with poor drainage where water sits. In beds, compaction from foot traffic can seal the surface so air cannot move down.
Stop watering until the top few inches dry, then water deeply but less often so the soil has time to breathe. Loosen the soil gently with a hand fork, and work in compost to improve structure without turning roots too aggressively.
For containers, empty the saucer, check that holes are clear, and consider a fresh, well-draining potting mix. If you see brown, mushy roots when you slip the plant out, trim them and repot before the smell returns.
🫧 Quick “sniff test” and rescue plan
- What that smell means: Soil is staying waterlogged, and air spaces are gone. Roots start to suffocate.
- Fast check: Push a finger 2 inches down. If it feels cool, slimy, or muddy, pause watering.
- Containers first: Dump any water in the saucer. Make sure drainage holes are open and not covered by roots.
- Gentle aeration: Use a hand fork to lightly loosen the top 1 to 2 inches. Avoid digging near the main stem.
- When to repot: If you slide the plant out and see brown, mushy roots, trim them. Repot into fresh, well-draining mix.
Bonus Tip: If your garden bed is heavy clay, top-dress with compost and keep feet off wet soil. Compaction locks the stink in.
8. Soil Washes Away Easily: Low Organic Matter and Weak Structure
Soil that rinses away in a hard rain usually has too little organic matter. It also means the soil crumbs are weak and fall apart fast.
You might notice muddy water running off beds, little gullies, or a crust that forms after watering. Do a quick jar test, shake soil with water, then watch how fast it settles. If you see mostly sand and silt with only a thin dark layer, you likely need more stable organic material.
Add 1 to 2 inches of finished compost on top and keep the soil covered with shredded leaves, pine fines, or straw. Skip heavy digging, it breaks up structure and makes runoff worse. Aim for gentle watering, like a soaker hose or a watering wand on shower mode, until the soil starts holding together.
🧪 A quick erosion check you can do today
- Jar test cue: If the water stays cloudy a long time, you likely have lots of fine silt washing away.
- Organic matter hint: A very thin dark layer at the top after settling often means you need more stable compost.
- Surface cover goal: Keep bare soil covered so raindrops do not hit it like tiny hammers.
- Watering upgrade: Use a soaker hose or shower setting to reduce splash and runoff.
- Digging caution: Skip deep turning, it breaks crumbs apart and can make crusting worse.
Bonus Tip: After you top-dress compost, add 2 to 3 inches of mulch and leave a small gap around plant stems to prevent rot.
9. Weeds Thrive While Crops Struggle: pH and Balance Are Off
When weeds look vigorous but your vegetables sit still, the soil balance is often off. pH is a common culprit.
Many common weeds tolerate a wider pH range than crops, so they keep growing while nutrients stay locked up for your plants. Grab a simple soil test and check pH first, then look at calcium, magnesium, and potassium levels if your report includes them. Most garden vegetables do best around pH 6.2 to 6.8.
If pH is low (too acidic), add garden lime in the amount recommended by your test, not a guess. If pH is high, use elemental sulfur or acid-forming fertilizers as directed, and lean on compost to steady the swings. Retest after a season before making another big change.
🧪 Quick pH triage that actually works
- Test first: Use a basic soil test kit for a fast read, or send a sample to your county extension lab for details.
- Target range: Most vegetables perform best at pH 6.2 to 6.8, because nutrients stay more available there.
- Low pH fix: If soil is acidic, use garden lime at the rate on your test. Too much can cause new problems.
- High pH fix: If soil is alkaline, use elemental sulfur or an acid-forming fertilizer as directed. Add compost to soften the swing.
- Check the “big three”: If your report includes calcium, magnesium, and potassium, look for imbalance. One high number can block another.
Bonus Tip: Retest after one growing season before making another major change. Slow corrections usually beat quick fixes.
Pick One Trouble Spot Today, Your Garden Will Thank You by Spring
Choose the one sign you see most, then fix that first, drainage, compaction, salts, or low organic matter. Do a quick check next, squeeze a handful for texture, watch how fast water soaks in, and note any sour smell or crust. Add compost, reduce heavy feeding, and protect bare soil with mulch so the good biology can rebound.
Keep a simple before-and-after note for two weeks, then retest with a pH kit if weeds still win and leaves stay yellow.
Frequently Asked Questions About Soil Trouble Signs to Fix Now, What Most Gardeners Miss
1. When is the best time in late winter or early spring to test soil in the US?
Test once the soil is thawed and no longer waterlogged. Do it a few weeks before you plan to fertilize or plant, so you have time to adjust pH and nutrients.
2. What is the simplest at home test for soil drainage and compaction?
Dig a hole about 12 inches deep, fill it with water, then refill after it drains. If the second fill takes more than 4 hours to drain, drainage is poor, and if a shovel or trowel is hard to push in, compaction is likely.
3. How much compost is safe to add before planting without overdoing it?
For most beds, add 1 to 2 inches of finished compost and mix it into the top few inches, or topdress and let worms work it in. Avoid going thicker every season, too much compost can raise salts and push nutrients out of balance.
4. Should I till compacted soil or use a garden fork and topdress instead?
In most home gardens, use a garden fork to loosen soil without flipping layers, then topdress with compost. Tilling can break soil structure and bring up weed seeds, and it can make compaction worse over time.
5. How do I know if my soil pH is too high or too low for vegetables and flowers?
A soil test is the most reliable, but clues include poor growth even with watering, yellow leaves, and nutrient issues that do not improve with feeding. Most vegetables and many flowers do best around pH 6.0 to 7.0, and big swings can block nutrient uptake.
6. Can I plant if my soil is still wet, and what problems does that cause?
It is better to wait, working wet soil causes clods and compaction that can last all season. Seeds may rot, roots struggle for air, and you often end up with stunted plants and more disease.
7. What cover crops work best to rebuild soil before spring planting?
In late winter, options are limited, but winter rye that was planted in fall is excellent for structure and weed suppression. For early spring sowing where it fits, peas or oats are good choices, and crimson clover helps add nitrogen if you can give it time before planting.


Daniel has been a plant enthusiast for over 20 years. He owns hundreds of houseplants and prepares for the chili growing seasons yearly with great anticipation. His favorite plants are plant species in the Araceae family, such as Monstera, Philodendron, and Anthurium. He also loves gardening and is growing hot peppers, tomatoes, and many more vegetables.