

Most houseplant problems do not need a new pot, a new fertilizer, or a long Saturday project. They need a tiny course correction that takes about five minutes. Let’s walk through 11 quick fixes that target what most folks miss, like light direction, sneaky drafts, and watering habits that look fine on the surface.
You will get simple, repeatable moves you can do right now, even if bending and heavy lifting are not on the plan.
1. Droopy Leaves: Water the Right Amount Fast
Droopy leaves often mean the roots are either too dry or sitting in soggy soil. A two-minute check can tell you which one.
Press a finger 2 inches into the potting mix. If it feels dry at that depth, water slowly until a little drains out, then empty the saucer right away.
If the mix feels damp or smells sour, do not add water. Tip the pot slightly to pour off any standing water, then set it on a dry towel for 10 minutes to wick moisture from the drain holes.
Fast rule: water deeply less often, and never leave the pot in water. If the plant perks up within a few hours, you nailed the cause and the amount.
💧 The 2-inch test that stops guessing
- Check depth: Press your finger about 2 inches into the mix, not just the surface.
- If it is dry: Water slowly until a little drains out the bottom.
- Empty the saucer: Dump it right away so roots do not sit in water.
- If it is damp or sour: Skip watering, then pour off any standing water you can.
- Quick dry-out step: Set the pot on a dry towel for 10 minutes to wick moisture from the drain holes.
Bonus Tip: If you are unsure, lift the pot. A very light pot usually needs water, and a heavy pot usually does not.
2. Yellowing Lower Leaves: Adjust Watering, Not Fertilizer
Yellowing lower leaves usually point to a watering issue, not a nutrient problem. Most houseplants drop older leaves first when roots stay too wet.
Check the soil 2 inches down with your finger. If it feels damp or cool, wait to water and let the pot dry a bit more between drinks.
Empty the saucer after watering so the pot never sits in runoff. If the soil stays wet for days, switch to a pot with a drainage hole or a faster draining mix with extra perlite.
💧 The “two-inch test” that saves roots
- Do this first: Feel the soil about 2 inches down. Water only if it is dry at that depth.
- What “too wet” feels like: Soil that is cool, damp, or slightly muddy means the roots are still sitting in moisture.
- Saucer rule: Empty the saucer after watering. Standing runoff is a common cause of yellow lower leaves.
- Pot check: Make sure there is a real drainage hole, not a decorative “indent.” If there is no hole, repot.
- Fast fix for slow soil: If the mix stays wet for days, add perlite next time you repot so air can reach the roots.
Bonus Tip: If you are unsure, wait one more day before watering. Slight dryness is safer than soggy roots.
3. Fungus Gnats: Dry the Topsoil and Trap Adults


Fungus gnats usually mean the top inch of soil is staying too wet. Drying that layer is the fastest fix.
Stop watering until the top 1 to 2 inches feel dry, then water from the bottom if you can. Set yellow sticky traps at soil level to catch the flying adults, and replace them when they fill up.
For a quick top-dressing, add a thin layer of coarse sand or fine orchid bark to keep the surface drier. Empty saucers after watering, since standing water keeps the cycle going.
🟦 Break the life cycle fast
- Dry zone: Keep the top 1 to 2 inches dry between waterings.
- Bottom water: Set the pot in a shallow tray for 10 to 20 minutes, then drain well.
- Trap placement: Put yellow sticky cards right at soil level, not up in the leaves.
- Refresh traps: Replace when dusty or covered, since old cards stop catching well.
- Surface barrier: Add a thin layer of coarse sand or fine orchid bark to discourage egg laying.
Bonus Tip: If you see gnats after two weeks of drying and trapping, repot into fresh mix and wash the pot to remove hidden eggs and larvae.
4. Brown Leaf Tips: Flush Salts From Potting Mix
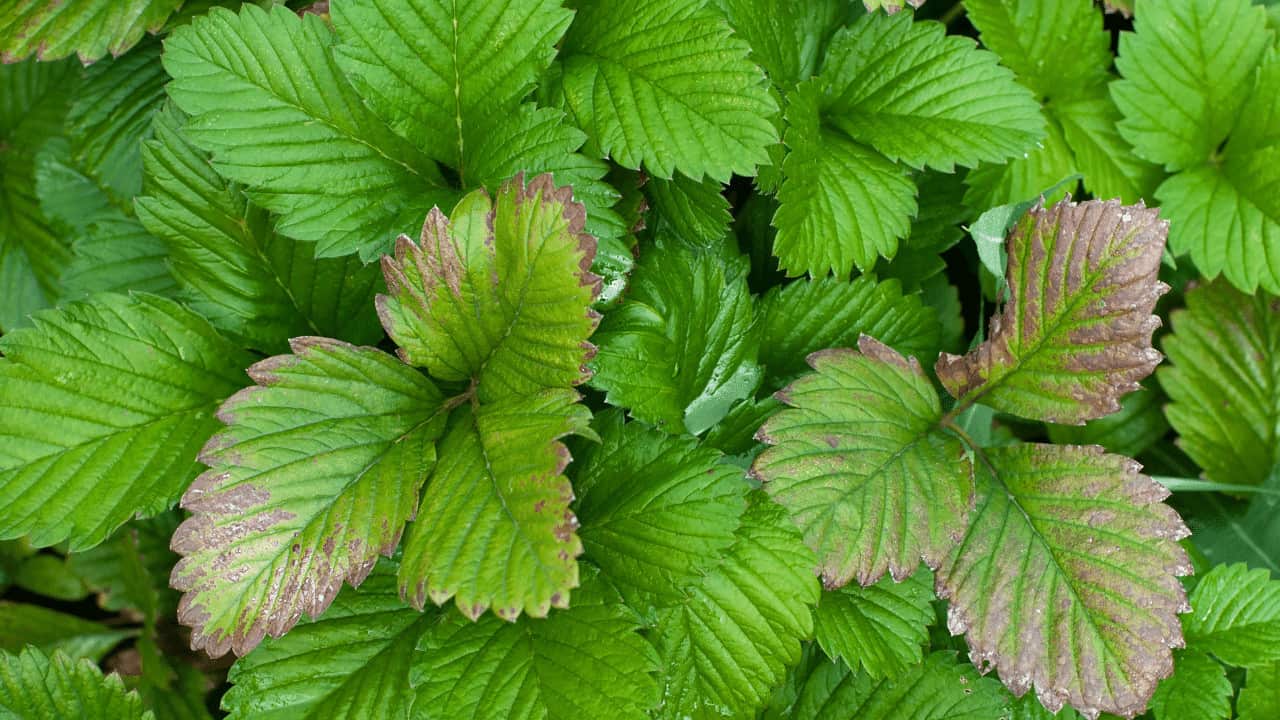

Brown, crispy tips on houseplant leaves often come from salt buildup in the potting mix. It is common after months of fertilizer and hard tap water.
Carry the pot to a sink or tub. Run room temperature water through the soil slowly for 2 to 3 minutes, aiming for water to pour freely from the drainage holes.
Let it drain well, then empty the saucer so the roots do not sit in salty runoff. Hold fertilizer for the next watering or two, then restart at half strength. If your water is very hard, try using filtered water once a month to reduce new buildup.
💧 A quick salt check before you flush
- Look for clues: A white crust on soil or pot rims usually means mineral salts are building up.
- Water temperature: Use room temperature water to avoid shocking roots.
- Drainage test: If water pools on top, poke a few holes with a chopstick to open channels.
- How much water: Aim for lots of runoff. A good target is water equal to 2 to 3 times the pot volume.
- Aftercare: Empty the saucer right away, then let the pot drain fully before putting it back.
Bonus Tip: If the mix stays soggy after flushing, plan a spring repot into fresh potting mix with added perlite for faster drainage.
5. Dusty Leaves: Quick Clean for Better Light Use
Dusty leaves block light and slow down growth. A quick wipe can perk a plant up fast.
Use a soft, damp microfiber cloth and support the leaf from underneath as you wipe. For hairy leaves like African violets, skip water and use a soft paintbrush to flick dust away.
Avoid leaf shine products, they can clog pores and leave a sticky film. If a plant is safe to rinse, a lukewarm shower works, just tip the pot so soil does not wash out. Finish by checking the leaf undersides, dust and pests love to hide there.
🧽 Leaf Cleaning That Actually Helps
- Best tool: Use a soft, damp microfiber cloth for most smooth leaves.
- Support first: Hold the leaf from underneath, so you do not crease or snap it.
- Hairy leaves: Use a dry, soft paintbrush on African violets and similar fuzzy plants.
- Skip the shine: Avoid leaf shine products, they can block pores and attract dust.
- Shower option: If the plant tolerates rinsing, use lukewarm water and tip the pot to protect soil.
Bonus Tip: After cleaning, check leaf undersides and stems. That is where dust and early pests often hide.
6. Leaves Facing Away From the Window: Simple Rotation Trick
Houseplants lean toward light, so one side gets lush while the other side thins out. You can fix the lopsided look in minutes.
Turn the pot a quarter turn so a new side faces the window. Mark the pot with a small piece of tape so you remember the next turn.
Rotate again about once a week, or every time you water, so the plant grows evenly. For tall plants, steady the stems with one hand while you turn the pot to avoid cracking roots. If leaves are hard pressed against the glass, pull the plant back a few inches to prevent cold damage in winter.
💡 A quick way to remember your turns
- Best rotation: Turn the pot a quarter turn each time, not a full spin.
- Easy reminder: Put a small piece of tape on the pot, then move it to the new “front” after turning.
- Watering link: Rotate when you water, so it becomes automatic.
- Stability first: Hold the main stems gently while you turn, especially on taller plants.
- Winter safety: Keep leaves a few inches off cold glass to avoid chill damage.
Bonus Tip: If the plant is heavy, slide it onto a simple plant caddy. Rotation becomes a one-hand job.
7. Plant Leaning Over: Stake It in Minutes
A leaning houseplant usually needs support, not more water. Staking it now prevents a permanent bend.
Use a bamboo stake, a thin dowel, or a straight chopstick that is a few inches taller than the plant. Slide it down near the pot edge, then angle it toward the root ball so you do not spear the main roots.
Tie the stem loosely with soft plant tape, a fabric strip, or a twist tie padded with a bit of paper towel. Make a figure-eight loop between the stake and stem so it does not rub, then tighten just enough to hold it upright.
🔵 Fast, gentle staking that avoids stem damage
- Best stake: Bamboo, a thin dowel, or a straight chopstick that sits a few inches above the top leaves.
- Where to place it: Push it down near the pot edge, then angle inward so you miss the thickest roots.
- Best tie material: Soft plant tape, a fabric strip, or a padded twist tie so the stem does not get pinched.
- Best knot: Make a figure-eight loop between stem and stake to prevent rubbing.
- How tight: Snug enough to stand upright, loose enough to slide a finger under the tie.
Bonus Tip: Check the tie weekly for the next month. Loosen or move it up as the stem thickens.
8. White Crust on Soil: Scrape and Top Dress
That white crust on the soil is usually mineral salts from hard water or leftover fertilizer. It can block water from soaking in evenly.
Use a spoon to gently scrape off the top 1/4 inch of soil, and discard it. Avoid digging deep, because many houseplants have feeder roots close to the surface.
Top dress with fresh potting mix, then water slowly until a little drains out the bottom. For the next few weeks, use distilled water, rainwater, or filtered water, and skip fertilizer until new growth looks steady.
🧂 Salt reset, without stressing roots
- What it is: A crust of mineral salts from hard water, plus leftover fertilizer.
- How much to remove: Scrape off about 1/4 inch of the top layer, then toss it.
- What to avoid: Do not dig deep, feeder roots often sit right near the surface.
- Top dress: Add fresh potting mix to replace what you removed. Keep it light, not packed down.
- Water after: Water slowly until you see a little drainage from the bottom.
- Short pause: Use distilled, rain, or filtered water for a few weeks. Skip fertilizer until growth looks steady.
Bonus Tip: If the crust keeps coming back fast, do a gentle “flush” on the next watering day. Run plain water through the pot for a minute, then let it drain completely.
9. Root Bound Plant: Do a Fast Root Loosen and Repot


A root bound houseplant dries out fast and stops putting on new growth. You may see roots circling the pot or poking out the drain holes.
Slide the plant out and look for a tight, solid root “basket.” Use your fingers to tease the outer roots loose, then make 3 or 4 shallow vertical slits if they are very matted.
Repot in a container one size up with fresh potting mix, and keep the crown at the same height. Water until it runs out the bottom, then let it drain well. For the next week, give bright light but avoid hot direct sun while new feeder roots recover.
💡 Quick repot checklist (no drama)
- Fast test: If the root ball holds the pot shape and looks like a tight “basket,” it is time.
- Loosen first: Tease just the outer 1/2 inch of roots. That is where new feeder roots will form.
- When to slit: Make 3 or 4 shallow vertical cuts only if roots are very matted. Do not chop deep into the center.
- Pot size: Go up one size only. A pot that is too big stays wet longer and can invite root rot.
- Crown height: Keep the crown at the same level as before. Burying it can cause stem rot.
- Recovery light: Bright light is great for a week. Skip hot direct sun until you see fresh growth.
Bonus Tip: If the plant keeps drying out fast after repotting, bottom-water once to fully rehydrate the old root ball, then return to normal watering.
10. Sudden Leaf Drop: Fix Drafts and Heat Vents
Sudden leaf drop often happens when a plant sits in a fast-changing air stream. Heat vents, cold windows, and exterior doors are common culprits.
Hold your hand near the leaves for 30 seconds and feel for warm or chilly airflow. If you find a draft, move the pot 2 to 3 feet away, or angle the plant so air does not hit it directly.
For vents you cannot avoid, use a simple deflector to push air up or to the side. You can also set the plant behind a lamp, a chair, or a low screen to break the flow, but keep it in the same light level. Within a week or two, you should see fewer dropped leaves and steadier new growth.
🪟 Find the sneaky airflow
- Quick test: Hold your hand at leaf level for 30 seconds, then check for warm or chilly movement.
- Common hot spots: Heat registers, baseboard heaters, kitchen exhaust paths, and the space in front of exterior doors.
- Move distance: Slide the pot 2 to 3 feet away from the air stream, even a small shift can help.
- Change the angle: Turn the plant so leaves do not face the airflow directly.
- Deflect the vent: Use a simple vent deflector to push air up or sideways instead of across the plant.
Bonus Tip: After you adjust the spot, wait one to two weeks before changing anything else. Plants need time to settle.
11. Sticky Leaves: Wipe Off Honeydew and Check Pests
Sticky leaves usually mean honeydew from sap-sucking pests. A quick wipe makes the plant look better right away.
Use a damp microfiber cloth or cotton pad with plain water, then wipe the top and underside of each leaf. If the residue is stubborn, add one drop of mild dish soap to a cup of water, then wipe again with clean water.
After you clean, inspect for aphids, mealybugs (white cottony clumps), scale (brown bumps), or spider mites (fine webbing). Treat by rinsing the plant in the sink and spraying insecticidal soap, then repeat weekly until you see no new stickiness.
🧼 Quick Honeydew Cleanup Plan
- Start simple: Wipe with plain water first. Many sticky films lift without soap.
- Best tool: Use a damp microfiber cloth or cotton pad. Paper towels can snag and tear leaves.
- Soap mix: Use one drop of mild dish soap in one cup of water. Then do a final wipe with clean water.
- Don’t miss hiding spots: Check leaf undersides, stems, and where the leaf meets the stem. That is where pests tuck in.
- Clues to look for: Aphids, mealybugs (white cotton), scale (brown bumps), or spider mite webbing. Sticky leaves often come back fast if any are left.
Bonus Tip: Put a white sheet of paper under the plant and tap a few stems. Tiny moving specks on the paper can confirm pests, even when you cannot see them on the leaves.
Your five minute reset routine starts today
Pick the one symptom you see most (droop, yellowing, gnats, tips, dust, leaning, crust, root bind, leaf drop, or sticky leaves) and do that fix right now. Then set a simple weekly habit, rotate the pot, wipe leaves, and check soil moisture before you water. If something looks worse after a day or two, switch to the matching fix instead of adding fertilizer or more water.
Keep a quick note on your phone about what you changed, because that is how you learn what your plant actually wants.
Frequently Asked Questions About 11 Five Minute Houseplant Fixes, What Most Folks Miss
1. How can I tell if my plant needs water or it is overwatered?
Check the soil 1 to 2 inches down with your finger. Dry soil and a light pot usually means it needs water. Soggy soil, a heavy pot, yellowing leaves, or a musty smell often points to overwatering.
2. What is the fastest safe way to get rid of fungus gnats indoors?
Let the top inch of soil dry between waterings, since larvae need constant moisture. Put yellow sticky traps near the pot to catch adults fast. If they keep coming back, water once with BTI (mosquito bits) tea.
3. Should I mist houseplants in winter in the US?
Usually no, misting helps for minutes and can encourage leaf spots in cool rooms. Use a small humidifier or a pebble tray for steadier humidity. Keep plants away from heating vents and drafts.
4. How often should I rotate my houseplants for even growth?
Rotate about a quarter turn every 1 to 2 weeks. If a plant is leaning fast toward a window, rotate weekly. Keep the light source consistent so the plant can adjust.
5. Is tap water OK for houseplants, or should I use filtered water?
Tap water is fine for many plants, especially if you let it sit out overnight. If you see white crust on soil or leaf tips browning, try filtered water or rainwater. Sensitive plants like calatheas often do better with low mineral water.
6. When is it better to repot versus just adding fresh potting mix on top?
Repot when roots circle the pot, grow out the drainage holes, or watering runs straight through. Top dress with fresh mix when the plant is stable but the surface soil looks tired or compacted. Do not bury stems or crowns when adding mix on top.
7. What can I do quickly if I find scale, mealybugs, or aphids?
Isolate the plant right away and wipe pests off with a cotton swab dipped in rubbing alcohol. Rinse the plant in the sink, then spray with insecticidal soap, covering leaf undersides. Repeat every 5 to 7 days until you see no new pests.


Daniel has been a plant enthusiast for over 20 years. He owns hundreds of houseplants and prepares for the chili growing seasons yearly with great anticipation. His favorite plants are plant species in the Araceae family, such as Monstera, Philodendron, and Anthurium. He also loves gardening and is growing hot peppers, tomatoes, and many more vegetables.