
The flowers are fading. The pods are drying up. Your garden might look like it’s calling it quits. But if you’re paying attention, it’s doing something much more generous. It’s giving you next year’s seeds. For free.
Most gardeners miss this part. They deadhead too early, pull up plants that still have work to do, or simply don’t realize what all those dried-up flower heads are hiding.
This isn’t some survivalist trick. It’s how gardeners used to restock their seed boxes before catalog season even existed. And it still works. You don’t need a single dollar, just a paper bag and a little patience.
Let’s walk through how to harvest next year’s garden without spending a cent — one seed head at a time.
🌼 What “Going to Seed” Actually Means
When a plant “goes to seed,” it’s not giving up. It’s just switching gears. The leaves stop growing, the blooms fade, and suddenly it’s all about the seeds. The plant starts drying out on top, and if you look closely, you’ll spot something new: seed heads forming where the flowers used to be.
You’ll see brown petals, dry stems, maybe even little pods or capsules. Some get papery and fragile. Others stay firm and rattle when you shake them. This is your sign. The plant is making sure there’s a next season.
It happens fast, and each plant does it differently. Calendula makes little curved spiky seeds right on the head. Cosmos drop skinny, pointy seeds that fall if you breathe on them. Dill turns its flower into a firework of tiny seed umbrellas. Marigolds twist into dry fans of future flowers.
Once you know what to look for, it gets addictive. Every dried bloom becomes a treasure chest. And you don’t need to be an expert to start collecting.
📘 Mini Seed Glossary
- Seed Head: The cluster where seeds form after flowering, like in zinnias or coneflowers.
- Pod: A shell that holds seeds and often splits when mature (peas, nasturtiums).
- Capsule: A dry container that opens along seams (like poppies).
- Achene: A single dry seed, often with a hair or plume (like in calendula).
- Umbel: A flat-topped flower cluster that turns into a spread of seeds (dill, carrots).
👀 Which Flowers and Herbs Are Worth Collecting From
Not every plant is worth the seed-saving effort, but some practically beg for it. They make clean, easy-to-harvest seeds that actually grow true the next year. And they do it without fuss. No fancy drying racks. No sieves. No microscope-level patience. Just a sharp eye, a dry day, and maybe an envelope or two.
Start with the sure things. Zinnias and cosmos are beginner gold — their seeds are easy to find and even easier to grow. Calendula gives you a full show: blooms, dried spirals of seed, and usually a second round if you leave a few to fall. Marigolds never seem to stop producing, and they’ll give you a thick fan of seeds at the end of each flower.
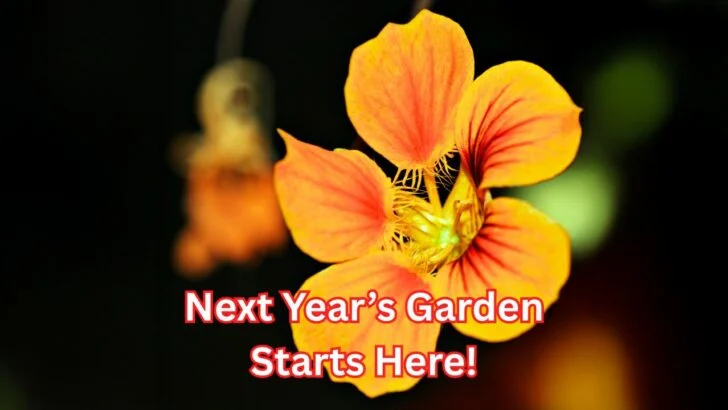
Then you’ve got herbs that go feral in the best way. Dill is generous to a fault. Poppies hold hundreds of seeds in tiny shakers. Borage drops seeds like it’s trying to colonize the yard. And nasturtiums? They leave their seeds right on the ground, daring you to notice.
If you’re tight on space or time, just pick two or three of your favorite blooms. It only takes a handful to get next year’s garden started for free.
🌿 Bonus: Veggies That Self-Seed Like Pros
- Lettuce: Let it bolt and you’ll have fluff-topped seed stalks in weeks.
- Arugula: Pops up in spring like it never left.
- Radishes: Their pods dry out with zero fuss.
- Chervil: This cool-season herb reseeds itself like clockwork.
- Mustard greens: Tough, spicy, and generous with seeds.
✂️ How to Harvest Seeds the Right Way
This is the part where people mess up. They see a flower drying out, snip too early, stuff it in a plastic bag, and wonder why nothing grows next year. Good seed saving isn’t complicated, but it does require patience and a little timing.
Start by waiting. Seed heads need to be fully mature. That means dry, brown, crisp to the touch, and often a little rattly. If the plant still looks lively or the seed pod is green and bendy, walk away and give it more time.
Pick a sunny, dry day. Morning dew and rain are your enemies here. Snip the seed heads carefully and drop them straight into a paper bag or envelope. Don’t cram or squish. Let them breathe while they finish drying indoors.
Label as you go. It’s easy to mix up dill and fennel or zinnia and marigold once they’re dry. Don’t rely on memory — write it down now, save yourself frustration later.
🚫 What NOT to Do When Saving Seeds
- Don’t harvest green seeds — they’ll mold or rot before they dry.
- Don’t use plastic bags for storage — moisture gets trapped and ruins everything.
- Don’t skip the drying phase — even if they “feel” dry, give them a few days inside.
- Don’t store in the sun — light can kill seed viability faster than you think.
🏷️ The Most Important Step: Label Everything
Saving seeds without labeling them is like putting mystery meat in the freezer. You might figure it out later — or you might end up planting radishes where you wanted roses. Even worse, you could ruin your muffins with what you thought was poppy seed but was actually dill.
Labels are non-negotiable. Keep them simple and consistent. At minimum, write down the plant name and the date you harvested. Bonus points if you add notes like flower color, variety, or whether the plant performed well this year.
If you’re collecting lots of different seeds, write your labels before you start harvesting. That way you’re not guessing with a pile of unmarked envelopes at the end of the day.
📝 Simple Label Template
- Plant Name: (e.g., Calendula)
- Date Collected: (e.g., Aug 2, 2025)
- Color / Variety: (e.g., Orange King)
- Notes: (e.g., Grew well in partial sun, no pests)
🏠 Where to Store Your Seeds Until Spring
You’ve done the work. You picked, dried, labeled. Now don’t ruin it with a bad storage spot.
Seeds are basically sleeping embryos. If they get wet, hot, or exposed to light, they start to wake up — or rot. What they really want is a cool, dark, dry nap until spring rolls around.
Good options? A paper packet inside a glass jar with some rice or silica gel. An envelope tucked in a shoebox in your closet. Even an old lunchbox works, as long as it stays out of the sun and humidity.
Whatever you do, skip plastic bags unless you’re 100% sure the seeds are bone dry. Even a little moisture can turn a zip-top bag into a mold party.
✅ Is This Storage Spot Safe?
- 🧊 Cool? Avoid heat sources, sunny windows, or stuffy attics.
- 🕶️ Dark? Keep them away from direct light or glass jars on shelves.
- 🌬️ Dry? Use paper, not plastic. Add rice or silica packs to absorb moisture.
- 📦 Protected? Keep out mice, bugs, and accidental spills.
🌱 Bonus Trick: Test Your Seeds This Winter
You don’t have to wait until spring to find out if your seeds are any good. Winter is long. Your fingers are twitchy. You’ve got time — and paper towels.
Testing seed viability is simple. It saves you frustration later and helps you decide what’s worth sowing in bulk. Plus, it feels like a science experiment you actually want to do.
Here’s how: Take five seeds from your saved batch. Dampen a paper towel, fold the seeds inside, and seal it in a zip-top bag. Keep it somewhere warm, like on top of the fridge. Check in a few days. If most sprout, you’re golden. If only one or two show up, maybe don’t count on a full bed of marigolds.
This is especially helpful if you’re saving from less predictable plants or working with older seeds from the back of your drawer. Don’t toss them until you’ve tested.
🧪 How to Run a 5-Seed Germination Test
- 💧 Moisten a paper towel but don’t soak it. Damp is enough.
- 🌱 Place 5 seeds inside and fold it like a burrito.
- 🛍️ Slip into a zip-top bag or a reused bread bag. Seal it.
- 🌡️ Keep warm — aim for around 65–75°F.
- 📅 Check after 3–10 days depending on the plant.
- ✅ Count sprouts to see your viability rate. 4 out of 5? That’s 80% — good to go.
💬 Why Seed Saving Isn’t Just Smart — It’s Powerful
There’s something deeply satisfying about harvesting seeds from your own garden. It’s not just about saving money — though that part is nice. It’s about stepping off the treadmill of always buying, always starting over. When you save your own seeds, you’re saying: I know what grows here. I know what I want more of. I trust my hands to make it happen.
That’s not just gardening. That’s legacy work.
Even if you only save a handful this year — a baggie of marigolds, some dill from the herb bed — that’s the start of something bigger. It’s frugal, yes. But it’s also intentional, connected, and entirely yours.
Spring doesn’t start in April. It starts now, in the dried petals and rattle of pods you almost forgot to notice. Go collect them. Your future garden is waiting.
🌿 Key Takeaways
- 🌼 “Going to seed” means your plant is wrapping up — petals fade, pods form, seeds mature.
- 🌺 Top flowers and herbs to save from include zinnias, cosmos, dill, calendula, and nasturtiums.
- ✂️ Harvest dry, mature seed heads on a rain-free day and collect into paper envelopes.
- 🏷️ Label every batch clearly with name, variety, color, and date. No guessing next spring.
- 📦 Store seeds in a cool, dry, dark place — think mason jars, shoeboxes, or sealed bins with rice packets.
- 🌱 Test your saved seeds this winter with a simple paper towel germination method.
- 💰 Seed saving is the $0 way to start next year’s garden with plants that already thrive in your yard.


Daniel has been a plant enthusiast for over 20 years. He owns hundreds of houseplants and prepares for the chili growing seasons yearly with great anticipation. His favorite plants are plant species in the Araceae family, such as Monstera, Philodendron, and Anthurium. He also loves gardening and is growing hot peppers, tomatoes, and many more vegetables.