
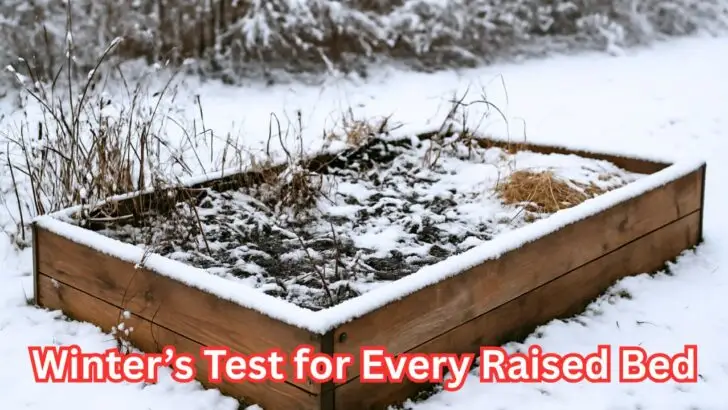
Raised beds make gardening easier, but winter can undo a whole season of work if the soil is left bare. Cold winds strip nutrients, heavy rains erode edges, and pests hide in leftover stems. A little preparation now protects the soil life that feeds next year’s crops and saves you a muddy spring cleanup.
This guide walks you through every step of winterizing raised beds, starting with how to time your tasks by USDA zone. Once you know when frost will hit, you can clear plants, add compost, plant cover crops, and shield the wood or metal frames so they last for years.
Know Your Zone Before You Start
Before pulling plants or hauling compost, find your USDA hardiness zone. Your zone sets the calendar for every step of winterizing raised beds. The right timing keeps soil biology active and helps cover crops take root before cold weather shuts everything down.
🗺️ Zone-by-Zone Timing
- Zones 3–4: Finish clearing beds and adding compost by early September. Sow cover crops in late August or early September so they root before hard frost.
- Zones 5–6: Clean and amend beds by late September through mid October. Plant cover crops early enough to sprout before frost, then mulch once night temperatures drop into the 30s.
- Zones 7–8: Plant winter greens or cover crops through October. Mulch lightly and water during dry spells to keep microbes active.
- Zones 9–10: Freezes are rare. Focus on weed suppression and soil enrichment with compost and a light mulch. Cover crops can be sown well into November.
Tip: Look up your average first frost date and plan tasks two to three weeks ahead of that date for best results.
Clear Out Spent Plants
Start by removing everything that is no longer producing. Dead stems and fallen leaves shelter pests and diseases through the cold months. Clearing the beds now keeps next year’s seedlings from facing hidden problems and frees the surface for compost or cover crops.
🧹 Clean-Up Checklist
- Pull annual crops: Remove tomato vines, pepper plants, and other summer vegetables down to the roots.
- Discard diseased material: Bag and trash any leaves or stems with spots or mildew so problems do not return next year.
- Save healthy debris: Chop and add to the compost pile if plants are disease free to recycle nutrients.
- Loosen soil lightly: A gentle rake helps expose insect larvae and breaks up surface compaction.
Tip: Wear gloves and clean tools with a diluted bleach solution after working in beds that had pests or disease to prevent spreading them to other areas.
Add Compost and Amendments
Once the beds are clear, give the soil a nutrient boost that will mellow over winter. A layer of rich compost feeds earthworms and beneficial microbes while improving texture. This slow release of nutrients sets the stage for strong spring growth.
🌱 Soil Enrichment Steps
- Spread compost: Add 1–2 inches of finished compost or well rotted manure across the entire bed.
- Check soil pH: Use a simple home test kit to decide if lime or sulfur is needed to balance acidity.
- Add slow release nutrients: Rock phosphate or bone meal can be sprinkled now to break down through winter.
- Lightly mix in: Gently fork the top few inches to blend amendments without disturbing soil layers too deeply.
Tip: Finish this step before heavy fall rains so nutrients have time to settle instead of washing away.
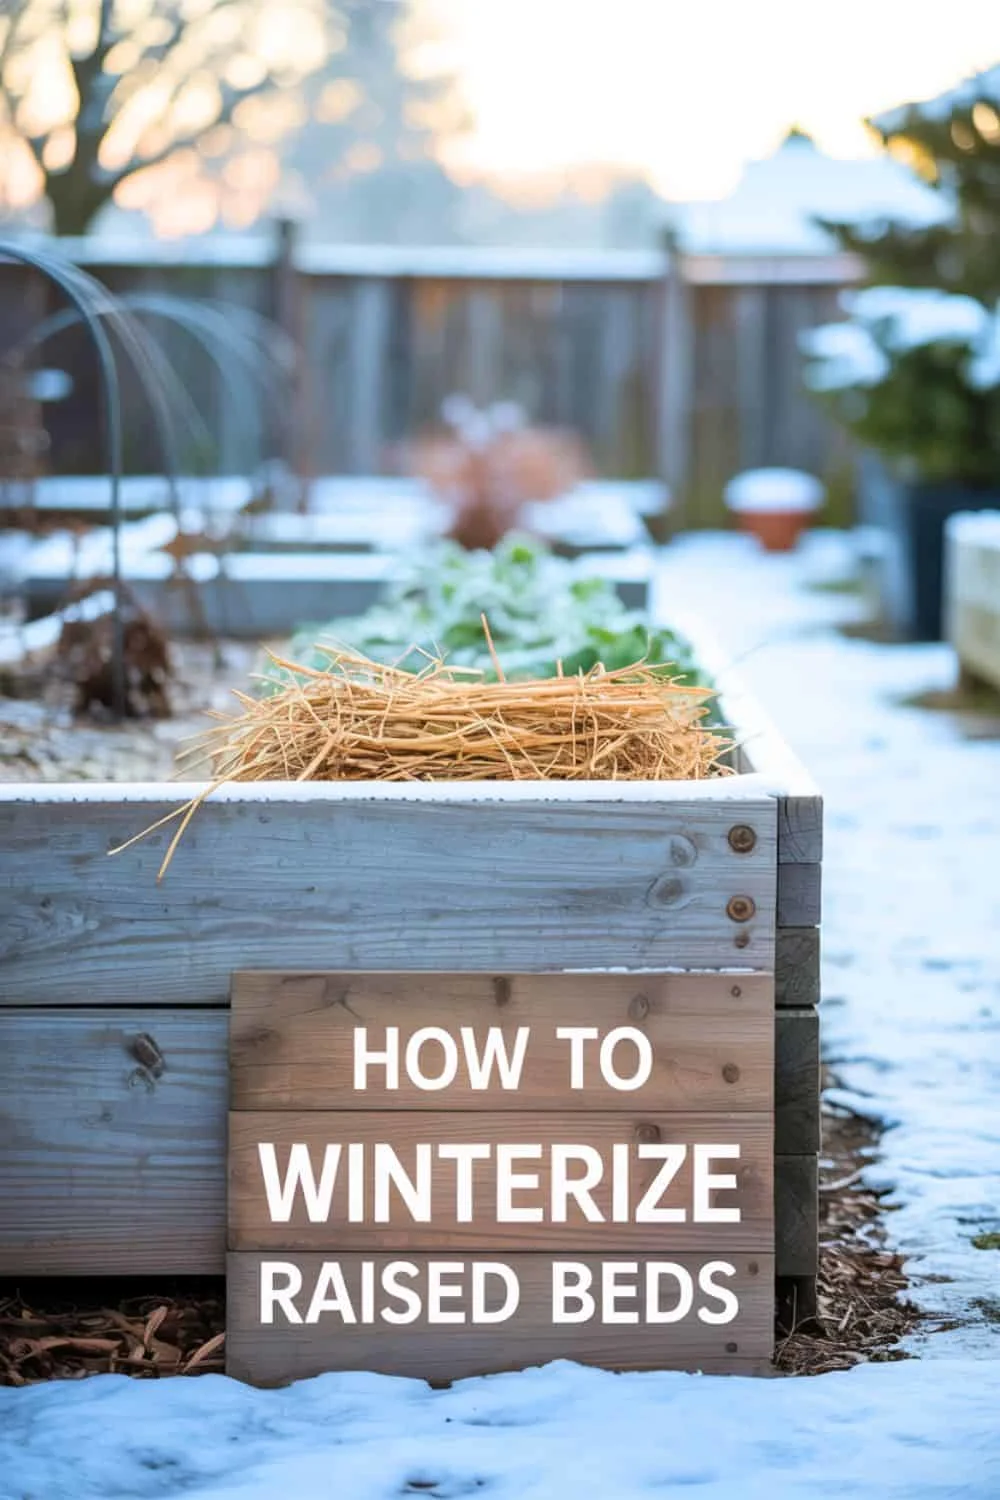
Protect the Soil Surface
Bare soil loses nutrients and structure when winter rains and wind hit. A protective layer keeps moisture steady, limits erosion, and shelters beneficial organisms until spring. Covering the surface now saves you from reworking compacted soil later.
🍂 Mulching Guide
- Choose natural mulch: Straw, shredded leaves, or pine needles insulate soil and break down into organic matter.
- Apply a thick layer: Aim for 2–4 inches to prevent erosion and moderate soil temperature swings.
- Keep mulch off wood frames: Leave a small gap along the edges of wooden beds to avoid moisture damage to the boards.
- Consider a temporary cover: Landscape fabric or burlap can be added on top of mulch for extra protection in windy sites.
Tip: If you plan to plant early spring crops, pull mulch aside in late winter to let soil warm faster.

Plant a Winter Cover Crop
A living cover crop protects the soil better than mulch alone. Rye, clover, and winter wheat send down roots that hold the soil, add organic matter, and feed soil microbes even in cold months. Come spring, you simply cut and turn them under for a natural boost of nutrients.
🌾 Cover Crop Basics
- Pick the right type: Winter rye is hardy and fast. Crimson clover adds nitrogen. Oats break down easily in spring.
- Seed timing: Sow two to three weeks before your expected first hard frost so roots establish before freezing temperatures.
- Prepare the bed: Rake the soil smooth and scatter seed evenly. Lightly cover with soil or straw to keep moisture in.
- Spring turnover: Mow or cut plants before they set seed, then dig or till lightly to work the green matter into the soil.
Tip: Water the seeded area well if autumn rains are sparse so germination stays on schedule.
Water Before the Ground Freezes
A final deep soak helps soil hold warmth and supports the microbes that stay active through cold weather. Moist soil freezes more slowly than dry soil, which protects any overwintering crops and prevents extreme freeze–thaw cycles that can damage roots.
💧 Late-Season Watering Tips
- Pick the right day: Choose a mild, sunny afternoon when the forecast shows several dry days ahead.
- Soak deeply: Water until moisture reaches at least six inches down so roots and soil microbes benefit.
- Drain containers: If you use sub-irrigated planters or have pots inside the beds, empty any standing water to avoid ice buildup.
- Shut off hoses: Disconnect and drain garden hoses after watering to prevent burst fittings during freezes.
Tip: This step is most valuable in dry autumns or windy regions where soil loses moisture quickly before winter sets in.
Secure or Repair the Bed Frames
Winter weather is hard on wood and metal. Freezing and thawing can warp boards, loosen screws, and split corners. A quick inspection and repair now keeps your raised beds sturdy and ready for spring planting.
🔧 Frame Maintenance Steps
- Check joints: Tighten loose screws or brackets to prevent boards from bowing under heavy snow.
- Inspect wood: Look for rot or soft spots and replace damaged boards before winter moisture spreads decay.
- Seal exposed surfaces: Apply a food-safe wood sealant or linseed oil to help wood shed water.
- Reinforce corners: Add extra corner brackets or stakes if the bed shows signs of shifting outward.
Tip: For metal frames, check for rust and touch up with a weatherproof paint to prevent further corrosion.
Shield from Heavy Snow or Ice
In regions with harsh winters, deep snow and repeated freeze–thaw cycles can compact soil and stress bed frames. Adding a simple cover now protects the soil structure and keeps spring planting easier.
❄️ Winter Protection Ideas
- Low hoops with fabric: Install PVC or metal hoops and stretch frost cloth or heavy row cover to keep snow off the soil.
- Plastic sheeting: Use clear plastic for a mini-greenhouse effect that sheds water and speeds spring warm-up.
- Wooden lids: Hinged wooden frames with hardware cloth provide sturdy protection against ice buildup and heavy snow loads.
- Wind breaks: Place straw bales or simple fencing on the windward side to reduce soil erosion and protect young perennials.
Tip: Remove or vent covers during warm spells to prevent excess humidity and mold growth inside the bed.
Conclusion and Spring Prep Reminder
Winterizing raised beds is more than a cleanup chore. It is an investment in next year’s harvest. Each step you take now—clearing plants, feeding the soil, planting cover crops, and protecting the frames—means less work and richer soil when spring arrives.
🌿 Final Checklist
- Know your zone: Set deadlines based on your first frost date.
- Clear and compost: Remove all plant debris and spread fresh compost.
- Cover and protect: Mulch or sow cover crops to lock in nutrients and prevent erosion.
- Secure structures: Tighten screws, replace boards, and add weather protection where needed.
- Shield the surface: Use hoops or row covers in areas with heavy snow or ice.
Tip: Mark your calendar for an early spring check-in. Beds that rest well through winter will be ready for planting weeks ahead of schedule.
🌿 Key Takeaways
- 🗺️ Know your USDA zone to set the right schedule for clearing, composting, and cover cropping before frost.
- 🧹 Clear out spent plants to stop pests and diseases from overwintering in dead stems and leaves.
- 🌱 Feed the soil now with 1–2 inches of compost or well rotted manure so nutrients mellow over winter.
- 🍂 Protect bare soil using mulch or a living cover crop to prevent erosion and keep microbes active.
- 💧 Water deeply once before the ground freezes to slow soil temperature swings and support soil life.
- 🔧 Secure bed frames by tightening screws, sealing wood, and checking corners before snow loads arrive.
- ❄️ Shield against heavy snow with hoops, row covers, or simple wooden lids to preserve soil structure.
- 📅 Spring pay-off comes from an afternoon of prep now, leaving rich, ready soil for early planting next year.
Frequently Asked Questions About Winterizing Raised Beds
1. When should I start winterizing my raised beds?
Begin two to three weeks before your expected first hard frost. Use your USDA zone and local frost date to set the exact schedule.
2. Do I need to remove every plant?
Yes, pull all annual crops and any weeds. Only healthy perennials or intentionally overwintered crops like garlic should remain.
3. Can I skip mulch if I plant a cover crop?
Cover crops protect soil well, but a thin layer of mulch on top helps conserve moisture and adds extra insulation in very cold zones.
4. What type of compost works best for fall application?
Finished compost or well rotted manure is ideal. Avoid fresh manure in fall because it can burn roots and may contain weed seeds.
5. Is it necessary to water before the ground freezes?
A deep final watering keeps soil moisture even, protects soil organisms, and slows freezing. This is especially helpful in dry autumns.
6. How do I protect wooden frames from rot?
Clean off soil contact near the edges, apply a food-safe wood sealant or boiled linseed oil, and keep heavy mulch a few inches away from the boards.
7. Should I fertilize in fall?
A balanced slow-release organic fertilizer or rock phosphate can be added now to break down over winter and feed spring crops.
8. Do I need row covers in mild climates?
If you rarely get frost, heavy mulch is usually enough. Row covers or plastic hoops are optional for protecting winter crops from heavy rain.
9. Can I still plant garlic or onions after winterizing?
Yes. Plant garlic and overwintering onions right after adding compost but before heavy mulching. They benefit from the same protection.
10. How often should I repeat these steps?
Repeat every fall. Consistent yearly care builds healthier soil, reduces pests, and keeps raised bed structures strong for many seasons.


Daniel has been a plant enthusiast for over 20 years. He owns hundreds of houseplants and prepares for the chili growing seasons yearly with great anticipation. His favorite plants are plant species in the Araceae family, such as Monstera, Philodendron, and Anthurium. He also loves gardening and is growing hot peppers, tomatoes, and many more vegetables.