
When I moved into my new home, I was desperate to have a thick, emerald green lawn in as short a time as possible.
I bought fertilizers, watered continuously, and mowed like a crazy person, but my scraggly lawn just didn’t flush! I had bare patches, and in some places, my St Augustine grass hadn’t even taken or grown.
What was I doing wrong?
I discovered some truths to planting St Augustine grass and having it spread quickly, and it’s not as complicated as I had imagined.
Here’s my foolproof recipe for getting your St Augustine grass to quickly spread.
Table of Contents
How to Make St Augustine Grass Spread Quickly
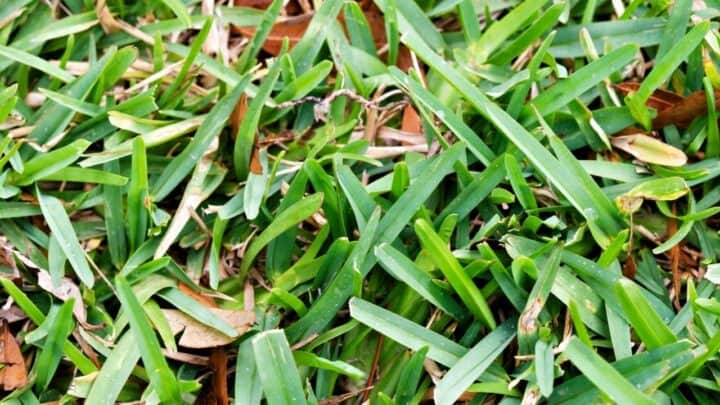
St Augustine grass wants to have a nurtured environment to grow in. With correct watering, good and accurate fertilizing, and unique planting methods, you can grow the plush green grassy carpet of your dreams in your own yard.
Using plugs and planting them correctly in well-aerated soil, you can quickly see impressive grass coverage as the stolons of the St Augustine grass start creeping and thickening.
Steps to Make St Augustine Grass Spread and Thrive
In a few easy steps, I was able to have my St Augustine grass spread, thicken, and become lush and healthy.
By carefully preparing the soil before you plant, you can set up your St Augustine plugs or sod up for success.
Step One: Prep Your Soil
St Augustine grass prefers well-aerated soil that has a pH of 6.5. A lower pH can be raised by adding lime powder to your fertilizer and to your soil.


My yard had a soil pH of 3.0, which was way too low for St Augustine to take root in, so I had to start by raising the pH by adding a fertilizer that was rich in ammonium nitrate.
My soil also had a tight texture as there was quite a bit of clay soil in my area. To ensure the stolons could root properly, I added sand to my fertilizer-soil mix.
This helped aerate my soil sufficiently to ensure good growth and space for the smaller grass roots to expand as the grass plugs began to spread.
Level up your yard before you even begin planting. Grass is quite water-dependent, and St Augustine grass is finicky.
Be sure there are no sudden inclines in your yard as stolons will struggle to grow here. In addition, if there are inclines, there will surely be declines.
Small depressions in your yard surface can cause water to collect, and your precious grass stolons can easily rot away in these collection pools.
Step Two: Choose Your Grass
Not all St Augustine grass is created equal, and while I would have adored a quick fix by laying down sod, instantly covering my yard, I didn’t have the budget.
Hey, I just bought a house, so I had mowed down my bank account at the time. So I opted for grass plugs instead.
Grass plugs are a great way to grow a lush lawn in no time at all, as long as you ensure you follow correct planting and make good on your care routine.
Step Three: Plant Your Grass
If you are planting sods, simply lay them down, covering all the exposed soil. This is followed by the start of your watering routine, which I’ll get into in a moment.
With planting grass plugs, there is a bit more method involved.
Depending on how much is your budget, you’ll have a certain number of plugs that you can afford. I decided to divide the number of plugs I had with the square footage of my backyard.
This gave me a good hunch of how many plugs I had per square foot of soil. When your plugs are further apart, they will require longer time to cover the exposed soil.
If they are closer together, or more plugs per square foot, then you will have more growth over a shorter time.
I had about 12 inches of soil exposed between plugs, which meant that by the end of the season, my lawn was almost completely covered with only a few bare patches still showing.
By the following season, I had a lush, sink-into lawn that I was immensely proud of.
If you can only plant your plugs 24 inches apart, you will have to wait a whole year to fully cover your lawn area. This is also not as labor-intensive as plugging in double that volume of plugs, so there is a payoff if you are a bit more patient.
I’m not patient though, so I quickly plugged my lawn area with all my plugs and prepared to care for my new grass while my back straightened itself out of a question mark position.
Step Four: Caring for Your Lawn
Once the plugs were planted, I began to care for my lawn. Like a young child, a healthy lawn needs water, growth stimulation, and careful tending.
One of the first things I realized is that weeds are much stronger and faster growers than grass plugs. Therefore, you need to remove weeds on a weekly basis.
If you allow the weeds to overgrow the grass plugs, you will soon have only barren sandy patches.
Water your lawn weekly, but resist the urge to soak it. St Augustine grass plugs will grow better when they are planted in semi-dry or aerated soil, so don’t drown them.
Initially, you will want to give your lawn a light watering at least three times per day. Once the grass begins to really root and spread, you may find it is less necessary to water so often.
Within no time at all, your grass will start growing and you’ll need to start mowing!
Frequently Asked Questions about How to Make St Augustine Grass Spread Quickly
How do you thicken St Augustine grass?
Ensure you prepare the soil correctly, take a pH reading of the soil, and if the soil pH is too low, you can increase it by adding ammonia nitrate fertilizer. Be sure to remove weeds and water frequently, and always aerate the soil after heavy rains.
Does sand help St Augustine grass grow?
While sand will not cause your grass plugs to grow, it can make it easier for the stolons to grow towards the neighboring grass plug, which means the grass plug will grow faster. Yes, you should add sand as a thin top layer over your fertilizer and topsoil to ensure your grass can really thrive.
The Final Plug
Ensuring your St Augustine grass flourishes all year means you need to follow the planting steps above by preparing the soil, choosing appropriate plugs or sod, planting your grass correctly, and caring for your lawn to help nurture the healthy growth of the stolons that will eventually link up and cover all the bare patches in your yard.
Soon, you will have to get the lawnmower ready for action!


Daniel has been a plant enthusiast for over 20 years. He owns hundreds of houseplants and prepares for the chili growing seasons yearly with great anticipation. His favorite plants are plant species in the Araceae family, such as Monstera, Philodendron, and Anthurium. He also loves gardening and is growing hot peppers, tomatoes, and many more vegetables.