
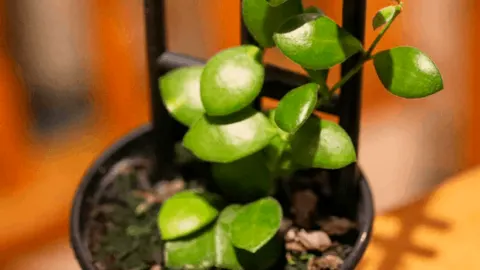
Of the Hoyas, the Hoya bilobata, dubbed as the wax plant or porcelain flower, can be considered as one of the more finicky plants in this genus.
It is a small evergreen perennial native to the Philippines, and it can either trail or grow to more than 24 inches. Also, it is known for producing beautiful tiny red flowers that emit a lovely, sweet aroma at night.
Let’s look at how you can take proper care of the Hoya bilobata wax plant and ensure that it has a long and happy life.
Hoya Bilobata Care
Achieve perfect Hoya bilobata care by selecting well-draining soil, ensuring filtered light, watering when the soil dries, maintaining a temperature range of 15-35°C (59-95°F), and sustaining humidity levels between 60-100%. Avoid exposing it to direct sunlight for optimal growth.
Let’s get into the different care aspects in more detail now.
Soil
Regarding soil, the Hoya bilobata conforms to most other Hoyas.
It prefers light, airy potting soil. You could create a good potting mix by putting in sphagnum moss, perlite, and orchid bark in equal proportions.
This mix will stop the roots from rotting by allowing enough drainage. You should also aim to keep the PH levels of the soil somewhere between six and seven.
You have to remember that Hoyas in general tend to grow in little substrate.
This is why some horticulturists can mount their Hoyas on wood and wrap them in Sphagnum. However, without a substrate, they have to water their plants more often.
Your Hoya bilobata may grow best in a relatively small pot. Such a pot will not only all the roots to be pot-bound, but it will also stimulate flowering. On average, you will have to repot your bilobata every two years.
Seeing as Hoya plants, in general, like to dry out every now and then, you would do well to use a terracotta pot. There are porous pots that can more easily remove water from your potting mix or soil substrate.
As for the plant’s vines, even though they can get really long, you can guide them with ease. And, you shouldn’t remove the peduncle of the bilobata, the stalk that carries the plant’s flowers, because it will bear new flowers before you know it.
Light
Well, it depends. If you decide to grow your wax plant outdoors, then you would do well to place it in a bright shaded area. Alternatively, if you want to place it indoors, then try exposing it to bright, indirect light.
That said, you want to be careful to avoid exposing your H. bilobata to direct, intense sunlight.
This may cause leaf burn. After all, these tropical plants are used to growing within the gaps of forests, receiving diffused and scattered light that has to pass through the treetops first.
Ergo, you want to recreate their natural habitat as best as you can.
Watering
The most important part of watering your Hoya bilobata wax plant is making sure that your soil mix drains well. Otherwise, you risk having the substrate carrying too much water, which can be harmful to your wax plant, rotting its roots.
Aside from that, you need to avoid overwatering your plant. Hoyas need to dry out every once in a while, and they hate sitting in water.
Temperature
For a Hoya bilobata, the ideal temperature is somewhere between 60 and 96 degrees Fahrenheit.
These plants aren’t fans of chilly weather, and if the temperature dips below 50 degrees Fahrenheit, the plant may suffer chill damage.
Humidity
Hoya bilobatas flourish best in a humid environment as they come from subtropical and tropical regions of the world. Over and above, some Hoyas might be accustomed to heavy rain as they endure monsoon season.
During the day, you should try to keep the air humidity around 60 to 80 percent. And, at night, you want to increase the humidity and keep it between 80 and 100 percent.
You can achieve the above levels of humidity with the help of a decent humidifier.
Moreover, should you live in a dry place with low humidity, you might want to consider placing your porcelain flower inside a casing of sorts, made from plastic or glass, to preserve its surrounding humidity.
Fertilizer
Hoyas in general, aren’t known for being heavy feeders. You just might have to give your plant both macronutrients and micronutrients every once in a while.
If you’re wondering how frequently “every once in a while” is, you should aim to fertilize anywhere between once every two weeks to once every month.
Regarding the type of fertilizer itself, you can opt for an organic fertilizer, or you can go with a balanced synthetic one so long as you cut it down a bit.
Additionally, as your Hoya bilobata is about to bloom, you might want to consider using a “bloom booster,” which is a type of fertilizer that is high in phosphorus. Another type of fertilizer you would do well to research is the slow-releasing kind.
Propagation
You can propagate your H. bilobata through separation or stem cuttings. If you’re going to go with cuttings, then you should make sure that you have at least a single node that can allow roots to grow.
These cuttings can then be either planted directly in soil or rooted in dampened sphagnum moss until adequate roots grow, after which the plant can be transferred to soil.
It should be noted that the latter option is far more successful than the former one.
Pruning
Although you can guide your bilobata’s vines, they can still become large and unwieldy. Therefore, if push comes to shove, you can just prune your plant. You should start with brown, dead stems and cut them back.
Alternatively, in the event that you are dealing with stems that are too vigorous for your taste, you have a few options to choose from. For starters, you can get a trellis and wind the stems around it.
Or, you could cut these vines so long as you make sure to cut back to a node. Finally, you can just accept your Hoya bilobata for the beautiful plant that it is and let the stems grow.
All that said, when you cut you Hoya bilobata, you might notice that some of the latex seeps out of the cut. Some people choose to stem the cut and use glue to stop the plant from leaking latex, while others don’t do that. The choice is up to you.
Whatever you do, try to avoid cutting the plant’s peduncle. It is responsible for the emergence of your plant’s flowers, and it should bring you beautiful blooms year after year.
An extra word on propagation
We’ve briefly talked about one way you can propagate your bilobata plant, stem cutting. Let’s talk a bit more about this method before exploring another way of propagation.
To start with, you need to cut the stem and place it in a wet medium. You can use dampened sphagnum moss as mentioned above, or you can just use plain old water.
In either case, roots should start to appear after 28 days. Once the roots have started to form, you can take your plant and pot it.
Regarding the cut itself, there are a few things you should take into consideration.
Firstly, try to take the cut from softwood. Additionally, the cut stem can range from four inches to twelve inches, and roots will still grow. You should also be sure to use sharp pruners and try to cut at an angle.
There are many ways you can submerge your stem to induce root growth.
For instance, you could use a popsicle-making container that can hold the leaves above the rim. Should you go for such a solution, you want to maintain the water level above the bottom node.
Moreover, as the roots start appearing, make sure that they remain covered in water. However, never cover the entire stem in water.
And, in case you decide to root the stems in a potting mix, you need to make sure that this mix is light enough to allow the emergence of new roots.
You can also strengthen the stems by dipping their ends in a rooting hormone. That said, if you use a potting mix, you might be better off cutting shorter stems, making the stem consist of one to three nodes maximum.
You should also strip the cutting from all of its leaves except for those at the top.
For starters, we’re not talking about air layering here. Rather, what you do is that you choose a softwood stem and pin it to another pot that has a light mix in it, one that is well moistened.
The difference between this method and stem cutting is that layering requires the stem to still be attached to the mother plant.
If you leave the stem in the new mix, you should start to see tiny roots sprouting on the stem. And, if you can’t see the roots, just give it time.
With that said, you need to make sure that the light mix in the other pot remains moistened at all times and that you expose your Hoya bilobata to bright but indirect light.
You can use stems that are up to 12 inches long, and you might want to pin up to 5 stems to a 4-inch pot.
Hoya Bilobata: Pests
When it comes to pests, Hoyas are, for the large part, resistant. Nevertheless, you might come across mealybugs on their leaves or aphids near the flowers.
To get rid of these pests, you can start with sharp sprays of water that will help you get these parasites off your plant. After that, you can use a horticultural oil to protect your plant. A neem spray might do fine as well.
Hoya Bilobata Care: FAQ
My plant’s leaves have become red. What does that mean?
If your Hoya bilobata’s leaves have turned red, this means that they have been burned as a result of direct light. You need to place the plant in a different place where the light reaching it isn’t as intense.
The leaves have shriveled up. What does that mean?
In this case, the probable culprit is a lack of water or humidity. Or, it may be the case that your Hoya bilobata has a problem with its roots, i.e. they have died or dried up. A third possible cause could be mealybugs. You need to investigate yourself to figure out the cause.
The plant is starting to look limp. Is there something wrong?
Yes. This is most likely a sign that there is something wrong with your Hoya bilobata’s roots. They may have died as a result of over or underwatering. Regardless, you need to check on the roots, and if they are dead, you ought to begin the propagation process by cutting a stem.
The leaves have fallen off. What does that mean?
If your leaves start falling off abruptly, this might mean that your bilobata experienced a cold draft or chill. You can easily fix this by placing the plant in a warm place.


Daniel has been a plant enthusiast for over 20 years. He owns hundreds of houseplants and prepares for the chili growing seasons yearly with great anticipation. His favorite plants are plant species in the Araceae family, such as Monstera, Philodendron, and Anthurium. He also loves gardening and is growing hot peppers, tomatoes, and many more vegetables.