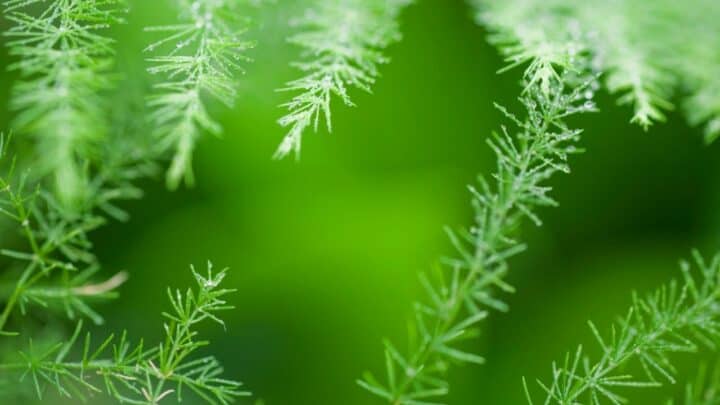

I regularly add some Asparagus fern stalks to my flower arrangements, and to keep my plant alive and well, I take good care of it with a regular watering schedule, the right lighting requirements, and more.
This means my fern has grown a lot, and once, it even outgrew my pot! I had to quickly study how to properly divide my Asparagus fern to repot it.
The great news is that even newbie gardeners can learn how to divide an asparagus fern, and do it correctly the first time around.
How to Divide an Asparagus Fern
Firstly, water the fern well to help protect the roots. Next, remove the plant from the soil. Then, clean your blade with rubbing alcohol and allow it to dry. Decide how sections you’d like to cut up the root ball, and then gather the fern fronds. Lastly, insert your blade into the root ball, and cut through the roots using a sawing motion.
Steps for Dividing Your Asparagus Fern
The very first consideration when dividing your asparagus fern is when is the best time to do so. I recommend splitting your fern in early spring when the plant is still in its dormant growing season.
Dividing it at this time ensures there is no damage or undue stress which you would have if you were to split it while the plant is actively growing later on in spring and summer.
Step 1: Watering
The day before I plan to divide my asparagus fern, I water my plant very well so the roots are well hydrated. This also helps protect the root system from stress when you cut it.
What do I mean by watering it really well? I know the soil is well saturated when I stick my finger in after watering it and the top 2 inches feel drenched with water.
Step 2: Remove It From the Soil
The next step is to remove the fern from the soil, whether it is planted in your garden or a pot. To remove the asparagus fern from a pot, flip the pot upside down while you keep your hand over the fern.
I usually shake the plant gently until it slides out, and I mean gently because I don’t want to displace the soil (or a lot of it) or disturb the roots unnecessarily.
I want the root ball to remain as intact as possible.
If your fern is planted in your garden, then you can use a trowel to gently loosen the soil around the asparagus fern. Grab hold of your plant, and pull it out of the ground.
Step 3: Sanitize Your Blade
Sanitizing your blade is a very important step and one that may be easily forgotten. I once accidentally forgot to clean my blade and all the ferns I had divided got bacterial or fungal infections.
Unfortunately, my plants died because I didn’t know better, and I would really like this to not happen to you.
So use a cotton ball soaked in rubbing alcohol and thoroughly rub this over the serrated blade of your knife. This will ensure that no bacterial or fungal infections are transmitted to the asparagus fern.
Before I use the knife, I make sure the blade is dry.
Step 4: Gather the Fronds
Next, I gather the fronds and ensure that each section, whether I divide the root ball in half or in quarters, has enough roots, stems, and leaves.
This ensures that there is enough foliage and the section will have no trouble photosynthesizing and growing when it is transplanted in a new pot.
To help me gather the fronds and ensure each has more than enough foliage, I use twist-ties to tie these stems together. This technique makes it all the more easier than to just divide the fern.
Step 5: Divide Your Asparagus Fern
Now I’m ready to divide my asparagus fern. I insert the blade of my knife into the soil. I only insert it halfway between the frond portions, and then in a back and forth sawing motion, I sever the root connections.
Sometimes I also need to use my fingers to help untangle the roots.
Step 6: Transplanting and Beyond
Once I have my halves or quarters, I transplant each of these into a new well-draining pot that contains well-draining soil. When I repot, I ensure the soil is flush with the crowns of the asparagus ferns.
I also water each of my new ferns immediately and ensure the top inch of the soil remains moist for the first couple of weeks. Once the roots start establishing, I water less.
I also grow these transplants under 50% shade and then gradually acclimate them to only 25% shade.
Why Divide Your Asparagus Fern
An asparagus fern can quickly and easily outgrow its planter if it’s planted under ideal conditions and well taken care of with regular watering, well-draining soil, a well-draining pot, and bright, indirect sunlight.
A plant outgrowing its pot is quite a sight to behold, and this is like a “congratulations; you looked after me well, mom” from your plant.
However, your plant may also start to die out in the middle if it outgrows its pot as there isn’t enough space for the roots. In this case, your fern will produce smaller leaves.
These are all signs you need to divide it or plant it in a bigger planter.
To keep your asparagus fern thriving so it continues to reward you with lush green foliage, pretty white flowers, and berries, you need to divide, or repot, it every 3-5 years.
It is also easy to divide the ferns because an asparagus fern’s roots are hardy, and if you happen to manhandle them, the plant will quickly make a new root system and grow and look beautiful in no time.
Frequently Asked Questions about Dividing an Asparagus Fern
Can you split an asparagus fern?
You can split, or divide, an asparagus fern. These plants tolerate division of their root ball well and quickly grow new and more roots once they are repotted.
How do you divide a large asparagus fern?
For a large asparagus fern, you need to use a hacksaw or strong knife to cut through the roots. The rest of the steps to divide an asparagus fern remains the same: water the soil, remove the plant from the soil, sanitize your blade, gather the fronds, and cut and divide.
The Final Divide
Dividing an asparagus fern for repotting purposes is easy, and even newer gardeners should not feel intimidated.
The asparagus fern is a hardy plant and a new, productive root system is easily established once it has been transplanted into soil.
While I urge you to follow all 6 steps, please don’t forget these three things:
- Water your fern well the day before you are going to divide the root ball.
- Sanitize your blade well.
- When you divide your fern into sections, ensure each has enough stems, leaves, and roots to ensure it grows well.
Happy dividing and repotting!


Daniel has been a plant enthusiast for over 20 years. He owns hundreds of houseplants and prepares for the chili growing seasons yearly with great anticipation. His favorite plants are plant species in the Araceae family, such as Monstera, Philodendron, and Anthurium. He also loves gardening and is growing hot peppers, tomatoes, and many more vegetables.