
(image credit, IG:betweenplants)
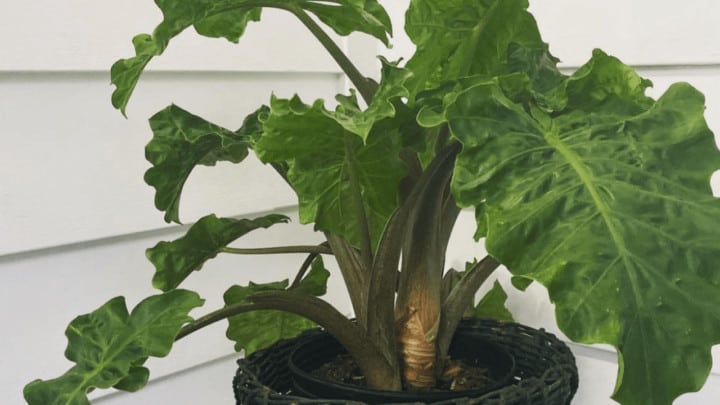
The Alocasia Low Rider is, as its name suggests, a dwarf variant of Alocasia. Other Alocasia are Alocasia Zebrina, Alocasia Sarian, and Alocasia Black Velvet.
‘Low Rider’ Perfect for those looking for a houseplant that will fit a small space, it complements existing collections beautifully and is prized for its beautiful green foliage.
As with all Alocasia variants, you need to follow a particular care regimen to help these little beauties thrive. That’s where we come in with this care guide for the Alocasia Low Rider.
[toc]
Alocasia Low Rider Care
Alocasia Low Rider is comfortable in temperatures of around 70 degrees Fahrenheit (21 degrees Celcius). The ‘Low Rider’ requires bright, indirect sunlight and humidity levels around 60 – 70%. The soil will need to be kept continually moist – not too dry and certainly not too soggy. Keep a regular watering regimen to ensure this is maintained. Soil conditions will need to be peaty enough to maintain water, but well-draining enough to avoid root rot.
Light
The Alocasia Low Rider needs light conditions that will replicate those that the Alocasia species experiences in the wild.
Found usually under the canopies of the rainforest in Asia, dappled light and partial shade would be ideal.
Of course, that is a little difficult to achieve when you have a houseplant. So, the next best thing is to ensure your plant has access to strong but indirect sunlight.
Place it in a room near the windows but not in direct exposure to the sun’s rays.
Ensure your Alocasia Low Rider is not in direct sunlight – this can lead to sunburn of the beautiful leaves.
Watering
Watering schedules, like light levels, are also important in ensuring your Alocasia Low Rider feels immediately at home.
The river beds of tropical regions are where you will find the Alocasia plant growing. As such, damp, moist soil is where the plant will be at its most comfortable.
It can be hard to get right initially, but generally, a regular light watering schedule will ensure the roots are not overwhelmed with water all at once and the soil is getting constant access to fluid.
Soil
As we have just learned, the soil needs to be kept slightly moist. This will require a specific blend of standard potting mix containing extra peat moss – you will find this will generally do the job.
Make sure you also have a couple of drainage holes in the pot to allow any excess water to drain off.
It is important that you get the soil consistency perfect right at the beginning to ensure the plant does not succumb to fungal infections such as root rot.
Temperature
This tropical plant will love warmer temperatures. Generally, it will be happiest in a range of 65 degrees Fahrenheit to 75 degrees Fahrenheit (18-24 degrees Celsius), although the upper ranges will be better.
Keep this plant protected from extremely low temperatures, even indoors. Anything below 60 degrees Fahrenheit for a prolonged period of time will put the plant into dormancy.
Flowers
Don’t buy the Alocasia Low Rider if you are wanting a plant that puts on a display of flowers. No – the Alocasia species is prized for its beautiful foliage.
Whilst other variants of the Alocasia species can be reliably expected to flower now and again, for the ‘Low Rider’ this is actually pretty unusual.
There is debate in the Alocasia enthusiast community as to whether to let your plant flower. The reason being is that it can be quite exhausting to produce even one flower, to the detriment of the leaves.
For that reason, many prefer to remove the first evidence of any flowers. You will likely not have to worry about it happening for your Low Rider though – it is a pretty rare occurrence.
Humidity
Given the tropical native environment of the Alocasia, it is no surprise that the Alocasia Low Rider prefers a humid environment.
That means humidity levels of over 60%. But, the plant will really thrive in levels closer to 70%.
You may struggle with this, depending on your environment. Help create a more humid atmosphere for your Alocasia Low Rider by misting the leaves or perhaps purchasing a humidifier if necessary.
You can also place your plant in areas that are more humid – for example, high water areas such as the bathroom or kitchen.
Propagation
You will be disappointed if you try to propagate the Alocasia Low Rider from either seeds or cuttings. That’s just not a method that will work well.
The main method of propagation for this plant is by separating the underground rhizomes that grow outward from the mother plant.
You will need to establish where to separate the rhizomes, and also identify if you have any offsets growing from the tubers under the soil.
The best time to do this is usually at the end of winter, just as the plant is waking up from its dormancy period.
Luckily (or unluckily as you may view it) a containerized plant won’t have the room to grow many rhizomes, so you will only have a few to separate.
Firstly, remove the containerized Alocasia Low Rider from the pot. At this point, you can also do a check to see if the mother plant itself will need repotted. You will know this if the roots are looking condensed or tangled.
Once you have lifted out the mother plant – carefully- you can give it a gentle shake to remove any unnecessary soil.
You will quickly be able to see where the opportunities for splitting the base rhizome are, and you may be lucky enough to find some offshoots.
Take a sterile knife or cutting instrument to cut off the rhizome and untangle any offsets from the roots of the mother plant.
Once separated, you will be ready to plant your new growths. Use a potting mix that will give them the best chance.
You can buy ready mixed potting soil or make a mixture using soil and coco coir. Once planted, give the new plants a little bit of water and ensure they are placed in an area of indirect sunlight.
Repotting
At the end of the dormancy period, just as you see the first signs of spring, you can think about taking your Alocasia Low Rider out of its pot for a quick check.
Here, you will be looking to see if the plant needs to be repotted to a container one size up. You should also check the roots are not restricted, that there are no signs of root rot, and change out the soil.
Growth
The Alocasia Low Rider is a good plant for those with limited space. As the ‘Low Rider’ will grow only to a maximum of 2 feet tall and wide, you won’t have to worry about it taking over the house.
If you are looking for something a little bigger or more dramatic, the Alocasia ‘Dark Star’ can get up to 6 feet tall!
Toxicity
Because the Alocasia plant species contains within its stems crystals of calcium oxalate, the plant can be toxic for animals and humans.
If you have particularly curious animals or children you may wish to select another species or ensure the plants are kept in an area that cannot be accessed easily.
If you do suspect a pet or child has consumed any part of the plant, keep a lookout for signs of a reaction.
This can look like swelling and redness around the lips or eyes, burning sensations, drooling, and itching.
In severe cases, the reaction can cause swelling of the airways which can be fatal. If you think your child or pet may be experiencing a reaction, seek medical help immediately.
Common Problems with the Alocasia Low Rider
The Alocasia plant and its many varieties offer stunning foliage and create a gorgeous backdrop to any home.
However, they are sometimes fussy and it can be difficult to replicate the tropical environment of the rainforests in the average home.
Below, we give you the low down on some of the most common problems experienced by the Alocasia Low Rider, and how to fix them.
Low light levels
The Alocasia Low Rider will begin to droop its stems if it is in conditions where light is not at sufficient levels. This is its way of searching for more light.
This is a hard one to work out, as you know you shouldn’t put the plant in direct sunlight. Ensure your Low Rider is not at the furthest point from the window in the room and that the indirect sunlight it gets is nevertheless bright.
Yellowing Leaves
There are many causes for yellow leaves on the Alocasia Low Rider. Some of the easy fixes include making sure the soil is damp enough and the plant is getting enough water.
On the flip side, it could be too much water. Another cause of yellowing leaves is dormancy caused by temperatures lower than 60 degrees Fahrenheit.
Root Rot and Overwatering
As we have learned in the course of this guide, the soil for the Alocasia Low Rider needs to be damp or moist, but not soggy.
Soggy soil will not make for a happy plant. Apart from causing root rot, the wet environment will eventually reach the leaves, causing discoloration.
Root rot is the worst part of the overwatering dilemma, however. Soggy soil will cause fungal infections to the roots, which will eventually be unable to absorb water, and the plant will die.
You may find it lifts completely away from the soil eventually, at which stage it is too late to remedy the problem.
Make sure you have adequate drainage, that the soil is moist but not soggy, and that you check the roots every 6 months for signs of infection.
Discolored, crispy and curling leaves
Low humidity can damage the beautiful appearance of the Alocasia Low Rider. If the roots cannot absorb as much water as needed to replace any moisture being lost from the leaves, they will begin to curl in on themselves and crisp up.
Check the humidity levels in your home – they should be around 60-70% ideally. If not, you may want to buy a humidifier or mist the leaves.
Certainly in winter, heating systems can cause humidity levels to drop to around 40%. You can help your plant by moving it to a more humid part of the house, such as an area in which you hang clothes to dry, a bathroom or even the kitchen.
Pests and unwanted visitors
Mealy bugs and spider mites love the Alocasia Low Rider. Keep an eye out for any unwanted pests – these two will likely make an appearance at some point.
Whilst the odd one here or there is not usually a big deal, an infestation can quickly take hold. If you notice any visitors you will need to separate your plant from the others and begin treatment.
You can wash off any bugs with a hose or apply a rinse of soap and water. We’d recommend you try this approach before you use any more abrasive solutions.
Frequently asked questions about Alocasia Low Rider
Why are the leaves on my Alocasia Low Rider falling off?
You may be shocked to find the leaves on your Alocasia dropping off – even to the point that they all go over the period of a few weeks. If you have just bought your plant or moved it into a new environment or soil this can just be a sign of stress and adaptation to the new surroundings. It could also be dormancy in winter or lower temperatures causing it to drop the leaves. Keep up the rest of the care instructions indicated in this guide and the plant will likely come back renewed in the spring.
Why is my Alocasia Low Rider not growing?
The Low Rider is a dwarf variant of the Alocasia species, and as such should not be expected to grow more than 2 feet high. Also, do not expect growth during the dormancy period.


Daniel has been a plant enthusiast for over 20 years. He owns hundreds of houseplants and prepares for the chili growing seasons yearly with great anticipation. His favorite plants are plant species in the Araceae family, such as Monstera, Philodendron, and Anthurium. He also loves gardening and is growing hot peppers, tomatoes, and many more vegetables.