
Caladium Buck is an easy plant to grow as it does not need excess care when grown indoors since it does not have any blooms.
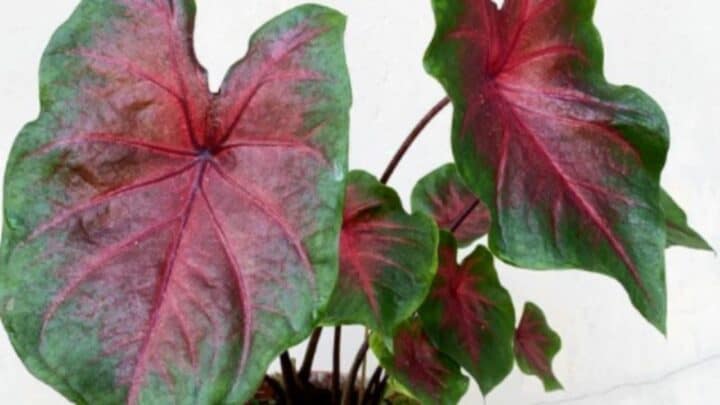
This plant is only grown for its stunning multi-colored leaves that can range from shades of pink, green, red, and even white.
This plant can be found in Hardiness zones 9 and 10. Caladium Buck is a native of tropical forests that are present in Central and South America.
Caladium Buck Care
Caladium Buck needs a soil pH ranging from 5.0 to 7.0, which is an acidic to neutral pH range. Keeping it under partial shade is the best choice as the plant cannot withstand bright sunlight. It is also important to place your Caladium Buck in temperatures ranging from 65°F to 85°F (18°C to 29°C) and keep humidity between 50-70%.
Soil
Perfect soil is essential for the growth of Caladium Bucks since they do not require a lot of minerals within their soil.
Simply using a well-draining soil mixed with organic compost and damp peat will get the job done.
Caladium Buck does need a well-balanced soil pH ranging from 5.0 to 7.0; this is an acidic to neutral pH range.
Water
Caladium Buck must be provided with moisture throughout its growing season; thus, the soil must be kept moist the majority of the day.
Caladium Buck’s leaves start turning droopy and yellow when the soil’s left to dry out.
You should water your Caladium Buck once the soil’s top 2 inches (5 cm) dry out. Ensure the pot you use drains well for the seepage of the excess water.
Applying mulch around the plant will also help the soil contain moisture for a longer period of time.
Light
Caladium Buck does not require a lot of sunlight. Keeping them under partial to full shade is the best option for this plant.
This is because even in its native land, it stayed under the shade of other plants.
Never keep your Caladium Buck under bright sunlight because the leaves will start to burn.
Temperature
As a native of tropical forests, the Caladium Buck require temperatures ranging from 65°F to 85°F (18°C to 29°C). You should always avoid keeping your Caladium Buck in temperatures lower than 32°F (0°C).
While the plant is slightly frost-resistant, it cannot handle temperatures any lower than 32°F (0°C).
Caladium Buck craves the heat and will survive a long time in a place where there is warm air, and the soil temperature is also warm.
Humidity
Caladium Buck belongs to rainforests, and any plant that originates from rainforests always loves staying in high humidity levels.
For Caladium Buck, keeping it in humidity levels ranging from 50% to 70% is the best option. Placing your Caladium Buck on a pebble tray filled with water is the simple way for you to achieve this.
Fertilizer
Caladium Buck doesn’t require lots of fertilizer. In fact, too much of it can cause the leaves to burn.
The best time of fertilizer you can use is any normal flowering plant fertilizer and diluting its strength by ¼ of what it was originally.
Fertilizing your Caladium Buck can help strengthen it, and it will also allow your plant to produce better tubers.
Also, it is not necessary to use a granular fertilizer; you can even use a liquid fertilizer.
Repotting
Repotting your Caladium Buck is only necessary if it’s too large for its current pot.
Usually, you will only need to repot your Caladium Buck every two to three years.
If you decide to repot your Caladium Buck, make sure that you:
- Repot it in a new pot that’s 2-3 inches larger than where you planted it previously.
- Repot it only during the spring season.
- Check if the new pot you used has proper drainage holes on the bottom.
- Place your plant in a good soil mix. Organic matter and damp peat are the best choice.
- Water it once you’re done repotting, making sure that all of the excess water drains through the pot’s drainage hole.
- Plant your Caladium Buck 4 to 6 inches deep (10 to 15 cm deep into the soil).
When you are repotting your Caladium Buck, make sure that all the tools you used were sanitized.
Pruning
Pruning a plant can make it grow better and bushier. It is recommended that you prune your Caladium Buck every two to three weeks.
When pruning your Caladium Buck, you should:
- Remove all the dead leaves from it.
- If any leaf looks like it is dying, pruning them off is also good.
You can also prune your Caladium Buck when the leaves have grown too much, or the plant has become too large.
Make sure that when you do this work, all the tools are sterilized. When cutting any part of the plant, use sharp shears and not dull ones.
Propagation
If you too wish to propagate your Caladium Buck, follow these steps:
Step 1: Remove your Caladium Buck from the pot
Remove your whole Caladium Buck from the pot. You do this so that it is easier for you to divide the plant in order to pot its tubers in a new pot.
When you plan to propagate your Caladium Buck, do not water it so that the soil remains compact.
When removing the plant from the pot, tap the outsides of the pot so that the soil attached to the sides gets released.
Then turn your Caladium Buck pot upside down to grab the whole plant along with the soil.
Step 2: Separate the stems of your Caladium Buck plant
Caladium Buck grows their stems in groups. When your plant is in a group, each of these groups grows separately.
It’ll be easier for you to know how to divide your plant up.
To separate the group of stems, you must slice through the soil between any two groups of stems. You do this by using your thumb and gently pulling the two groups apart gently.
Make sure that each group that you choose has its own roots and stems.
Groups that have one stem can also be used for propagation. Make sure you do not cut a stem that belongs to a group.
This is because a stem belonging to a group will not survive as it will not have its own roots.
Step 3: Use separate pots to place the stems in
Place the separated stems into new pots.
You can get many new Caladium Buck plants by doing this.
Step 4: Put soil in all the pots
Once the stems have been placed in the pot, start pouring in the soil. To help keep your Caladium Bucks stems upright, just stick and tie the stems to it.
Caladium Bucks have soft stems, and they can end up bending downward.
Step 5: Place the bulbs on top of the soil
When you propagate your Caladium Buck at the bottom of the soil in the “mother” plant, you will find bulbs.
Take these bulbs and place them on top of the soil so that they grow faster.
Place the flat part of the blub on the soil and the pointed part facing upwards. You should also place the bulb halfway into the soil.
Step 6: water your new Caladium Buck
Now water your Caladium Buck as the plant will need to replenish its moisture and food. Propagating can be stressful for the plant, and doing this final step can help your plant grow well.
When you are propagating your Caladium Buck, make sure all your tools are cleaned so all of the dirt is removed. Using alcohol or disinfectant’s the best method in sanitizing your tools.
You can also place your tools in diluted bleach for thirty minutes and then rinse them with water.
Blooms
Caladium Buck does not have any blooms and is only grown for its stunning foliage.
Growth
Caladium Buck has a medium to a short height ranging from 1 to 1.5 feet. There are some Caladium Buck in dwarf forms that are less than twelve inches tall as well.
The size of the leaves can vary, but generally, Caladium Buck leaves are considered to be medium in size.
View this post on Instagram
Common Problems for Caladium Buck
Tuber Rot
Tuber rot is a common problem for plants that grow tubers. This rot is caused by bacterial fungi that results in the plant rotting.
The most common cause behind tuber rot is the use of contaminated equipment.
Tuber rot can also occur due to:
Blight
This occurs when lesions on nearby foliage have spores on them that were washed into the soil. Blight can be identified on your plant if it has discolored patches on the skins of the tubers.
Underneath the skin of the tuber, there should also be reddish-brown rot.
Pink Rot
This is a fungus that is soil-borne and enters tubers through the stems or any wounded places on the tubers. Rot such as this will have a vinegary odor
Blackleg
This enters the tubers through rotting stems. The fungus will cause black lesions to be formed on the base of the stems.
The plant’s growth becomes stunted, and the tubers become soft and water-soaked.
To avoid tuber rot, do not place your tubers close to one another as Caladium Buck does not like to be overcrowded.
Too much fertilizer should not be used on your Caladium Buck either, as overfeeding it can also cause the tuber to rot.
Keep away from fertilizers that have high levels of nitrogen in them.
Try not to overwater your plant. This is because an already rotting plant can spread the rot to other places of the plant, causing it to die faster.
You can also use fungicides to help control the rotting of your tubers.
Southern Blight
Southern blight can cause your plant to have water-soaked leaves on the lower level or can generally give the whole plant a water-soaked appearance.
Southern blight remains in the soil, and if any part of the plant is in contact with the soil, it too will get infected.
Caladium Buck infected with Southern blight will start to wilt and become yellow within days of the infection.
Removing all the parts of the plant that have been infected is the best option to save your plant.
Throw away all the infected areas of the plant by putting them in a bag first. This is so that the wind does not carry any of the infected parts back to your plant.
Tips for Growing Caladium Buck
Following some basic care tips can do wonders for your Caladium Buck as this plant is not highly demanding and can be quite a stunning piece inside homes and gardens.
To grow your Caladium Buck well, you should:
- Plant it in a well-draining soil mix that has damp peat and organic matter mixed in it.
- Keep your Caladium Buck in high humidity levels (50 to 80%).
- Plant your Caladium Buck 6 to 7 inches apart.
- Water your Caladium Buck moderately. Do not water it if the 2 inches of the soil’s wet.
- Keep it under partial or full shade.
Frequently Asked Questions about Caladium Buck Care
Is Caladium Buck Toxic for Animals?
Caladium Buck is poisonous if they are ingested by animals and humans. They can also cause skin irritation for some people with sensitive skin.
Why are the leaves of my Caladium Buck turning yellow?
Multiple things can cause your Caladium Bucks leaves to turn yellow. The most common cause behind yellow leaves is underwatering. If the plant remains dry for too long, the leaves become droopy and turn yellow.
Conclusion
Caladium Buck may only have its leaves to show to the world. But just the leaves of this plant can rival the beauty of many others with blooms.
This plant is one of the best housewarming presents you’ll ever give to someone.
If you already own a Caladium Buck yourself, then giving new ones out to your friends won’t be a hassle.
This is because simply propagating them once gives you many new Caladium Buck plants.


Daniel has been a plant enthusiast for over 20 years. He owns hundreds of houseplants and prepares for the chili growing seasons yearly with great anticipation. His favorite plants are plant species in the Araceae family, such as Monstera, Philodendron, and Anthurium. He also loves gardening and is growing hot peppers, tomatoes, and many more vegetables.