
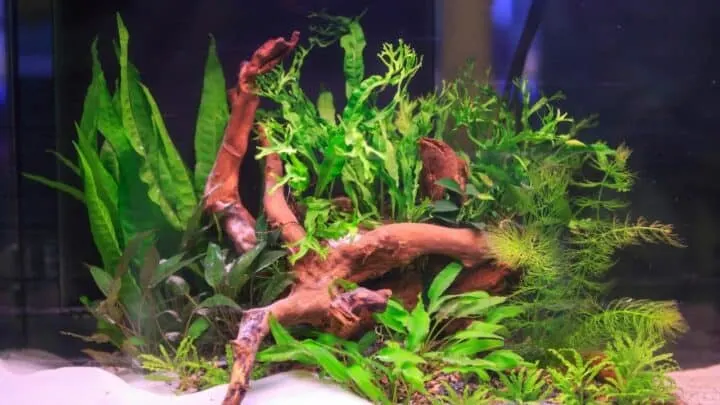
Aquariums are one of the coolest types of home decor there are, especially if they include aquarium plants in addition to fish.
Plastic aquarium plants may be easier to maintain than real ones, but they aren’t nearly as realistic looking either.
Even more, real live plants are extremely beneficial to aquariums and the fish that live in them.
But, maintaining them and trimming them is a bit more challenging than simply plopping plastic “grass” into the tank.
Read on below to learn exactly how to trim your aquarium plants, including tips and FAQs!
How to Trim Aquarium Plants
Trim aquarium plants using scissors with an s-bend while the plants are submerged in the water. Cut back the main mass, making the longest stems an equal height to the shorter ones. Another method is cutting down low on stems. Lastly, remove and replant or dispose of the floating debris.
Supplies Needed to Trim Aquarium Plants
Before getting started with trimming your aquarium plants, you must gather a few things to help get the job done:
- Scissors with an s-bend shape
- Aquatic tweezer
- Fish net
- Aqua fertilizer (optional)
1. Trim Back the Main Mass
The first step in properly trimming aquarium plants is to cut back the main mass. The goal is to make the plant an equal height, or at least more uniform in general.
For this step, use a very sharp pair of s-bend scissors and trim directly in the water. Let each cutting float to the surface. Only trim one species at a time.
2. Trim Under the Stems
After you trim back the main mass of an aquarium plant, check the underpart of the stems and trim any of them that look unhealthy. Likewise, wherever the plant is too thick, cut away the stems down low.
As with the main mass cuttings, let the stems float to the surface for collection before moving on to the next species that needs a trim.
3. Remove Cuttings from the Tank’s Surface
Once you finish with trimming up your first species (if dealing with multiple species) it’s time to scoop up all of the cutting and debris floating on the surface of the tank. For this, use your hands and a fish net if needed.
Set the cuttings to the side and move on to trimming up the next species. Remember to keep the cuttings from each species separated as you go on trimming and cleaning the surface of the aquarium.
4. Replant, Discard, or Give-Away Cuttings
When you’ve finished trimming all of the aquarium plants, you have a few options. You can replant the stems that are healthy in the tank to thicken up the greenery, you can give them away to other hobbyists or friends, or you can simply dispose of them.
If you choose to dispose of your aquatic plant cuttings, make sure to wrap them up in tissue paper or seal them in a plastic bag before tossing them in the garbage. You can also add them to a compost bin if it has a lid.
Avoid tossing them where birds can pick them up and carry them away. Likewise, never dispose of aquarium cuttings into natural waterways. Both of these actions may lead to an imbalance in the local waterways.
5. Add New Water to the Aquarium
After you’ve performed all the steps listed above, it is best practice to change out at least 50-percent of the water in your tank. Replace it with fresh clean water.
Changing out at least half of the water in your tank helps optimize the regrowth phase of the plants you trimmed.
In general, it also helps create a more balanced ecosystem including preventing excessive algae growth.
More Tips for Trimming Aquarium Plants
1. Trim Small, Trimm Frequent
One of the first things to understand about aquatic plant care is that trimming aquarium plants is best performed more frequently, in smaller doses, than less often, after letting everything grow out and then trimming it back all at once.
Not only does trimming your aquatic plants more often help keep them healthier, it keeps the whole aquarium more balanced. It also prevents disturbances in the tank’s pH level and discourages algae growth.
2. Cut Longest Shoots First
If you are trimming often, it’s easy to spot the longest shoots poking up from the main mass of the various aquarium plants.
Once you spot them, snip them right at their bottom-most set of leaves. Alternatively, you may opt to cut them at an equal length to the top set of leaves on the shorter shoots.
3. Replant Cuttings
Replanting after you finish trimming is the most productive thing to do with aquatic plant cuttings. These plants may be even easier to clone than some of the easiest houseplants to propagate.
Unless your aquarium just really doesn’t have the room, stick the fresh cuttings into the aquatic soil-mix in the bottom of the tank.
An alternative method, a newer and cutting edge technique, is planting the cuttings back into the bottom of the main mass they were trimmed from.
Frequently asked questions about trimming Aquarium plants
When should I trim my new aquarium plants?
Most new aquarium plants require trimming within the first month of being planted in their new environment. Further, they require frequent trimming afterward. Keep in mind that some aquatic plants, however, may take several extra weeks to develop full root systems. These much slower-growing aquatic plants won’t require trimming for the first 6 to 8 weeks.
How much of my aquarium plant should I trim?
Depending on the species of aquatic plant you are dealing with, the amount that you should remove during one trimming session varies. As a general rule of thumb, avoid cutting more than half of the plant off.
How do I trim my aquarium plant into a bush?
The most straightforward way to trim your regular aquarium plant into a bush is actually by cutting the existing plant in half (believe it or not!). When cut down into half of its former size, the plant’s survival instincts kick in and it grows out more rapidly and extensively than before. The result is in essence an aquatic bush.


Daniel has been a plant enthusiast for over 20 years. He owns hundreds of houseplants and prepares for the chili growing seasons yearly with great anticipation. His favorite plants are plant species in the Araceae family, such as Monstera, Philodendron, and Anthurium. He also loves gardening and is growing hot peppers, tomatoes, and many more vegetables.