
Potatoes are an everyday staple in many American dishes. From fries to mashed potatoes to baked potatoes, you hardly miss a dish without potatoes.
Studies show the average American eats 125 pounds of potatoes and their products in a year.
While the Irish potato has been the most common variety, growers and consumers alike have started appreciating other varieties as well.
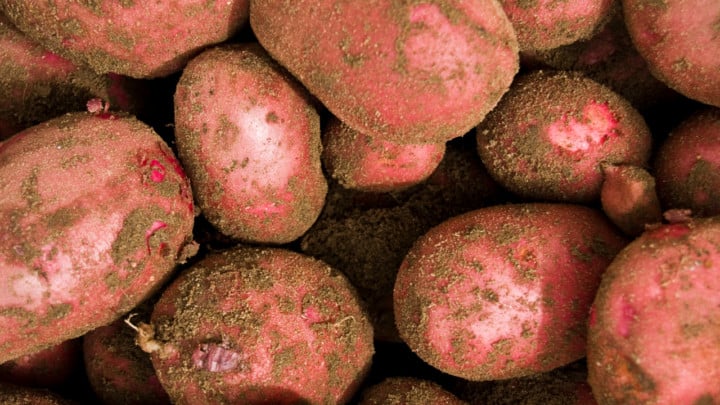
One such variety is the red potato, known for its nutritional benefits.
It is rich in vitamin B6, potassium, fat, antioxidants, and is cholesterol-free. If you’re planning to set up a garden in your kitchen, the red potatoes are great variety to add.
Here’s a detailed overview of how to grow red potatoes.
[toc]
How to grow red potatoes?
When growing red potatoes, you need to consider the place you live in. Since potatoes are a mid-season variety, it’s best you plant them about six to eight weeks from the last frost date. Make sure that you’ve prepped the soil before you plant the seeds you bought. After which, you can plant the red potato seeds either using the scatter or the trench method. Water them thoroughly, but not too much that you’ll soak the tubers. But, don’t forget to hill the potatoes once shoots appear.
When to Plant Red Potatoes
Most potato varieties, including red potatoes, thrive in cool weather.
They are usually categorized as either: early, mid, and late-season season types based on how long they take to grow and the season they’ll be ready.
The red potatoes are a mid-season variety.
As for the best time to plant red potatoes, it depends on where you live. Gardeners living in the Northern region should plant about six to eight weeks before the date of the last frost.
However, if the ground is frosty at night, cover the sprouted foliage with artificial covering (plastic containers or old sheets) or mulch temporarily.
Conversely, those living in the Southern region should plant red potatoes as a winter crop, i.e., between September and February.
And if winters are mild, then you can grow it in September as a fall crop. However, in areas like Georgia, it’s best to plant red potatoes in February.
Planting Red Potatoes
Buy the Seed Potatoes
Buy some seed potatoes from the local nursery and plant them once their sprouts reach ½ to 1 inch (1.3-2.5 cm).
Some people prefer supermarket potatoes, but this type has been treated to prevent sprouting or exposure to pathogens, making it a bad candidate for planting.
Since potatoes are prone to disease, look for those with tiny root tentacles growing from the skins to enjoy a disease-free crop. Be sure to ask the different varieties available, too if planning to grow a particular type.
There are six red potato varieties:
- The red Ruby matures early and has a bright red skin
- Red Gold which has red skin and a golden-colored flesh
- All Red has red skin and light red flesh. It’s a heavy-producing variety
- Red LaSoda and LaRouge thrive and mature early in warmer climates
- Red Pontiac with a round to oblong shape is a popular mid-season variety
Plant the seed potatoes
If planting them in a small apartment, use egg cartons, burlap bags, or buckets to plant the potatoes.
Ensure each seed potato gets an individual carton and keep the sprouts pointing upwards to facilitate growth.
If you’re not planning to transplant the seed potatoes once they start sprouting, ensure they have the perfect conditions for growth:
- 6-8 hours of sunshine every day
- soil temperature of 40+
- Add compost and work it down six inches and cover it with soil
- Avoid using soil from a former garden plot or potato patches where tubers were planted
- If using a bucket makes drainage holes (2-7) around the carton or bins, the plants drain correctly. If the soil doesn’t drain, the plants may rot or develop mold
When to Plant Seed Potatoes
The potatoes are ready for planting when the sprouts are ½ to 1 inch long (1.3-2.5 cm). A pro tip is to plant whole seed potatoes with 4-5 sprouts if planning to harvest many red potatoes.
However, if you want to harvest large-sized potatoes, chop them, so each seed has 1-2 sprouts.
Prepare the Planting Site
Adequate site preparation ensures a healthy and disease-free harvest.
Here are some tips:
- Ensure the soil is loose and well-drained
- Pour a thick layer of compost, about 1-2 inches wide, and use a metal-pronged rake to till the soil
- Use the rake to mix the compost with the original soil to ensure the soil base is nutritious and your potatoes grow quickly
- Check the soil pH. Red potatoes thrive in soil with a PH of 5.2-6.0. You can purchase a soil test from the local supply store to find out the PH. Take a small sample and mix it with the indicated mixing agents. If the soil is too acidic, add finely ground limestone. However, if it’s too alkaline, treat it with ground sulfur or gypsum.
Planting the Potatoes
There are two ways of planting potatoes: the trench and hill method and the scatter method.
Trench Method
This potato planting technique requires you to dig shallow trenches that are six inches in depth. Once you’ve made the trenches, you place the seeds in them.
Here’s how to do it:
- Dig a trench of 6×8 inches using a round-point shovel or a hoe. Then place the seed potatoes in each trench, leaving 12 inches between them with the sprouts facing upwards. You can also read about the proper spacing of potatoes if you’re unsure. If using a bin, place two potatoes in each bucket and ensure the potatoes have adequate space to root down.
- If planting chunks of cut potatoes, use 3-4 small sections and fill up the container with well-drained soil before planting the potatoes. Make sure to cut them about 1-2 days before planting so they can heal, ultimately forming a protective layer over the cut area. The healing period also improves moisture retention and prevents the potatoes from rotting.
- If you plant them on rocky soil, place the potatoes directly in it. Then sprinkle a mix of soil and compost and cover them with leaves. As they emerge, add organic mulch for soil cooling, moisture conservation, and controlling the growth of weeds.
Scatter Method
For this method, you only have to spread the seed potatoes directly on the ground and add a few inches of mulch to cover them up. As the plants grow, that’s the time you add a mulch layer.
However, if you live in areas infested with rodents, the scatter method isn’t suitable.
Watering the Plants
Red potatoes need lots of water to grow. The idea is to keep the plants wet but not soaked.
As such, watering them 1-2 times a week should be enough. Check the moisture level before watering them by inserting your finger 1-2 inches into the dirt.
If the finger comes out, dry water the potatoes.
Hilling Potatoes
The most important aspect of growing potatoes is not to allow the tubers to get exposed to the sun for extended periods.
As the potato grows, it produces the main stem allowing the flowers and leaves to come aboveground.
These tubers then form secondary stems branching off from the main stem.
If the tubers are left in the scorching sun for long, they turn green and produce a poisonous compound called solanine. This compound is responsible for making potatoes bitter and nauseating.
However, you can prevent it by employing a technique known as hilling. It involves creating a hill of soil once the shoots emerge.
The best time to do the hilling is in the morning because plants are tallest then. If done during the day, the plants are probably scorched by the sun and have started drooping.
Also, ensure the potatoes have enough water when hilling (water 1-2 times a week) while maintaining a healthy balance.
If you water too much, you’ll have misshapen tubers.
Then, repeat the hilling process before the potatoes start blooming. To do this, cover and support the tubers with some of the dirt around the potatoes’ base. You can also consider growing red potatoes in raised garden beds if you like.
Harvesting Red Potatoes
You can usually harvest red potatoes 3 months after you planted them. At this time, the plants stop flowering, and the leaves turn yellow.
For this potato variety, the best time to harvest is 2-3 weeks after the plants stop flowering.
When harvesting, it’s important to dig carefully to avoid cutting or bruising them, but if you damage one of the potatoes, set it aside immediately.
Injured potatoes develop diseases that can affect healthy tubers.
Then dust off the soil and store the healthy one in a cool (not more than 50 degrees Fahrenheit), dark, and dry place to allow them to cure.
Be sure to check them regularly for shriveling and avoid washing them as water can cause decay.
Once harvested, it’s best to cook red potatoes quickly (at least after one month) because they are not long-lasting.
Curing Red Potatoes
While this variety doesn’t last long, there are ways to ensure they last long after harvesting.
The most effective is to reduce watering after flowering. And once the vines begin to yellow and die back, cut and remove them from your garden.
Then you can harvest the potatoes after 8-10 days. If the skin still appears sensitive, leave them for a few more days before harvesting.
Once harvested, spread the potatoes in a well-ventilated place for at least two weeks to allow them to dry and develop thick skin.
Also, don’t store the potatoes near fruits such as apples because they contain ethylene gas which causes potatoes to go bad.
Here are more storage tips:
- Ensure the space is cool with a temperature of 42-55 degrees Fahrenheit. Beyond this temperature, the potatoes are likely to sprout and develop diseases. Some suitable storage options include the closet, an unheated entrance, spare room, or the basement
- Ensure the room is humid enough. If storing them in a vast dry space like a basement, consider increasing the humidity. For example, you can place large buckets of water in front of an air source
- The room should be well ventilated because potatoes still use oxygen even after harvesting. That’s why you should avoid storing the potatoes in airtight containers. If you’re planning to use them, ensure they are perforated to enhance airflow
Common Pests and Diseases that Affect Red Potatoes
Like other potato varieties, red potatoes are also prone to pests and diseases. Here are those you should look out for:
Scab
This is a common potato disease caused by a high soil PH.
The ideal soil PH for growing red potatoes is 5.2-6.0; a higher PH may cause potato scab.
Add peat moss to the area where you’ll plant the potato so you can reduce the soil’s pH level.
Beetle
It would help if you combated these pests early in the season. Check the leaves’ undersides for eggs or larvae of common beetles like the Colorado potato beetle.
Aphids
These are tiny insects that suck out rich nutrients from plants. If they attack your red potatoes in crowds, they harm the flowers and weaken the plants.
Since they multiply rapidly, it’s best to control them before the reproduction phase begins.
Aphids move slowly, making it easy to prevent them from spreading. The adults attack the stems, flowers, and leaves, so you should look out for:
- Deformed flowers
- Yellowing of leaves
- Leaves covered with a sticky substance
Late blight
It is the most common disease affecting potatoes. It turns the foliage black and moldy.
While you can still harvest the potatoes, it would help if you harvested them after a few weeks.
Flea beetles
Adults flea beetles appear during the planting season when the outdoor temperatures reach 50 degrees Fahrenheit. They usually make holes in the young leaves, leaving a lacy appearance.
The beetles also spread bacterial diseases like wilt and blight across different plants. The best way to trap them is to plant radishes, basil, or nasturtium as traps
Thin, red wireworms
They attack the potatoes from the underground. That’s why it’s important to do crop rotation.
Growing potatoes in the same garden bed every year attracts pests. Crop rotation slows the spread of such pests and enhances soil health.
Frequently asked questions about growing red potatoes
What is the ideal soil temperature for planting red potatoes?
Potatoes should be planted once the soil temperature reaches 45-51 degrees Fahrenheit. This is because potato tubers grow best when the temperature is 60-70 degrees Fahrenheit and stop growing once the soil hits 80 degrees Fahrenheit.
Why should You mulch around the crop?
It is important if planting the potatoes in hot areas because the thick layer of straw reduces the temperature by 10 degrees Fahrenheit.
Which is the best fertilizer to use when planting red potatoes?
Organic fertilizers are the best. Their slow-releasing nature enhances the plant’s nutrient absorption.
Which are the best plants for crop rotation to avoid pest attacks?
The secret to an effective crop rotation is to avoid planting crops in the same botanical family. For example, rotating potatoes and tomatoes worsens the problem because they are both Solanaceae (nightshades). Instead, rotate with them with kale, or broccoli which are in the Brassicas family group.


Daniel has been a plant enthusiast for over 20 years. He owns hundreds of houseplants and prepares for the chili growing seasons yearly with great anticipation. His favorite plants are plant species in the Araceae family, such as Monstera, Philodendron, and Anthurium. He also loves gardening and is growing hot peppers, tomatoes, and many more vegetables.