
Climbing houseplants need a moss pole to grow to their full potential. Once they attach to a moss pole, they mature quicker and develop bigger leaves and thicker stems.
Making a moss pole is easy and a fun DIY project. I created many moss poles for my Monstera and climbed Philodendron plants. Therefore I would like to share my complete Step-By-Step Guide on how to make a moss pole. I illustrated it with multiple pictures and also created a video.
We get commissions for purchases made through links in this post.

How to Make a Moss Pole
To make a moss pole soak sphagnum moss in water. With a wire cutter, cut chicken wire to the desired. Put humid sphagnum moss on the chicken wire, leaving 1 inch on each side. Roll the chicken wire and form the moss pole, either flat or round. Use seven zip ties to tie your moss pole tightly. Put the moss pole in your container of choice and add potting mix. Tie your plant onto the moss pole and water it every few days.
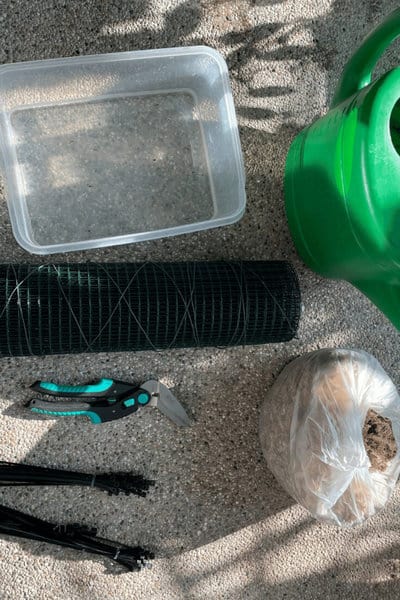
To make a moss pole for your climbing houseplants, you will need the following:
- Sphagnum moss
- Chicken wire
- Wirecutter
- Container
- Water
- Zip ties


How To Build A Moss Pole Video Tutorial
DIY Moss Pole – Needed Materials List


[toc]
DIY Moss Pole – Step-by-Step
Step 1: Materials needed for a moss pole
The Medium
To build a moss pole, you need a medium. The most commonly used medium is Sphagnum moss. It is great because it retains water well and is soft enough for houseplants to put their air roots into it and attach them to the pole.
An alternative you can use is leca balls (clay balls) or if you have really fine mesh potting soil or pebbles.
I however recommend you use dry Sphagnum moss as it is proven to work great. No wonder it is called a moss pole.
I use New Zealand Sphagnum moss as it is considered to be the best moss for anything related to houseplants. Buy at least 2-3 packs to build multiple moss poles.
Chicken Wire
The chicken wire is essential as this is where your Sphagnum moss will go. The mesh will add the needed stability, ensure the moss stays in place, and provide open areas where roots can grow.
I recommend PVC-coated hardware mesh. As long as you are not using multiple poles and stack them on top of each other, there is no need for wooden or PVC sticks to stabilize the construction further.
The mesh is easy to form and bend and very sturdy.
Look for chicken wire with a 19 gauge thickness and a mesh size of 1/2 inch (1.27cm).
Wirecutter
You will need a wirecutter to cut the wire and the zip ties. Regular scissors will not work. It won’t be able to cut the wire, and it is a pain to cut the zip ties.
Zip ties
I love zip ties. There is no faster way to close the wire mesh containing the Sphagnum moss once you have the desired diameter and form. Zip ties will make this moss pole build much easier than most other tutorials.
Container
You will want to have a container or bucket that you can use to wet the Sphagnum moss.
In my opinion, you can never have too many containers when you are a houseplant lover.
I use PVC containers for pretty much everything as a saucer, as a propagation box with a lid (works great), and to mix my potting mixes.
Compression Sprayer or Pouring Jug
A compression sprayer or pouring jug adds water to the container and keeps the Sphagnum moss wet.
This is optional and unnecessary, but I love using a compression sprayer to keep the Sphagnum moss slightly moist and fertilize the moss pole.
This way, roots will grow quickly into the moss pole, and the plants will attach better. But this is optional, as even a dry moss pole will work.

Step 2: The Sphagnum moss
According to the University of Arkansas, Sphagnum moss has a pore spacing of up to 97%. It can hold between 60-68% of its volume in water. This is why it is a perfect medium for a moss pole.
Climbing Philodendrons such as Philodendron melanochrysum, Philodendron patriciae, and Monstera such as Monstera adansonii, Monstera deliciosa can attach their air roots to it and start getting bigger leaves.


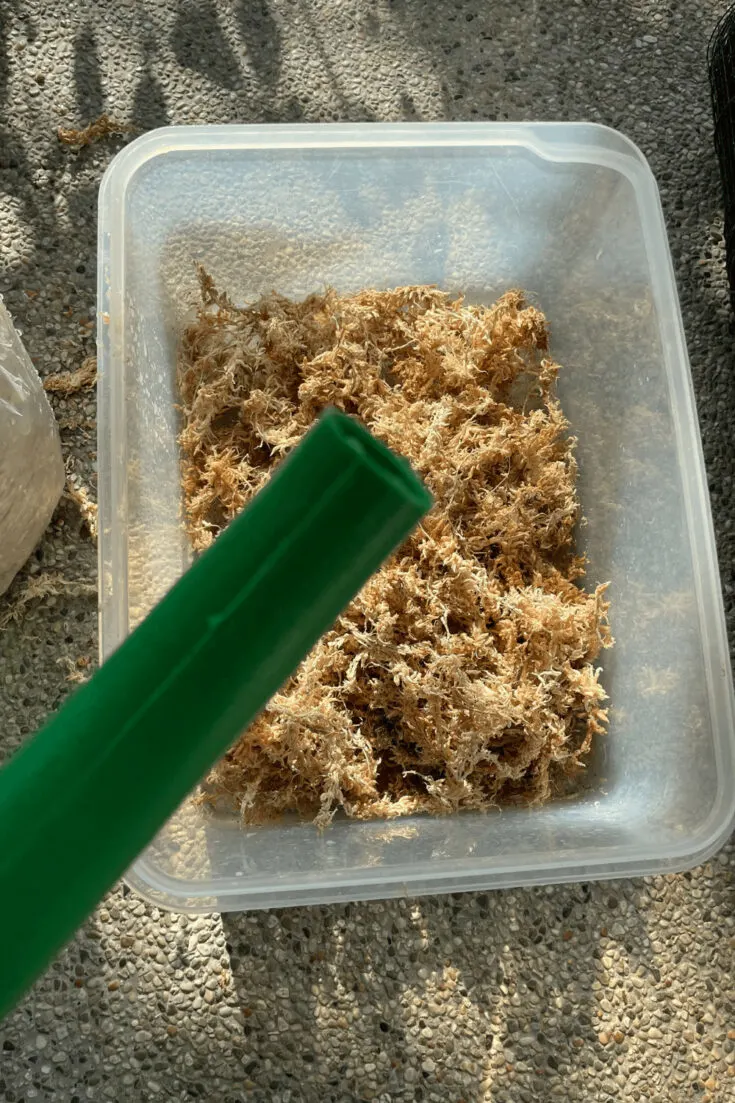
Step 3: Put water in a container
Put the Sphagnum moss in a container or bin filled with water. You can use tap water, distilled water, or reverse osmosis water. I am using lukewarm tap water as this works just fine.
Dry moss is too flimsy and crumbly to use it based on my experience. It will also make a mess.

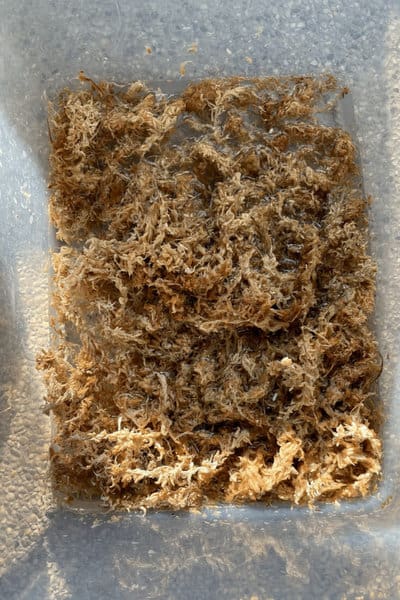
Step 4: Soaking the Sphagnum moss in water for 5 min
The Sphagnum moss needs to be soaked with water before using it. Put the moss into the water for 5 minutes until it changes its color from light brown or beige to dark brown.

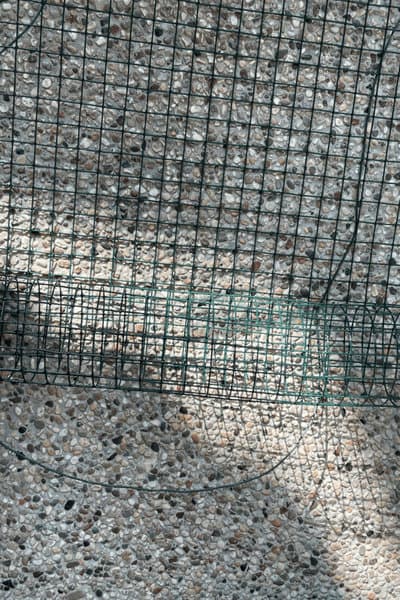
Step 5: The wire
Lay out the wire and take your measurements. I lay the wire flat on an even surface and roll it from one side. This way, I determine the thickness of the moss pole.
You can make thick, slim, flat, and round moss poles. When building moss poles, I almost always go for slim round poles. The slimmer the poles, the less space they will take in pots. The more potting medium I will be able to provide for my plants.
Some shingle plants, such as the Monstera dubia, will appreciate a flatter surface. In that case, make the moss pole flatter. It will be straightforward to flatten the pole once the moss is in it.
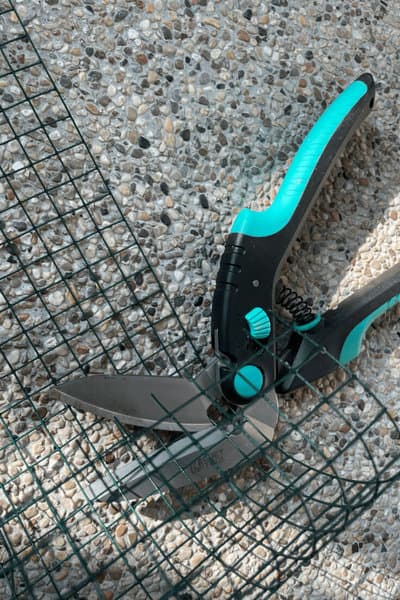
Step 6: Cutting the wire
Scissors will not work. I tried it. I mean, you can cut the wire, but you will destroy the scissors in the process. It will also be cumbersome, and you might find yourself swearing. Therefore invest in a good wirecutter.

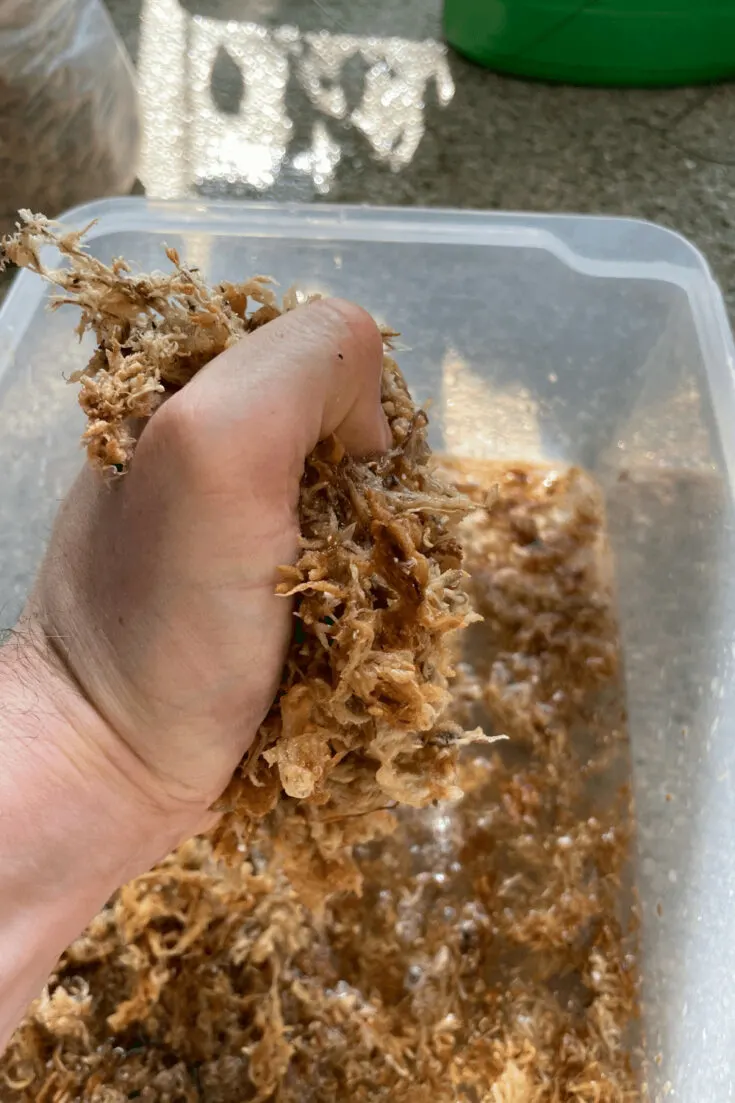
Step 7:
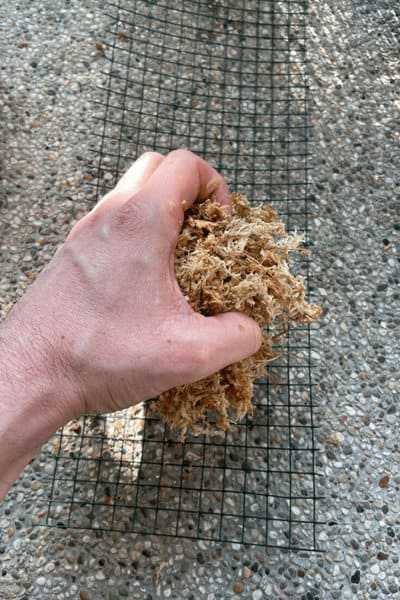
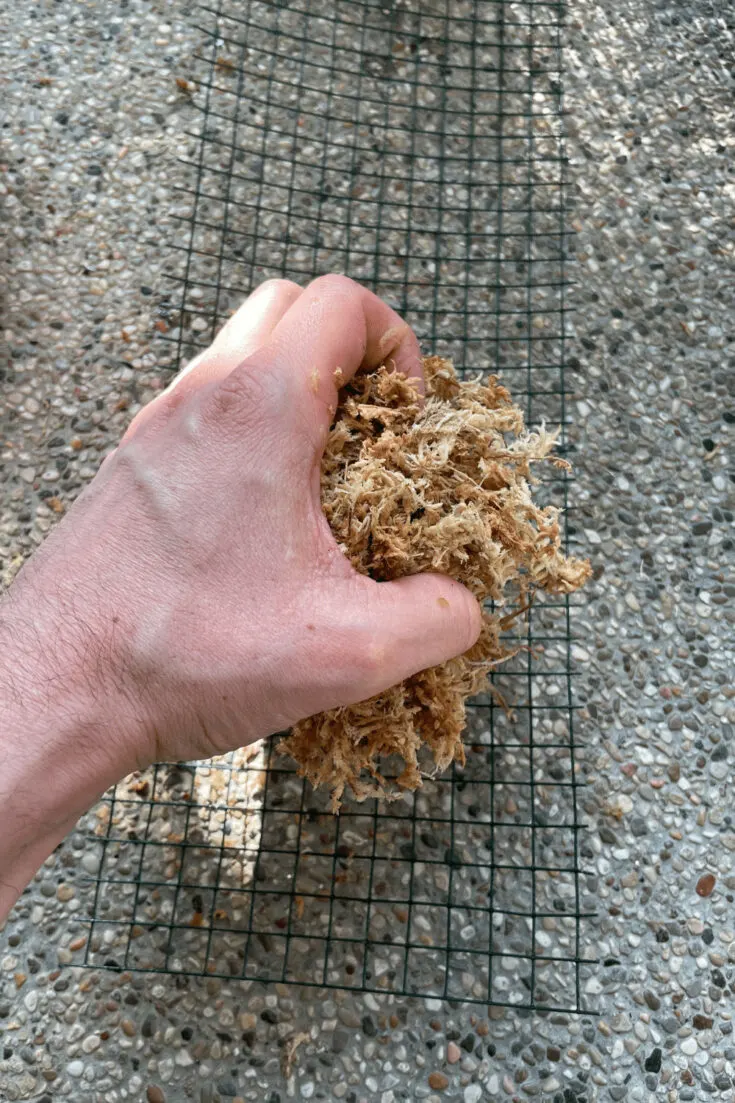
After soaking the Sphagnum moss, take the moss into your fist bit by bit and press the water out as much as you can.

Step 8: Arranging the moss
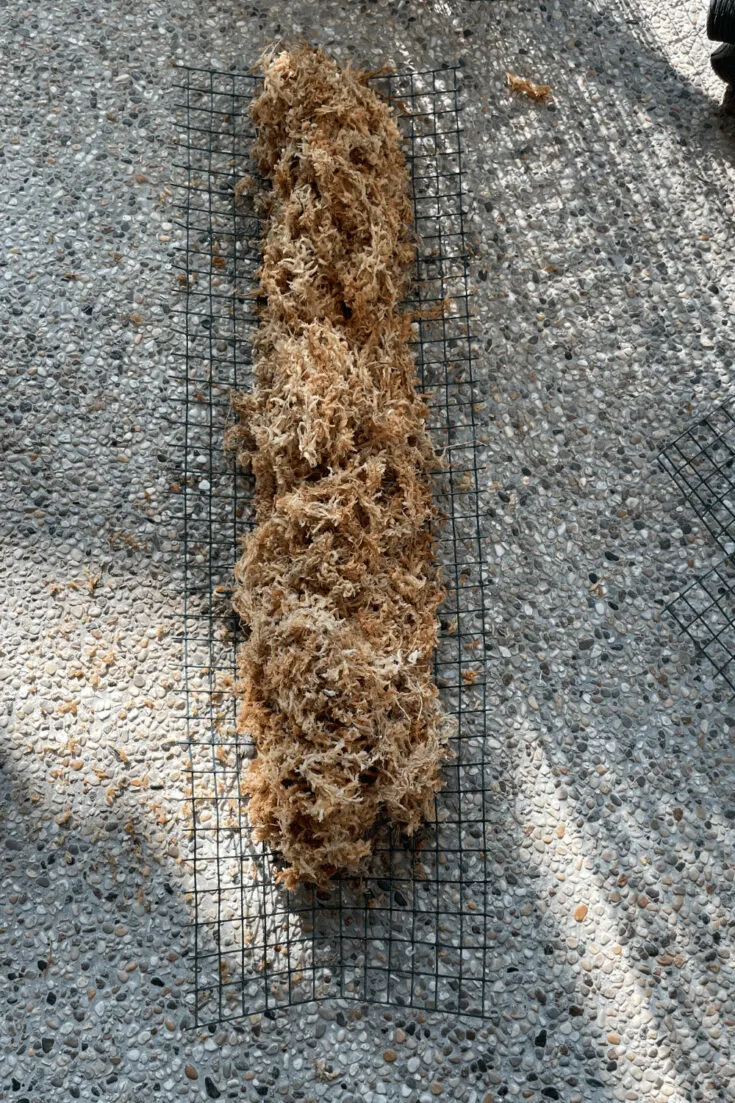
With your hand-arrange the moss throughout the middle of the chicken wire.
Step 9: A moss pole in the making
When arranging the moss, it should look similar to that. You will want to leave some space on either side as you are going to roll the wire and you want to secure it tightly once rolled.
Leave some space at the bottom as you will stick the pole into the potting mix later.

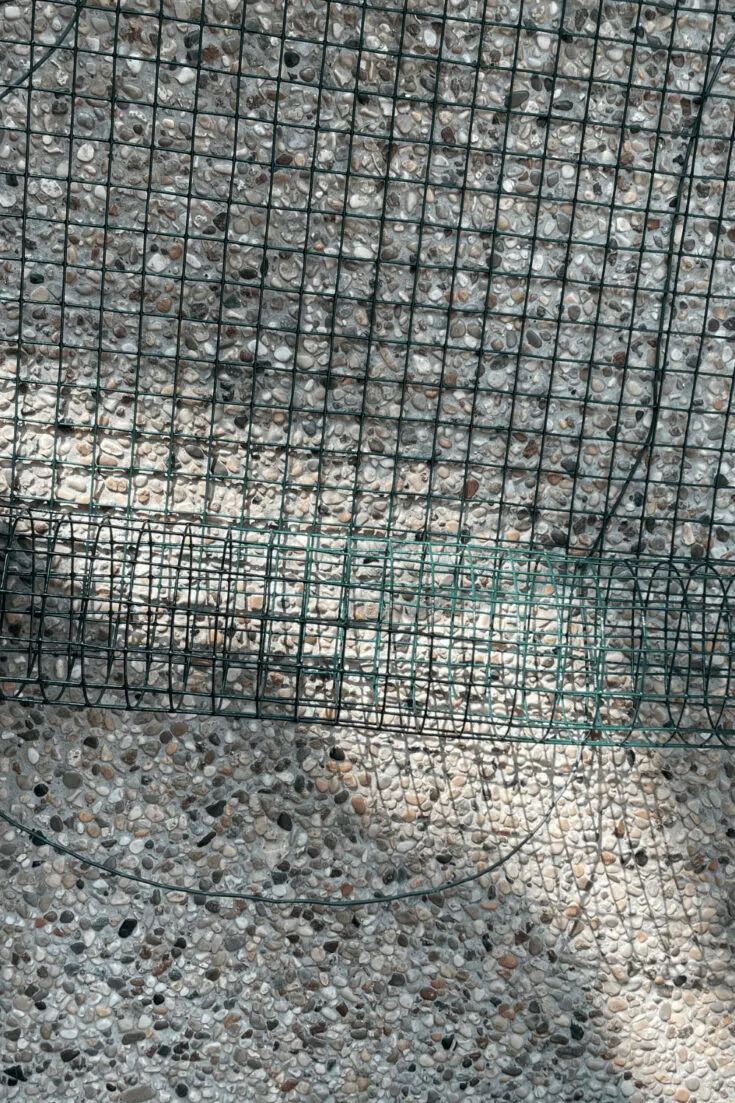
Step 10: Rolling the fence
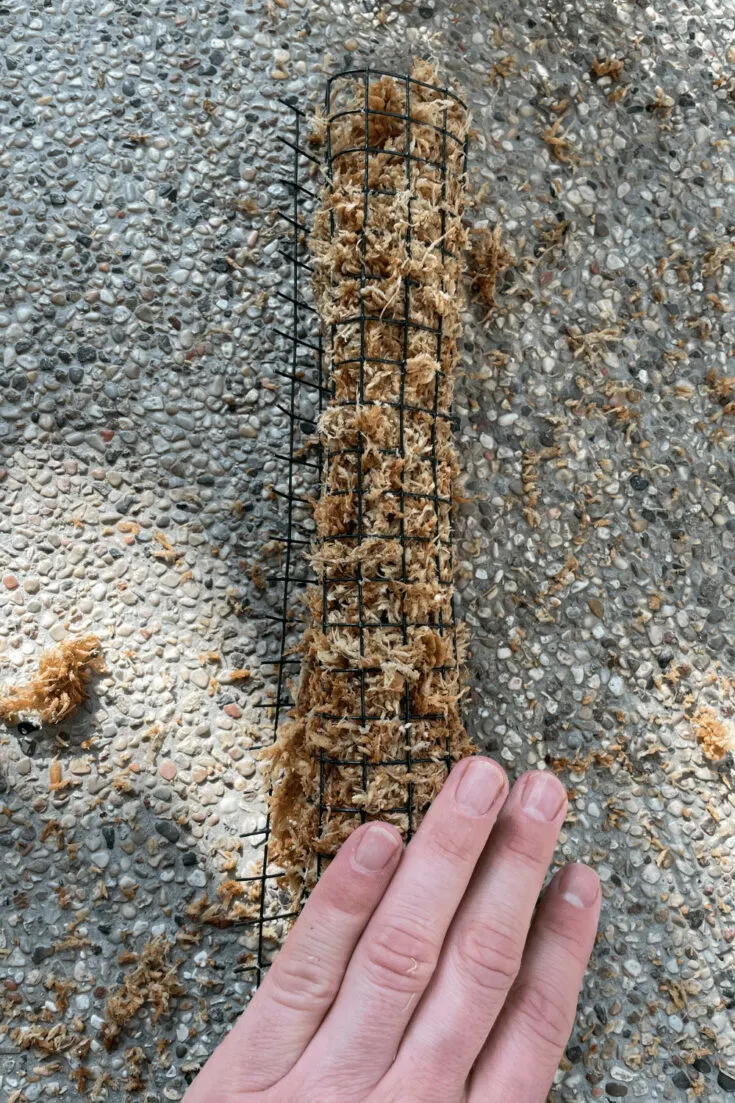
Roll the chicken wire using both hands. You want the Sphagnum moss to be tight in there. Because once the moss is losing some of its humidity it will get less dense anyways.
So try to roll and press it to get a nice round shape or whatever shape you are going for.

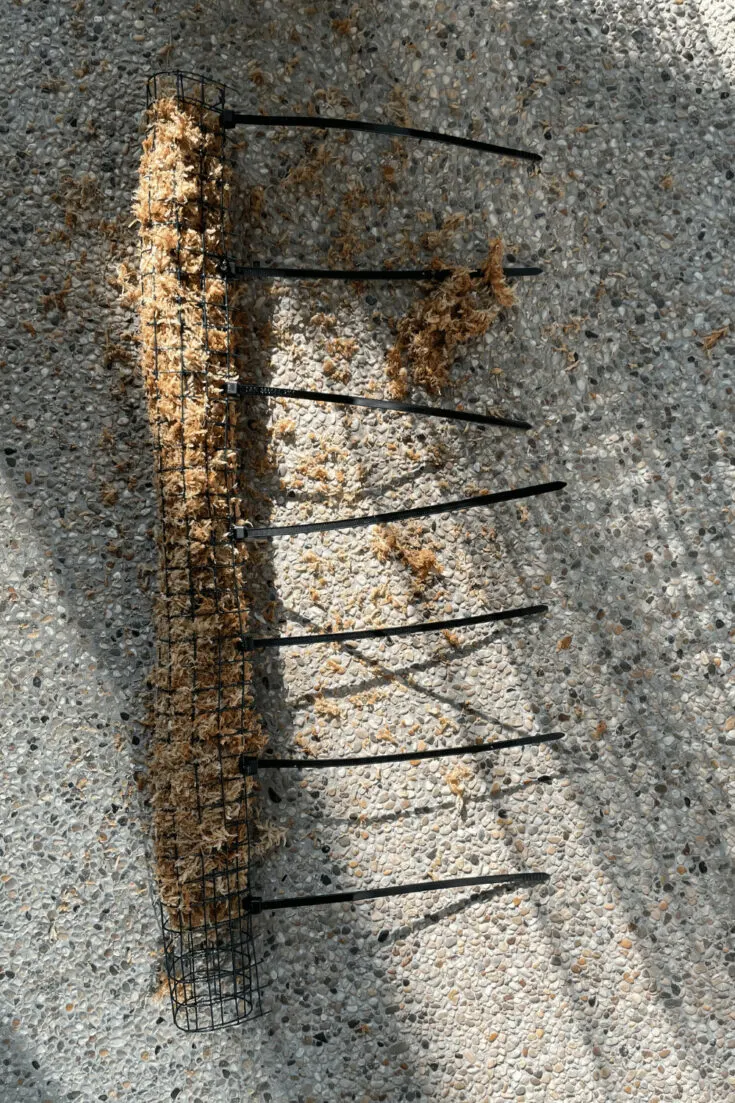
Step 11: The Zip Ties
This is the magic trick and why you might like this tutorial more than others. Zip Ties are an extremely effortless way to attach the wire and enclose the poles.
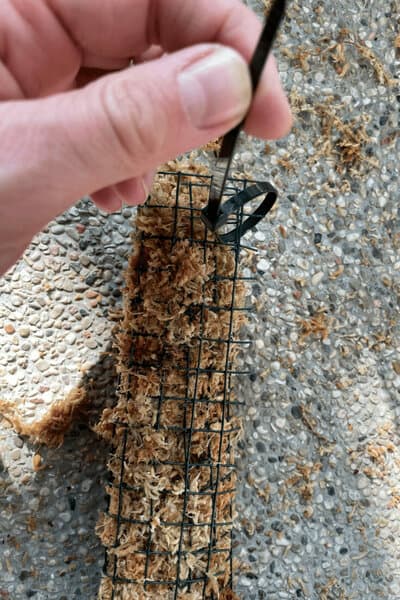
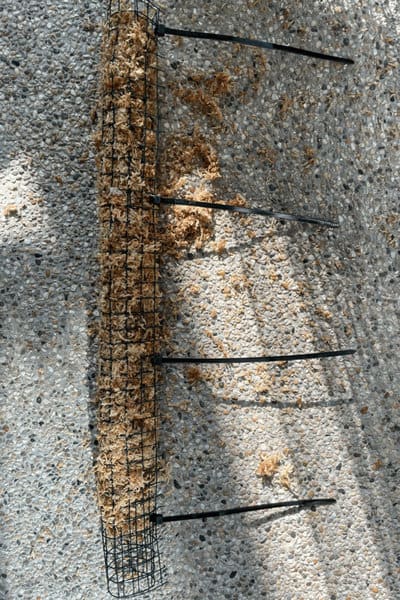
Step 12: Securing the pole
Secure the pole using 4 zip ties and space them about 10 squares apart. It will depend on what height and dimensions of the wire you bought.

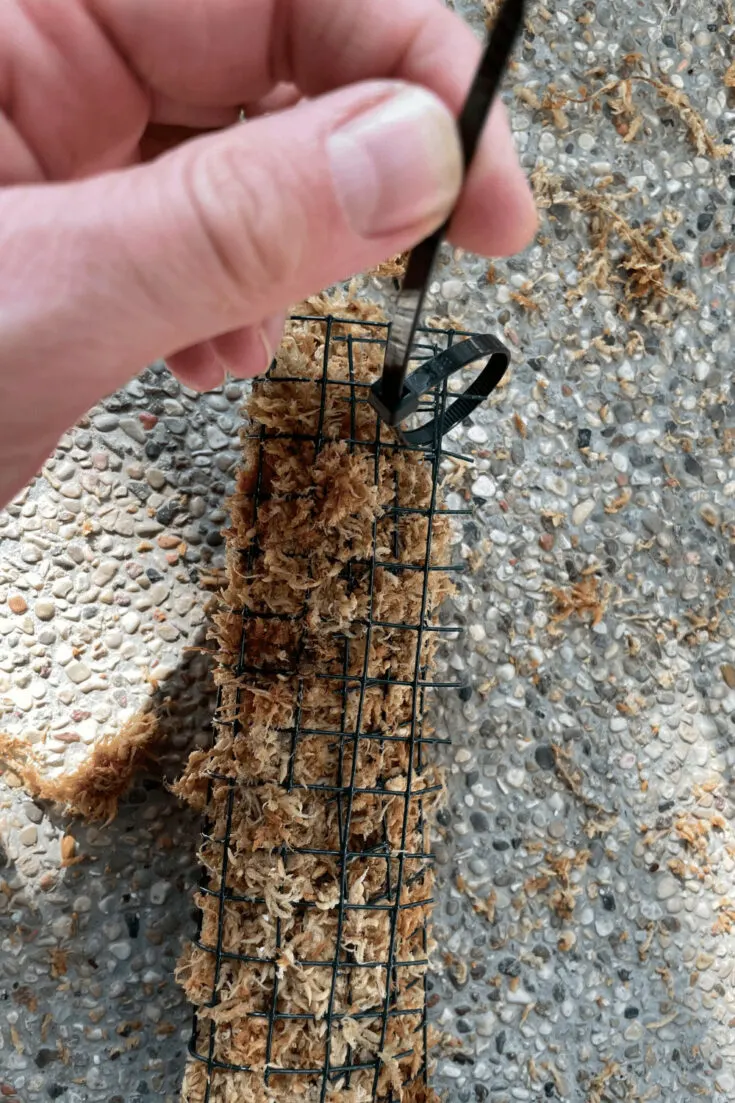
Step 13: Add additional zip ties
Reinforce the chicken wire by adding additional zip-ties in between. The more zip ties you use, the more secure the moss pole will be. However, it is a tradeoff between how much material you want to invest into one pole.
As I am always building multiple moss poles at a time, I wasn’t going too crazy with the zip times. However, I have to admit that this is the most fun part for me.
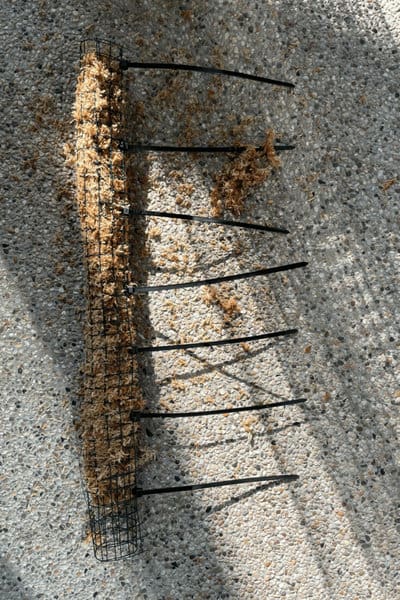
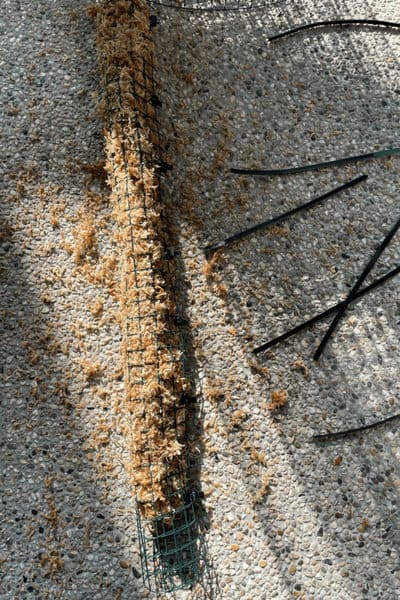
Step 14: Cutting the tie(s)
Cut the zip ties using the wirecutter as the ends will look unattractive between all the green lush foliage that is about to grow along the pole.

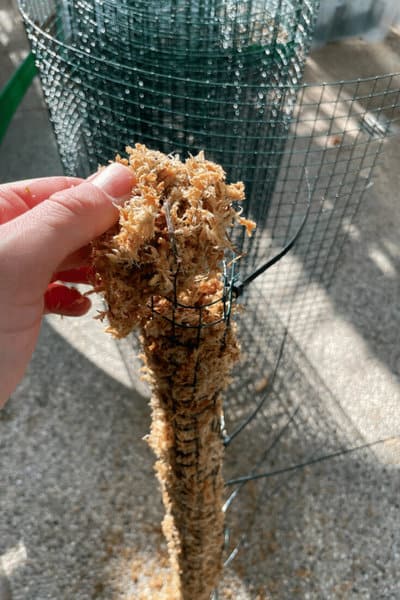
Step 15: Plug it like it is hot
Add some more Sphagnum moss on top to make it tighter.

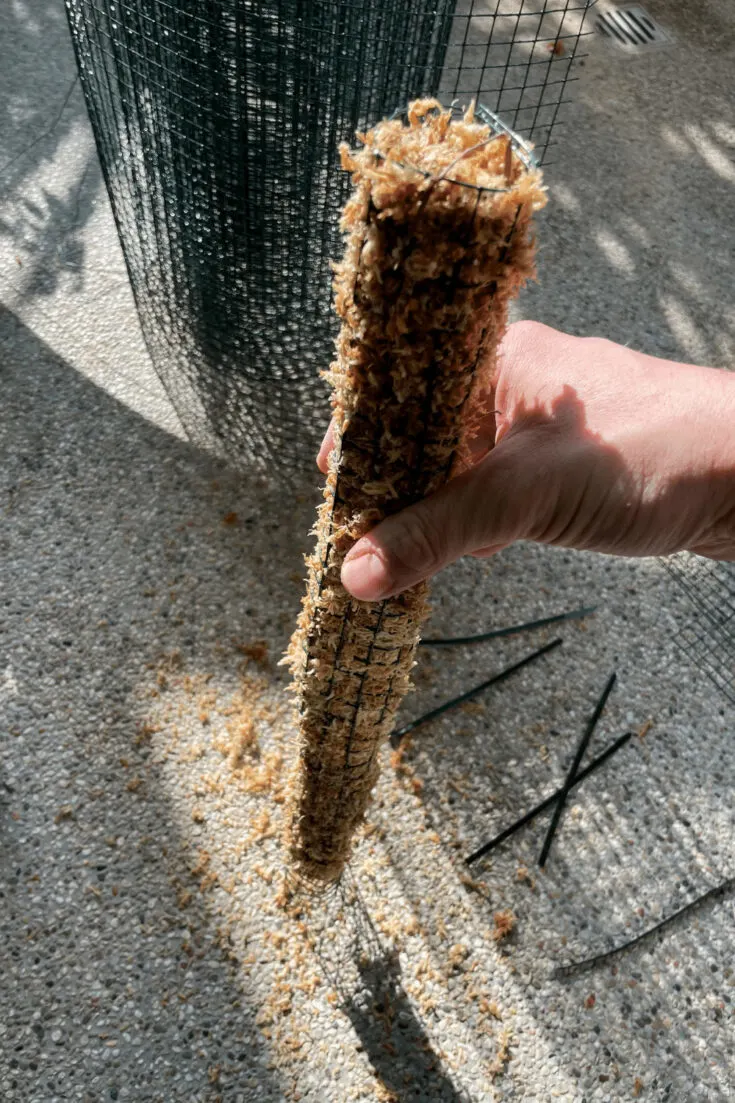
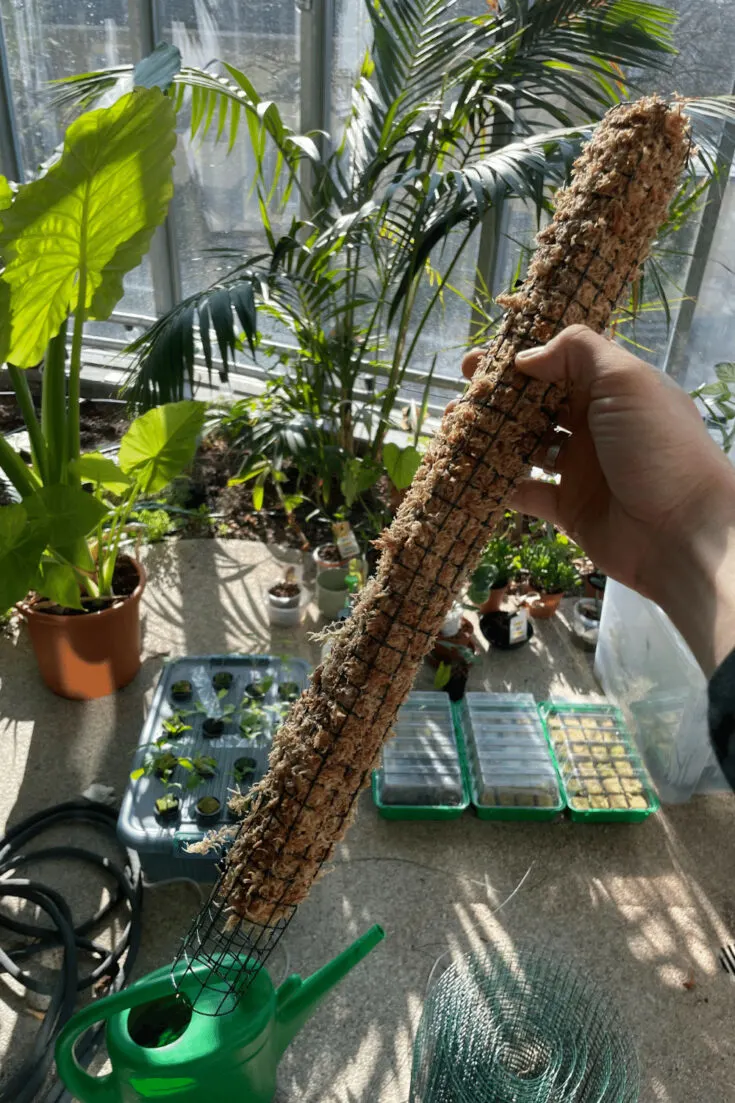
Step 16: A Moss Pole is born
Congratulations, you have built a moss pole, which is now ready to be placed into a planter. You can then attach and secure a plant onto the pole.

Step 17: Flex (optional)
Flex the moss pole in front of your plants and take a picture to remind yourself that it was yours truly that built this moss pole. Continue to build more moss poles. Trust me, you will need them anyways, or start to place them into a pot.

Step 18: Put the moss pole into a pot
Now that you have completed the DIY moss pole tutorial, you can add one of the most poles to one of your planters. For this, I always remove all the potting soil and put it back in again. This way, the moss pole will hold way better in the pot. Since you left a part empty at the bottom, you can fill it with potting soil when putting the moss pole in.
It is also an excellent opportunity to check on the roots and maybe replenish some of the potting soil or add in some slow-release fertilizer at the same time.
I usually put the pole and the plant into the empty planter before refilling it with the potting soil.
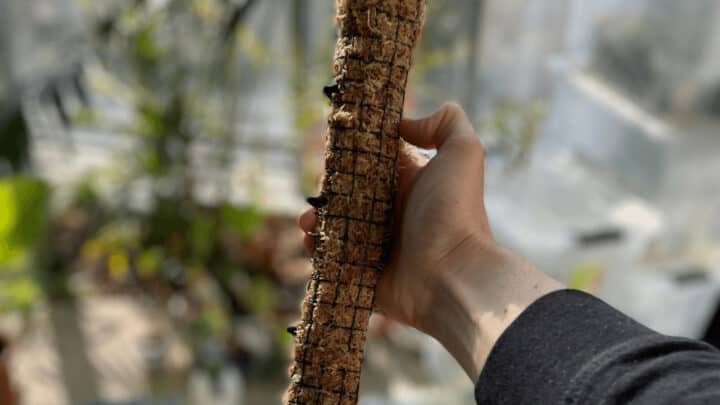
Step 19: Attach your climbing plants to the moss pole
Then it is time to attach the climbing plant to the moss pole. I tried many different ways to attach the plants in the past. I used cords, paper clips for smaller plants, horticultural cords, and other things.
But since you already have bought zip ties, you can also use zip ties. The plants will start to attach themselves really quickly, and you might be able to remove whatever you used. But you will want to give them some guidance in the beginning.
Step 20: Water the moss pole
Ok, this is a controversial one. Some people argue that only a watered moss pole is a good moss pole. Others say you can leave them dry as the plants will attach anyways, and they will dry out instantly. Both parties are right in a way.
But the overachiever I am in the first camp and will water my moss poles every few days. And yes, indeed, they dry out quickly. But by watering, I can add fertilizer just for the air roots and also water my plants. And no question, the plants will root into the pole even quicker. It is just hard to maintain this schedule.
The Benefits of Using a Moss Pole
A moss pole has several benefits for climbing houseplants:
- It keeps them looking nice and attractive
- It helps the plants to mature as they grow
- Bigger foliage
- Get more Holes and slits
- Chance of blooming Monstera, Philodendron, etc.
Frequently Asked Questions About How to Make a Moss Pole
Do I need to water a moss pole?
You don’t have to water a moss pole as plants will grow air roots into the moss pole even if you don’t water it. Moss poles are drying out quickly within days, and keeping up the watering routine is hard.
How do I water a moss pole?
The easiest way to water a moss pole and keep it wet is to use a pressure sprayer.
What is needed to build a DIY moss pole?
Sphagnum moss, chicken wire, water, a container, zip ties, and a wirecutter.
Is a moss pole needed for climbing houseplants?
You don’t have to use a moss pole to grow climbing houseplants. The disadvantage is that plants such as Monstera deliciosa and Monstera adansonii will become unruly over time and will not develop mature foliage with slits and holes that much.
Conclusion About How to Make a Moss Pole
Making your moss poles is an excellent DIY project that is very easy to do, and you even can have your kids help you along the way if you have any. Just ensure you supervise them once they start playing with the wire clipper.
A moss pole is almost a must for climbing plants as we all want to allow these plants to mature and gift us bigger leaves and grow stronger, don’t we?


Daniel has been a plant enthusiast for over 20 years. He owns hundreds of houseplants and prepares for the chili growing seasons yearly with great anticipation. His favorite plants are plant species in the Araceae family, such as Monstera, Philodendron, and Anthurium. He also loves gardening and is growing hot peppers, tomatoes, and many more vegetables.
Last update on 2026-05-01 / Affiliate links / Images from Amazon Product Advertising API