
Orchids are arguably one of the most addictive plants—the more of them you have, the more of them you want to grow.
Like every other first-time orchid grower, my initial intention was simply to nature a few orchids until they set a bloom.
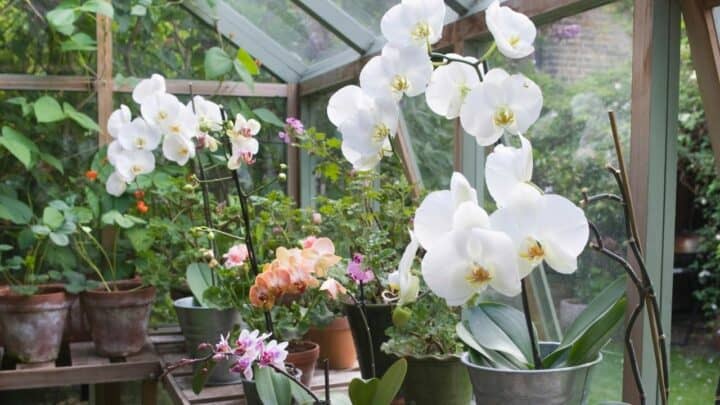
Three years down the line, I have an entire greenhouse of orchids, and I’m considering erecting a second one.
I always heard people say that orchid growers are the most dedicated of all indoor houseplant growers, but I never imagined that I’d be one of them.
So, when the thought of putting up an orchid greenhouse first crossed my mind, I wasn’t ready and didn’t know where to start.
How to Build an Orchid Greenhouse
To build an orchid greenhouse, first, find the right spot to set it up. After which, choose the appropriate shape and build a solid greenhouse foundation. Then, you start designing the interior and installing a water supply system. Lastly, make sure to install vents for proper ventilation.
Building an Orchid Greenhouse Step By Step
Here’s a step-by-step guide on building orchid greenhouses:
1. Find the Right Location
Before we even start planning for an orchid greenhouse, we should find a suitable location.
This will primarily depend on how big we want the greenhouse to be and the amount of light the plants need.
Southern exposure is the best; it gives just the right amount of light to nourish the plants without scorching them.
If we cannot find a southern location or most of the orchids we are planting are too sensitive to direct light, a western or eastern location will suffice.
Avoid a northern exposure unless there’s no alternative. Northern locations typically have insufficient light and will most likely need supplemental artificial light.
Next, we need to decide whether your greenhouse will be attached to the house or a free-standing one.
While freestanding greenhouses are aesthetical and afford us more space, the downside is that we may find it challenging to reach them during harsh weather conditions like rain and snow.
With an attached greenhouse, it’s less costly to run utilities, and we can easily access the greenhouse regardless of the weather.
The downside is that attached greenhouses typically have smaller spaces and may block light from entering the house.
2. Choose an Appropriate Shape
Once we’ve found a spot for your greenhouse, it’s time to decide on your greenhouse’s shape. Again, this depends on the space and light we want.
In the past, most orchid greenhouses had curved shapes—the point where the greenhouse’s roof met the wall formed a curve, not a point.
This approach is costly because we have first to bend the glass. Today, the most common orchid greenhouse shape is a straight eave structure that looks like a ship.
If we want to customize the greenhouse to match our home’s style, the best option is to extend it from the house with a double pitch configuration.
The other advantage of this shape is that it gives more space than a lean-to design, especially if we use a gable end.
3. Build a Solid Foundation
The next step is beginning the actual construction. If the orchid is a 6×8 feet print or larger, we must ensure that the foundation is strong enough to support the entire structure.
As is in ordinary greenhouses, the foundation is typically made of a concrete slab.
One critical thing we shouldn’t forget while laying the foundation is drainage. Establish a central drain and ensure that the concrete slab slants towards it.
Otherwise, we will have to contend with stagnant water in the greenhouse, which is not healthy for the orchids and may become breeding grounds for mosquitoes.
In some cases, we may also need to install a French drain around the foundation’s perimeter to get rid of the water that doesn’t make it to the central drain.
4. Design the Interior
Most US states have hot and cold spells. Therefore, the greenhouse’s interior should have supplemental cooling and heating to keep the orchids flourishing throughout the year.
The two most common heating systems are solar panels and propane heaters.
For coolers, the best option is an evaporative (swamp cooler) cooling system. It entails water circulating throughout the greenhouse’s roof over a sponge and pumping system that circulates the cooled air.
I advocate for the swamp cooler because besides lowering the temperatures, it also adds humidity to the air.
Some orchid growers prefer to empty their greenhouses during summer. The advantage of doing so is that it gives us ample time and space to clean and restructure the greenhouse.
However, it’s only viable if we have the luxury of time and ample shaded areas like trees or pergolas within our homes.
5. Install a Water Supply System
All plants need water to survive, and orchids are no exception. The most basic orchid greenhouse watering system is a hose hook-up+sink with a faucet.
The hosepipe should be long enough to allow us to water all the orchids in the greenhouse.
We can also place plants underneath the faucets to wash off the dust, pests, and any unwanted material into the sink and down the drain.
A more advanced option is a drip or automatic misting watering system. As the term suggests, the system allows us to pre-schedule watering sessions.
So, we can go on vacations without having to worry about our orchids being watered by relatives who have killed all their houseplants.
6. Keep the Air Moving
Without proper ventilation, hot air will rise and get trapped in the greenhouse’s ridge, causing overheating and scorching of the orchids.
We should, therefore, have automatic ridge vents to let out the hot air and allow in cooler air.
We can also have grouped eave vents or windows along the walls to let in cold air.
For large greenhouses, we may want to install circulation fans at opposite corners for extra ventilation.
Frequently Asked Questions About How To Build An Orchid Greenhouse
How do I build my orchid shade?
The process of erecting a shade is more straightforward than that of putting up a greenhouse. Select an appropriate location, estimate where to put the corner pickets, and then drive them in the respective corners. Finally, put a poly-pipe arch over the erected pickets.
Where’s the Best Spot to Put an Orchid in the House?
The best spot for an indoor orchid is a place with limited draft and constant temperature throughout the day. Avoid exposing it to direct light.
Conclusion
Heaters, coolers, ventilators, and water systems are the essential features of an orchid greenhouse.
However, we can always add other accessories like humidifiers and benches on a need-basis.
I hope this text helped you build an orchid greenhouse.


Daniel has been a plant enthusiast for over 20 years. He owns hundreds of houseplants and prepares for the chili growing seasons yearly with great anticipation. His favorite plants are plant species in the Araceae family, such as Monstera, Philodendron, and Anthurium. He also loves gardening and is growing hot peppers, tomatoes, and many more vegetables.