
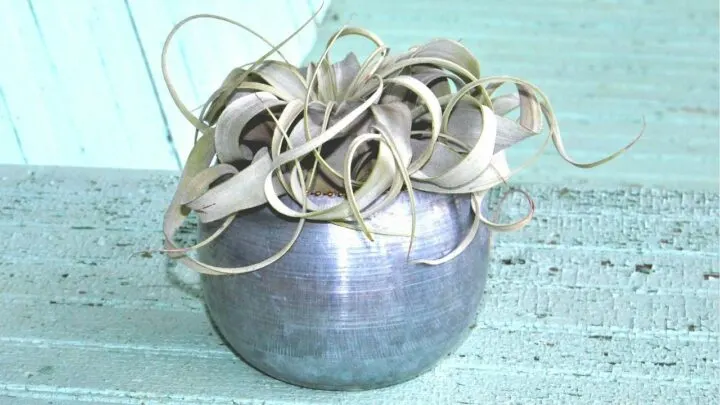
Tillandsia Xerographica is a stunningly beautiful air plant native to semi-arid areas of Southern Mexico, El Salvador, Guatemala, and Honduras.
In its native habitat, it can be seen suspended high in the branches of subtropical tree canopies.
Like all air plants, Tillandsia Xerographica doesn’t require soil and will naturally attach itself to trees, rocks or stones, sourcing water from the morning dew or the remnants of rainfall.
It displays a unique pattern in that its silvery leaves curl around and under themselves as they grow.
[toc]
Tillandsia Xerographica Care
To keep your Tillandsia Xerographica healthy, it’s important to spray or ‘mist’ it 2-3 times per week, depending on the season, and the temperature and humidity of your growing area. For example, a greenhouse is far more humid than most homes so if you’re growing your plants in a greenhouse, you’ll need to bear that in mind when working out your watering regime. The ideal temperature range for this plant is 60° – 80° degrees Fahrenheit (16° C – 27° C). Humidity should be maintained at around 60-72%. For best results, you should fertilize roughly once a month using a non-urea Bromeliad fertilizer 17-8-22. Good air circulation is important and your plant should ideally be located in indirect sunlight.
Where to grow your Tillandsia xerographica
Tillandsia Xerographica likes to be kept in bright, indirect sunlight. If you have a conservatory or a room with lots of windows, a position where it gets plenty of light will be ideal.
Around 20 minutes of direct sunlight each day is unlikely to cause your plant too much harm and of course, sunlight is necessary for it to go through the process of photosynthesis and produce food. Any more than that, though, is likely to cause it sunburn.
Signs of sunburn may include brown spots, dried patches on the inside growth or blotchy marks on the leaves. If it is not getting enough sunlight, you may see leaves falling or cupping inwards.
If you struggle to find a happy medium between direct and indirect sunlight, artificial light can work too although your plants will tend not to thrive as much.
Watering
Air plants are famed for their ability to live off the air, but when keeping them at home you will need to supply water for your plants to thrive. Even for air plants, though, Tillandsia Xerographica is particularly tolerant to dry conditions. The plant will naturally take up humidity and nutrients from the air around it but will need to be sprayed 2-3 times a week if kept indoors.
This will vary depending on the humidity of your home so be guided by your plant. When it needs water your Tillandsia Xerogaphica’s leaves will curl slightly and the leaves may appear slightly wrinkled.
If you overwater it, the leaves will be become straight. Overwatering can be more damaging than underwatering so err on the side of caution.
It should only take you a few weeks to find the perfect watering schedule for your plant. You may also need to adjust your watering regime as the seasons change.
To reflect the occasional heavy rainfall of its natural conditions, it is advisable to give it a thorough soaking once a month.
This is done by fully submerging it in lukewarm water for around half an hour before gently shaking it and leaving it to dry on a tea towel or draining board.
Make sure you get rid of all water from the crevices of the plant before you put it back in its pot.
Remember, in its natural habitat, the sun would remove all the water but. In a home environment, leaving pooled water in between leaves can lead to rot.
Temperature
The ideal temperature range is between 60° – 80° degrees Fahrenheit (16° C – 27° C). Inside the home, this is likely to be the temperature range all year round but if your Tillandsia Xerographica is kept outside, it’s best to bring it in during the cooler months to ensure it is kept at a comfortable temperature. If regularly exposed to temperatures below 40°, your plant is likely to suffer.
Humidity
The natural air humidity for Tillandsia Xerographica is in the region of 60-72%. The humidity in your home is likely to be significantly below this which is why it’s important to spray your plant to make up for the moisture it is not naturally receiving from the air around it.
Be careful not to water your Tillandsia Xergraphica if you do live in an area of high humidity as it will be absorbing moisture from the air and your watering is likely to cause an excessive intake of water.
Fertilizing
Fertilizing is not essential for our Tillandsia Xerographica but is recommended to enhance the growth of the plant. Fertilized plants will have better color, stronger blooms and more pups.
Tillandsia Xerographica requires a fertilizer which is absorbed directly into the leaves. Bromeliad fertilizer 17-8-22 is recommended.
It’s best to use a low-nitrogen fertilizer as it will help encourage blooming. You should also look for a non-urea-based fertilizer. Urea-based nitrogen is released when bacteria in the soil convert it, but as Tillandsia Xerographica does not grow in soil, the nitrogen will not be released from the urea.
Fertilizing is not a substitute for regular watering so should be done in addition to misting the plant. You should fertilize no more than once a month.
Overuse of fertilizer can cause nitrogen burns. These present as yellowing, browning or withering of the leaves.
If you think you may have overfertilized your Tillandsia Xerographica, you should soak it as if you were doing a monthly watering and then dry it completely.
This will help to get rid of some of the excess salt which causes the burn.
Air circulation
Wherever possible your Tillandsia Xerographica should be placed near a window where there is good air circulation. Air plants have trichomes that help them absorb moisture from the air. They depend on the circulation of the air around them to provide carbon dioxide and to prevent moisture from becoming trapped in its crevices and causing rot. The air flow should be such that, after misting, your plant is fully dry within 4 hours and without you having to manually dry it.
Of course, if this is not the case, the first thing you should do is dry the plant. Then you can look at relocating it to somewhere with better air circulation.
Equally important as circulation is air quality. Plants kept indoors can dry out due to air conditioning units, fans or heaters.
Natural airflow such as that from an open window is most favorable but it won’t always be possible.
In these circumstances, you should avoid placing it directly next to an air vent and you will have to monitor your plants to ensure they are getting sufficient moisture and aren’t drying out too quickly.
Terrariums tend to be a poor choice of location for any air plants as they provide poor air circulation.
Propagation
Tillandsia Xerographica can be propagated using seeds or pups. Pups are the quickest way to propagate as it will take a seedling approximately 8 years to become a fully grown plant.
Growing Tillandsia Xerographica from pups
You should start to see the first pups of your Tillandsia Xerographica appear within 2-6 months of its first bloom. Pups grow near the base of the plant and are quite easy to remove and transplant.
Using a sharp knife, cut the pup away from the mother plant, taking care not to cut into either. Try to keep the cut close to where the two join.
Once you have successfully removed the pup, place it in its new location and follow the same care guidelines as you would for the mother plant.
To propagate from seeds, you’ll need to wait until the flowers have died and then dry them out. When the seed pods open, you’ll see the seeds which are made up of a small brown seed with a wispy white tail that resembles cotton candy.
The tail is used in nature to catch the wind and transport the seeds so for the purposes of propagating at home, it’s not necessary. The important thing is to collect the brown seeds.
This can be done by removing the seed from the tail with a pair of tweezers.
Once harvested, the seeds need to be soaked. This is best done by placing them in a container of water. You can leave the lid on to help create a greenhouse effect, but you’ll need to make sure you remove it every 2-3 days to allow fresh air in.
At this stage, light is not important. Within a few weeks, you should see green flecks appearing on the outside of the seeds. This is evidence that they have germinated and are ready to be transferred to their substrate for growing.
Your choice of substrate should hold water without becoming sodden. Your seeds will need to remain moist, but too much moisture and they may develop mold. Velcro or cheesecloth are both good choices.
Humidity and indirect sunlight are important at this stage of the process.
Growing Tillandsia Xerographica from seeds
When growing Tillandsia Xerographica from seed, patience is key. You will need to water your seedlings until they are mature enough to obtain moisture on their own. This can take years.
A plant which is about 4-5 inches in diameter is likely to be around 4-5 years old.
That said, Tillandsia Xerographica plants grown from seed should be stronger, more hardy and longer-lasting than those grown from pups.
Of course, propagating from pups will supply you with a steady stream of new plants as time goes by.
Conclusion
Tillandsia Xerographica is an interesting rosette-shaped plant, popular among interior designers and often included in displays.
The beautiful, silvery leaves provide an understated shimmer which, combine with its unique shape, make this plant stand out without demanding center stage.
When in bloom, it displays a vibrant violet color which seems to emerge from the base of the plant via a kaleidoscope of greens and reds.
For all its delightful form and color, it is easy to maintain and is ideal for people dipping their first tentative toe in the world of houseplants.
It will grow in most indoor settings and too much watering is more dangerous to it than too little so you can be wary about what you are doing and learn as you go along. Provided you don’t overwater and cause it to rot, you will be able to rectify almost any mistakes you make.
Often, simply moving it to a different location to remove it from direct sunlight or keep it away from manmade environments created by HVAC systems is enough to revive it.
It’s also easy to propagate.
For those who have patience and enjoy a challenge, propagating from seed can be extremely rewarding. But if you prefer something a bit quicker, you can grow your portfolio of Tillandsias by transplanting the pups.
These can be relocated in your home or office, and they make a great gift too.
Plants have been proven to help with mental wellbeing and by giving a loved one a Tillandsia Xerographica to place in their home, you provide them with a delicious touch of greenery to liven up their home or workspace without burdening them with a care regime they neither want nor have time for.


Daniel has been a plant enthusiast for over 20 years. He owns hundreds of houseplants and prepares for the chili growing seasons yearly with great anticipation. His favorite plants are plant species in the Araceae family, such as Monstera, Philodendron, and Anthurium. He also loves gardening and is growing hot peppers, tomatoes, and many more vegetables.