
Begonias are some of my favorite plants, and though they grow easily enough, repotting them can be a challenge.
I made a few beginner mistakes at the start with my first begonia.
Planting it into a much larger container will not result in a bigger plant, and giving it loads of fertilizer won’t supercharge a begonia either.
Luckily, I learned, and this is the best way how to repot a begonia.
How to Repot a Begonia
Wait until your begonia is completely root-bound before you start repotting it. Once you’re sure your begonia’s rootbound, choose the right size container, ensure adequate drainage, add the correct potting medium, and repot your begonia with ease. Make sure to place your newly repotted begonia in a warm area exposed to indirect sunlight.
Repot Your Begonia In Five Easy Steps
Learning how to repot my begonia involves a five-step process that includes knowing when to repot the plant and how to choose a new pot.
Select an appropriate potting medium, ensure good drainage, and finally, let the begonia adjust to its new home.
Here’s how.
Step One: When to Repot Your Begonia
A begonia is a plant that prefers a snug home in a well-fitting pot. Begonias tend to be root bound, and you should wait until your begonia is fully grown into the potting medium before repotting it.
To see whether your begonia is root bound, pay attention to signs such as its roots peeking through the pot’s drainage holes and the soil becoming compacted around the stem.
I also test my begonia by gently taking hold of the stem close to the soil, pulling softly to lift the plant out of the pot, and looking at the root structure.
A root-bound begonia will have fully grown into the pot, leaving little to no loose soil or potting medium.
If there is still quite a bit of potting medium in the pot or around the roots, simply slip your begonia back into its pot and leave it to continue happily growing.
If not, then it’s time to repot.
Step Two: Choosing a New Pot
The new pot should be no more than an inch bigger than the previous pot. This may seem like a wasted effort, but if your begonia ends up in a larger pot, it won’t grow well and may suffer.
A snug home is best.
I always place the old pot (with the begonia inside) inside the new pot, judging its size by measuring the top and side of the gap between the two pots.
If I can get about two fingers into the gap between the pots and the old pot sits about a finger digit deep into the new pot, then it’s a good fit.
Step Three: Choose a Potting Medium
Begonias thrive in potting mediums and don’t like regular soil.
So my golden mix is as follow:
Equal parts vermiculite, peat moss, and perlite mixed with a healthy scoop (about two tablespoons) of finely ground limestone.
I mix this in a separate canvas bag, adding water from a spray bottle as I mix the potting medium by shaking it vigorously. When it’s dark and clammy, it’s ready.
Step Four: Ensure Good Drainage
Make sure there are sufficiently large drainage holes in your new pot as begonias don’t like being in water-logged soil.
As an added protection, I add a layer of medium size gravel at the pot’s bottom before adding the potting medium.
If the drainage holes aren’t big enough, I easily drill some larger holes with a power drill if the pot is plastic.
With clay pots, I increase the depth of the gravel layer to improve drainage as risking my pot breaking by drilling isn’t worth it.
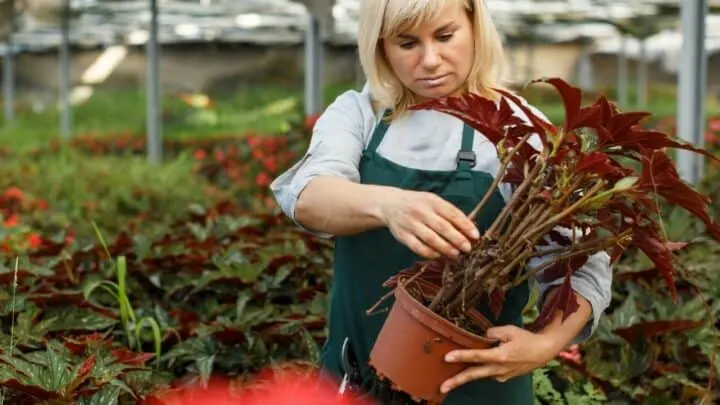
Step Five: Repot Your Begonia
So you’ve done all the preparations, and it’s now time to repot your begonia. For me, this is sometimes the moment of truth as I slip the old pot from my begonia by holding it firmly by the stem.
I place a layer of potting medium, about an inch thick, at the bottom of the new pot.
Next, I lower the begonia into the new pot. It should sit just a little lower than level with the pot’s rim. If it is sinking too deeply, it may mean the pot is too deep.
However, if this is the case, I can remove the begonia and add in a little more gravel at the bottom before adding in the potting medium again and replacing the begonia.
Finally, I add in more potting medium, filling in the gaps around the sides of the pot and layering some new potting medium over the top.
Again, I spray sufficient water onto the begonia to water the soil, but water shouldn’t be running out the bottom drainage holes.
My last step is to place my begonia somewhere warm and in indirect sunlight.
Within a few days to a week, my begonia should have adjusted to the new home and be growing happily.
If the begonia starts looking ill, I may have overwatered or added too much of one of the potting medium components. Or the area I placed it is too warm or it isn’t warm enough.
Frequently Asked Questions About How To Repot A Begonia
What soil is best for begonias?
While begonias don’t really like soil, you can plant them in sandy loam soil. Best by far is to plant them in a well-drained potting medium such as mixed vermiculite, peat moss, and perlite.
Do begonias do well in pots?
Begonias love pots as they thrive in potting mediums. Since they prefer a snug container, which lets them become root bound, they actually prefer growing in a pot.
Should I water begonia after repotting?
You should give your begonia a generous watering after transplanting, but avoid drowning the soil as this won’t be good for the root system. I prefer to use a spray bottle to apply water in bursts, waiting to see how much is absorbed by the potting medium before adding more.
Happy Repotting
With good preparation and the tips I shared above, you should have no problem repotting your begonia. A happy begonia will bless you with beautiful blooms and rich foliage.
If you’ve overwatered or fertilized too judiciously, you may need to repot your begonia again.
However, have some patience, and ensure your begonia has a warm and temperate area to acclimate to its new pot.


Daniel has been a plant enthusiast for over 20 years. He owns hundreds of houseplants and prepares for the chili growing seasons yearly with great anticipation. His favorite plants are plant species in the Araceae family, such as Monstera, Philodendron, and Anthurium. He also loves gardening and is growing hot peppers, tomatoes, and many more vegetables.