
An excellent way to care for orchids is to repot them once in a while as they grow, especially since they may live for more than 100 years.
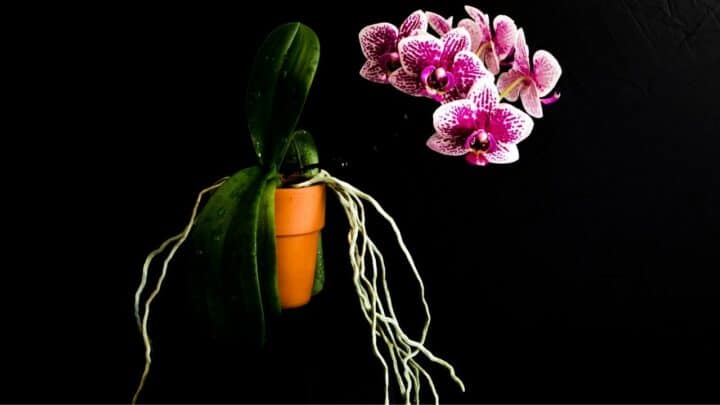
Aerial roots are essential for orchids and should be your main consideration for repotting.
Repotting frequently will ensure the orchid flourishes and produces beautiful flowers every blooming season.
Table of Contents
How to Repot an Orchid With Air Roots
To repot an orchid with air roots, first wait for the right time to do it before shopping for the components you’ll need. Then, take the orchid out of its old pot, using warm water rinse the roots, then trim off spoilt roots using sterilized scissors. Spray a mixture of 3% hydrogen peroxide, place the orchid in the new pre-cleaned pot, and fill the pot with the medium.
Steps In Repotting An Orchid With Air Roots
1. Wait for the Appropriate Time to Repot
The best time to repot an orchid is during its active growth phase, which occurs during summer.
This is when the plant is developing new roots, which will help it adapt well to its new pot.
2. Shop for the Components Necessary for Repotting
To repot orchid plants, we need the following components. I prefer to use items I have at home.
If anything is missing, I find items at my local gardening store.
- Planting medium
- Pot
- Scissors
- Old newspapers
- Sterilizing fluid
- Hydrogen peroxide
- Gloves
- Warm water
- Thermometer


3. Prepare the Working Space
I usually work inside my garage to reduce the chances of being disrupted while working. Sometimes, when the weather is a bit sunny, I work outside close to my garden.
If I am working from the garage, I lay newspapers on the table to prevent dirtying.
Dirt will adhere to the newspapers, and it will be pretty easy to clean up when I’m done. Any other cover is acceptable, such as an old mat or old cloth.
4. Take the Orchid Out of Its Old Pot
Before taking the orchid out of its pot, I water the orchid with excess water and wait for 30 minutes.
This increases the ease of loosening up the roots of my orchid. I then gently and carefully pull out the orchid from its pot.
There are usually a few roots that might have become stuck to the pot, which need additional wiggling.
As I move the orchid, I take care to reduce damage to the roots to the bare minimum. This increases the chances that my orchid will take on the new pot and medium.
I have learned that this requires practice, but it comes on easy if you are surgical. The best way to approach this has always been to employ patience.
Every time I have been in a hurry, I have mistakenly broken many roots, and the orchid has struggled a bit before finally dying or growing once replanted.
As I pull the orchid from the pot, I prefer to hold it as close to its base as possible instead of holding all leaves together, which may damage the leaves.
5. Remove the Old Potting Medium
The old potting medium may sometimes get stuck on the roots of the orchid. I gently touch the roots while shaking the roots to remove the excess medium on the roots.
This medium must be gotten rid of if the plant is to survive in its new pot—the chunks of bark and medium fall off.
Using my forefingers, I gently rub the roots with large medium pieces, not damaging the roots.
I also take care not to damage the foliage or air roots by applying unnecessary pressure on them.
6. Using Warm Water, Rinse the Roots
Warm water (90 – 110 degrees Fahrenheit or 32 – 43 degrees Celsius) is good as it increases the flexibility of the orchid roots.
Little or no water must get into the orchid’s crown to prevent crown rot. If water goes in, I use dry tissue paper to suck out the water.
For those tough and stubborn rooting medium pieces still stuck to my orchid, I soak the roots in warm water for 15-20 minutes.
If some pieces still stick to the roots, I continue soaking them for an hour or so, with shaking.
Since orchids are a type of water plant, you can leave them in water for long as you do other tasks.
7. Trim Off Spoiled Roots Using Sterilized Scissors
Since old rotten roots are not as valuable, they may increase the space needed for repotting.
Many mushy and dry roots could be an indicator that the orchid has not been cared for well.
This is a good feedback review that helps me adjust my care patterns to optimize the orchid’s care and growth.
Poor roots indicate that I may have been overwatering the plant, or I failed to aerate the roots by adjusting the medium or pot adequately.
Rotten roots also indicate that repotting should have been done earlier.
I use a clean, dry cloth and a sanitizing agent. 3% Hydrogen Peroxide can also be used to sterilize the scissors.
Sterilization prevents transferring orchid diseases from plant to plant.
I then use the scissors to cut off the bad roots slowly.
8.Spray a Mixture of 3% Hydrogen Peroxide
Spraying the roots with hydrogen peroxide will help eliminate bacteria, fungi, and pests as it will work as an antiseptic. Some of my friends also alternatively use cinnamon.
This step is helpful to repot due to infections or diseases. However, this is an optional step.
9. Place the Orchid in the New Pre-Cleaned Pot or Old Pot
I clean the new pot if some chemicals or substances may have adhered to the pot’s wall. If the roots can fit in the old pot, I clean the old pot and return the orchid into the pot.
Orchids love a snug fit for pots, and if the pot is new, I find it helpful to use a 1-2 inches larger pot.
10. Fill the Pot With the Medium
I then hold the orchid uprightly and fill the pot with a new potting medium to avoid damaging the air roots or covering them.
I fill the root gaps and use my fingers to check that the medium does not become too tight or dense. I then let the water run over my orchid.
Frequently Asked Questions About How To Repot An Orchid With Air Roots
What options do I have for the potting medium?
I usually use Bark. Other options sphagnum moss, lava rocks, coconut fiber, or clay pellets
Should I repot during blooming?
You shouldn’t repot orchids during their blooming stage. Any disturbance in the roots of the orchid interrupts photosynthesis which can cause flowers to fall off.
Conclusion
Repotting orchids refreshes the roots and aerates them to enable healthier root growth and formation, which improves plant health.
It also reduces stored up fertilizer in the soil, improves the permeation of water, and prevents waterlogging.


Daniel has been a plant enthusiast for over 20 years. He owns hundreds of houseplants and prepares for the chili growing seasons yearly with great anticipation. His favorite plants are plant species in the Araceae family, such as Monstera, Philodendron, and Anthurium. He also loves gardening and is growing hot peppers, tomatoes, and many more vegetables.