
If your orchid does not seem to be thriving, it could be an issue of root rot.
It is terribly easy to rot the roots of an orchid- orchids like well-draining soil and sitting in water for any length of time can be disastrous.
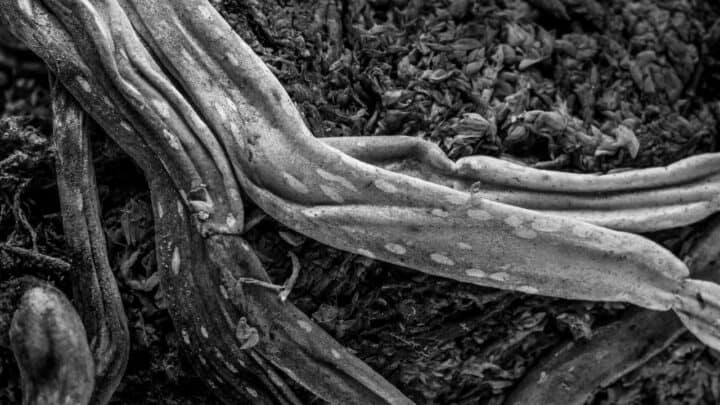
Root rot causes the roots to turn dark and squishy, so it can be helpful to pot your orchids in see-through or translucent liners before setting them in pots or containers to grow.
There are many ways to prevent your orchid from root rot. Keep reading to save your orchid!
How to Save an Orchid with Rotten Roots
To save an orchid with rotten roots, repot the plant and change the soil. Remove the orchid from the soil and remove any dead or compromised roots from the plant. Let the plant’s roots dry out before repotting the orchid in new soil that offers good drainage.
Save Your Orchid From Root Rot
So, how will you save your orchid from rotting roots?
It is integral to start by removing the orchid plant from the current soil and pot.
Take a ruler, chopstick, or knife, and carefully run it around the perimeter of the container to loosen the soil and root-ball from the pot.
Gently tug the plant and its rootball from its pot and shake gingerly to remove loose soil. If the roots are rotted, the soil and roots are likely to be wet or damp.
Make sure that you are placing the plant and root-ball on a clean, dry surface, before proceeding.
Go ahead and disinfect a pair of pruning shears or scissors with household disinfectants, rubbing alcohol, or bleach- and use the shears to trim the dead, black, or soft roots away from your orchid.
Discard the roots and the used potting soil.
You may choose to use a fungicide on the roots before repotting to prevent issues from arising later. These products curb the growth of bacteria, mildew, and mold.
Place your orchid with root-ball on a clean towel or some newspaper to dry out.
Get the roots as dry as you can before repotting, even if you must wipe or dab the roots with clean paper towels. Allow to sit and dry overnight.
Make sure that the new pot is disinfected before adding soil or your orchid.
Do not use a pot that is too big, either; most orchids do well in a pot no bigger than 6 inches in diameter.
Line your pot with something porous and draining, like an aggregate.
You may choose to purchase potting mix that is specifically designed for orchids to ensure they thrive in their new pot.
Place your newly potted orchid in diffused sunlight and water until damp, but not soaked.
Root Rot: What It Really Is
Improper watering is the main cause of orchid root rot. If you suspect your orchid may be afflicted, check the roots.
Dark or black roots are a sign of rot, and if the roots have turned soft and squishy, it may be too late to save the orchid.
Some reasons why an orchid’s roots are rotting include too much water, as well as too little.
Poor lighting and soil that is too dense can also lead to problems.
Pests and diseases are known to cause the roots of an orchid to rot.
Signs Of Root Rot In Orchids
Do you know the signs of root rot?
As mentioned, the roots will appear dark, soggy, or dead, but are there other preemptive signs of an issue with the orchid?
Keep an eye on your orchid for the following indicators of root rot.
- Wilted leaves that are not recovered with irrigation.
- Algae on the side of the plant pot or container.
- Moisture coming from the roots once pressure’s applied.
- Flowers are wilted or dark.
- Fallen buds.
- Dry leaves.
While these symptoms may not be associated with root rot, these signs should inspire you to check the roots of your orchid more carefully.
The healthy, living roots of an orchid are firm and not slimy.
The color should be light, not darkened, or black which are signs of rot.
Potential Problems After Repotting
Assuming you have repotted an orchid with rotting roots, what if it begins to demonstrate issues later on? It could probably be the soil used.
Make sure that you only use well-draining, fresh, and somewhat sandy soil for your orchids. Traditional potting mixes are not ideal for these plants as they are too dense.
Another reason why your repotted orchid may have root rot again could have to do with ventilation.
While orchids love a humid environment, they need adequate airflow to stay healthy and thrive. Air helps circulate the moisture, so it does not linger and cause bacterial growth.
Check your orchid’s pot- does it have ample drainage holes in the bottom?
This will help ensure that water can escape, and the roots of your orchid are not saturated.
Frequently Asked Questions About How To Save An Orchid With Rotten Roots
What is the best way to avoid root rot?
To prevent root rot, careful watering practices should be practiced. Water orchids from above and allow them to fully dry out before the next watering schedule. Never allow an orchid to sit in water- it can kill the plant.
What growing conditions should you subject your orchids to prevent root rot?
Orchids like temperatures that range from 60 to 85 degrees Fahrenheit, in a well-ventilated spot. These plants like sunlight and fertilizer, too. Water the soil to make it damp, but not too soaked which leads to rotting roots.
Can an orchid get too little water?
The answer is ‘yes’ and underwatering an orchid can also cause problems with rotting roots. It needs to dry out between watering, but do not allow it to be dry for days at a time or the plant will die.
Conclusion
Orchids are beautiful plants that require some care and attention.
These flowers can be susceptible to root rot, so use these tips to avoid disappointment and prevent problems with your plants.


Daniel has been a plant enthusiast for over 20 years. He owns hundreds of houseplants and prepares for the chili growing seasons yearly with great anticipation. His favorite plants are plant species in the Araceae family, such as Monstera, Philodendron, and Anthurium. He also loves gardening and is growing hot peppers, tomatoes, and many more vegetables.