
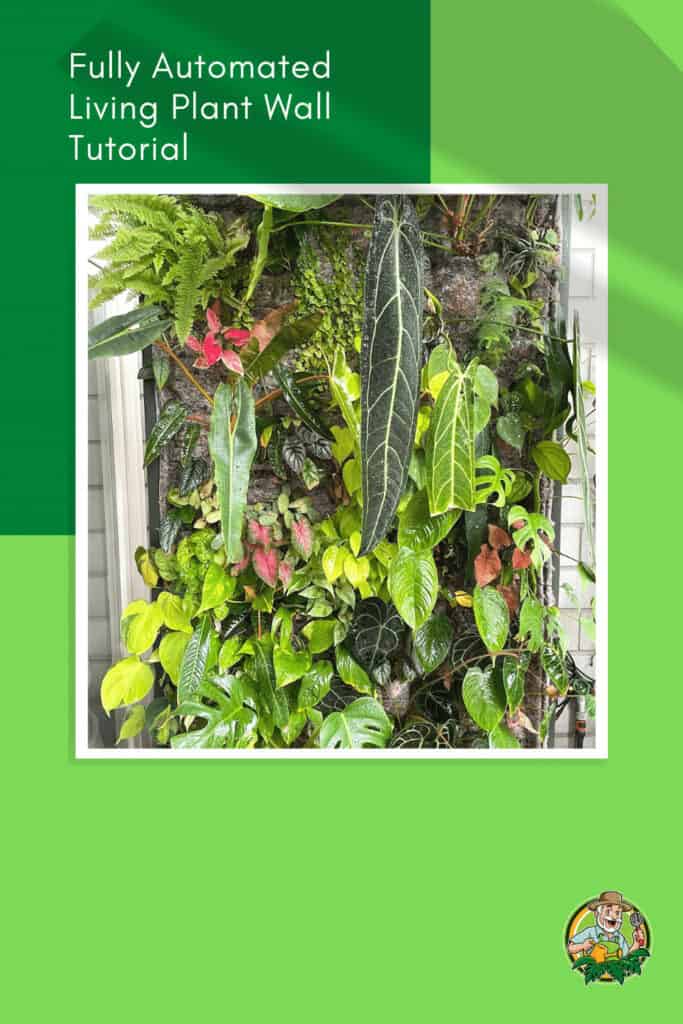
I will show you how to make a living wall in this article. I have built mine about two years ago.
I always wanted a plant wall for my plants where they could grow with little involvement and work from my side.
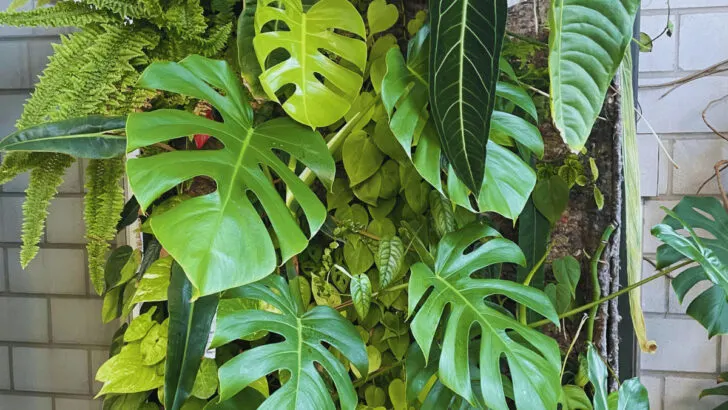
I am growing mostly Aroids, which grow on other plants. Many of these are climbers, meaning they need support like a moss pole, trellis, or a wall to grow bigger leaves and mature. I finally decided to create a living plant wall. Here is the complete DIY tutorial.
We get commissions for purchases made through links in this post.
Table of Contents
How To Make A Living Wall
To make a living wall with live plants, you will need a substrate or container for the plants to grow roots in. A great way of building a living wall is by using felt. In addition, plants will need regular watering and fertilization. You can either water them manually, or you can water them automatically using a water pump and a tubing system. Materials such as metal, plastic, or wood can be used to construct the wall.

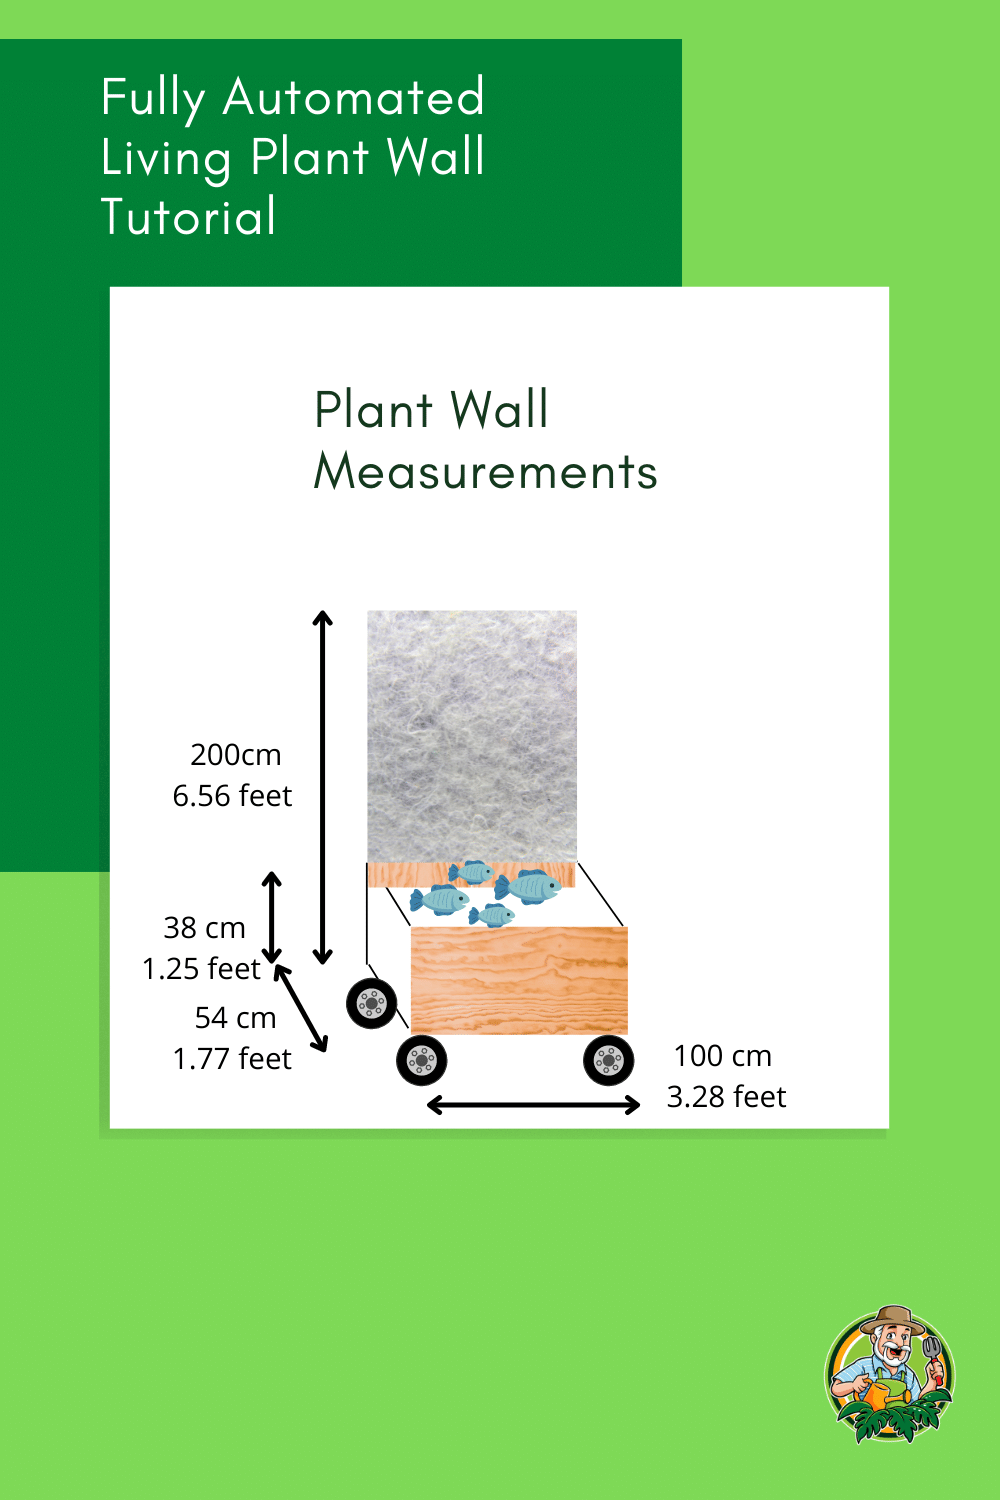
Step 1: The measurements for the plant wall
Let’ start off with the measurements for the plant wall.
Of course, you can build it at any height or width you want, but this will give you a good indication of the measurements of my living plant wall.
Whereas width is not a big issue, the higher you go the more reinforcement you will need to build a stable construction.
Measurements:
Overall measurements Plant Wall: length x width x depth = 6.56 feet (200cm) x 3.28 feet (100cm) x 1.77 feet
Backwall: length x width x height = 6.56 feet (200cm) x 3.28 feet (100cm) x 0.79 inches (2cm)
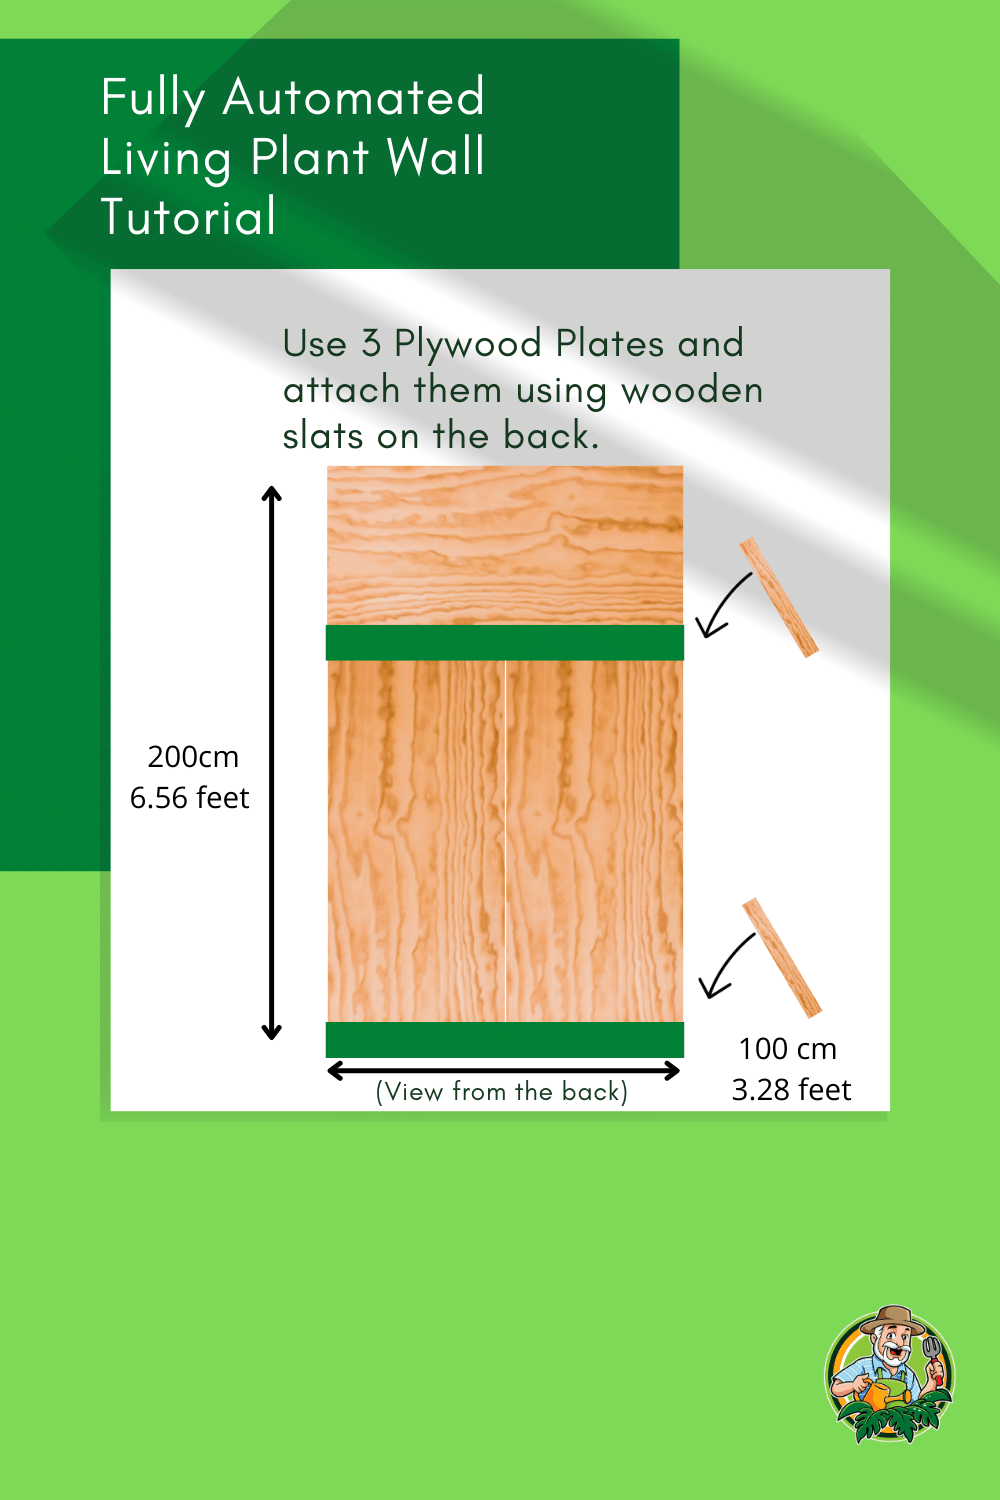
Step 2: The Plywood base structure back wall
Once you go the desired materials and measurements, you can get started.
I started off with 3 main plywood plates that I combined in a way to end up with a width of 3.28 feet (100cm) and a height of 6.56 feet (200cm).


At these dimensions, the plant wall will be sturdy and there is no chance for it to tip over as it is on wheels.
You could go wider for sure but with the current construction, I wouldn’t go much higher as I built it on wheels and I fear it might tip over at a certain height.
The way I combined the plywood plates is by using 2 wooden slats on the back of the plates.
These add reinforcement and also ensure that the plates hold on together.
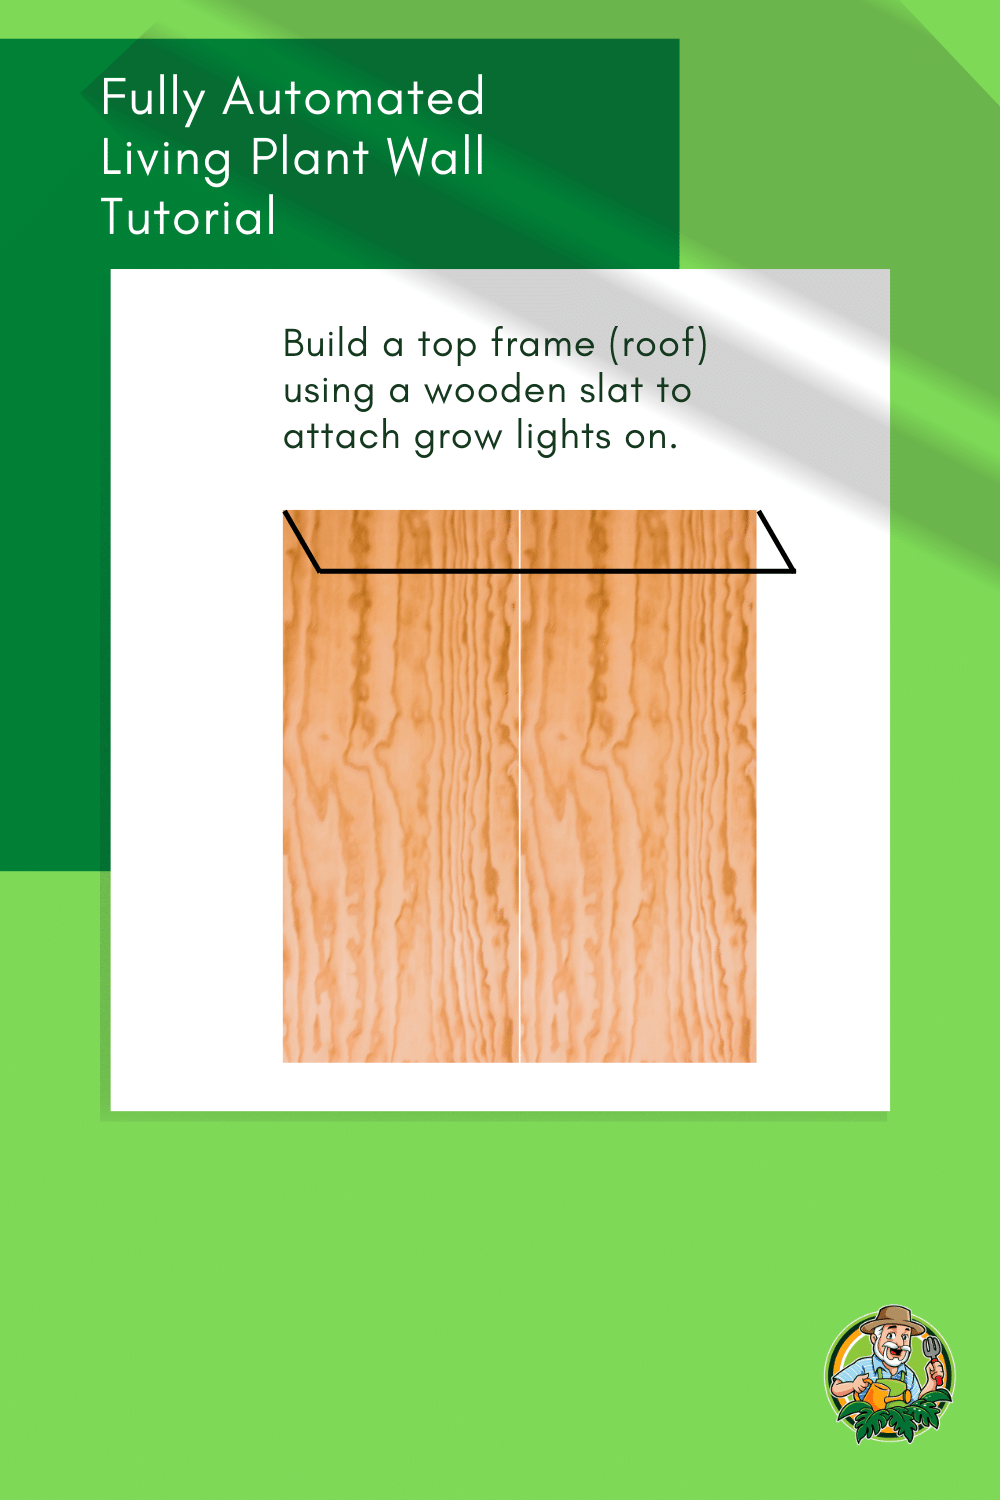
Step 3: Build a top frame for grow lights and to avoid water spillage
There is a chance that your plant wall will not get a lot of sunlight. This is when grow light comes in handy.
For this purpose, I built a top frame using plywood where you can attach grow lights.
At the same time, a frame around the plant wall will ensure there isn’t too much water spillage.
The leaves on the plant wall will have water running down on them, and I can tell you the water will go in all directions.
That is why we will build a frame around the wall. The top frame can also be used for light fixtures and should be several inches wider than the rest.
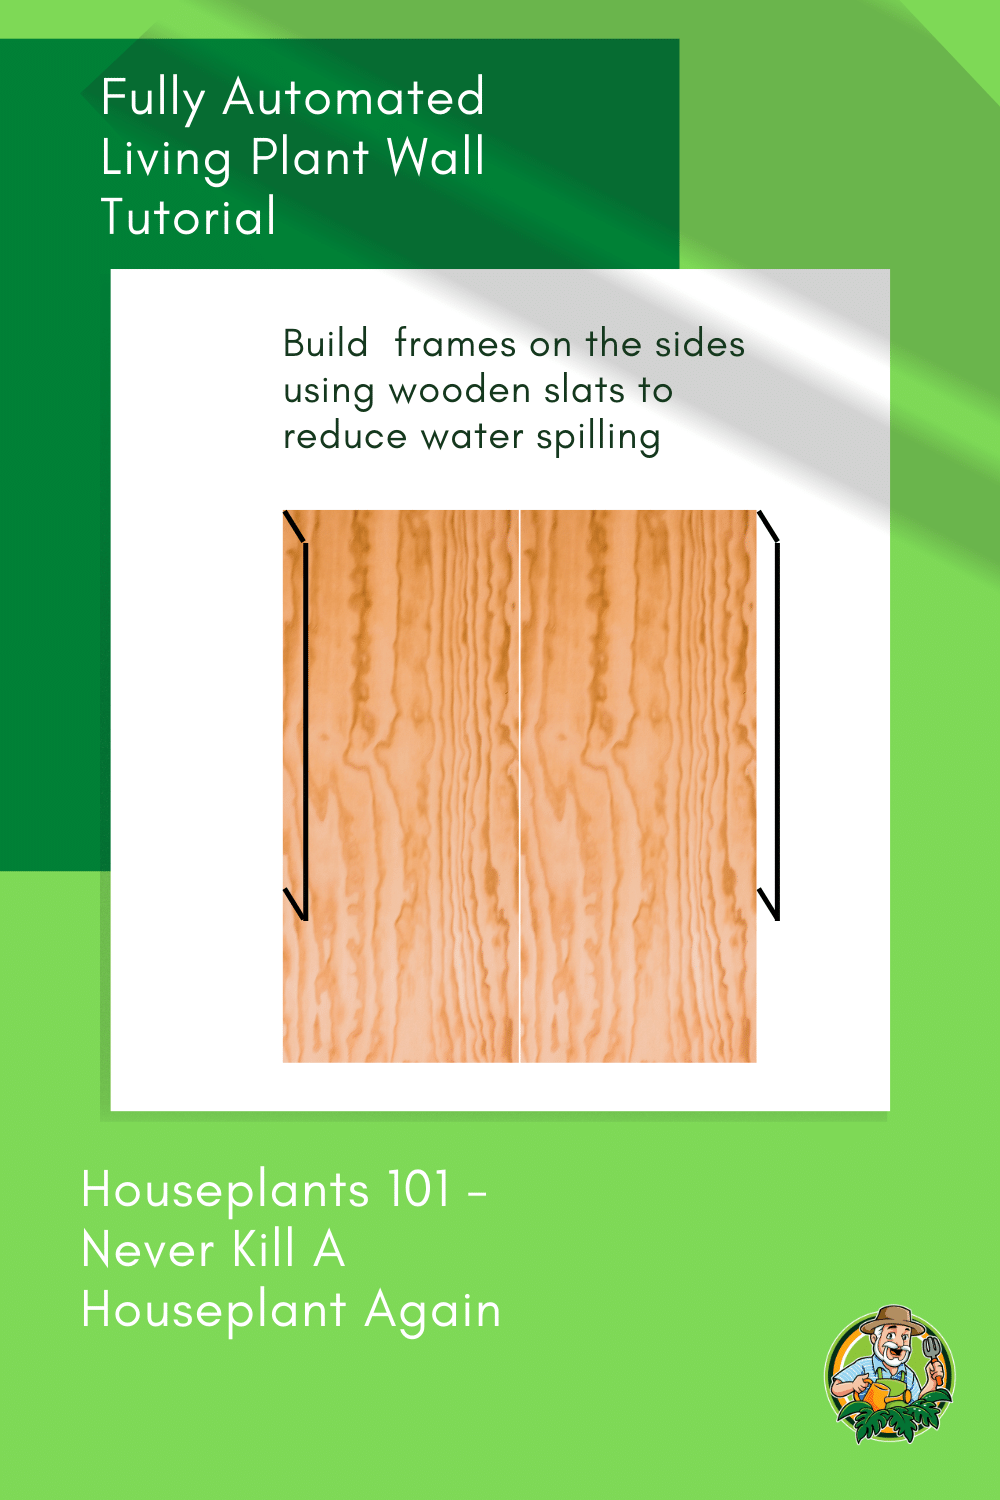
Step 4: Build a frame on the sides
After building a frame on the top, you will also want to build frames on the sides of the plant wall.
This is to avoid water flowing out on the sides of the wall. For the side frames, I used wooden slats again.
You will then also cover these frames in a pond liner to get great protection against water spillage.
The side frames don’t need the same width as the top frame; you just want a couple of inches on the side.
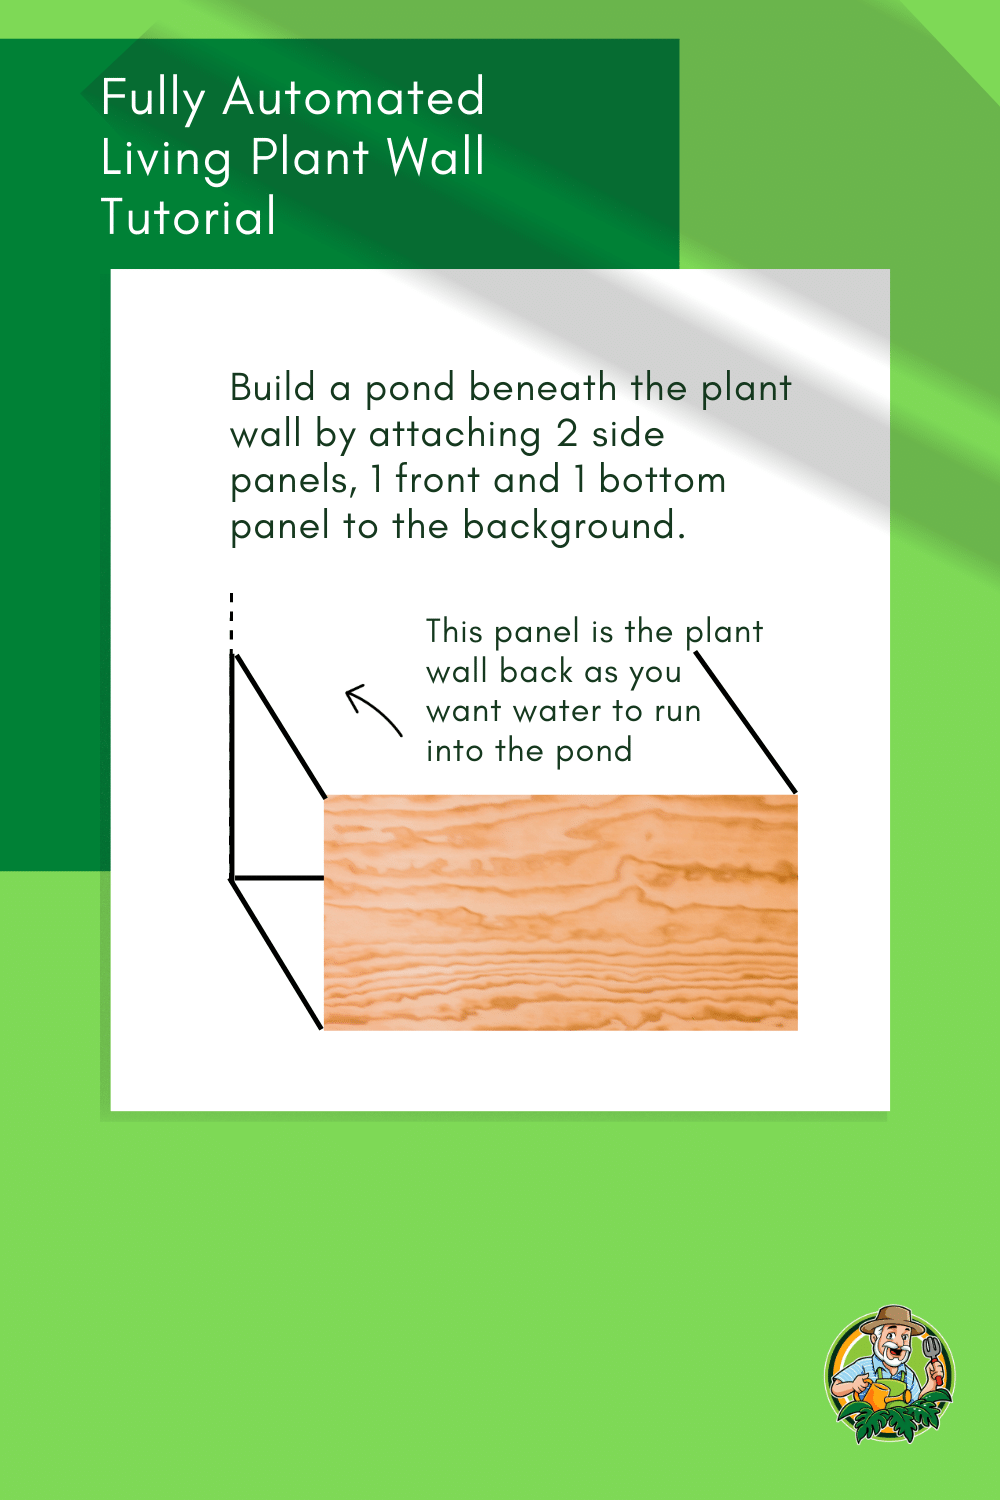
Step 5: Build a pond underneath
You don’t have to build a pond underneath your plant wall if you don’t want to. You could opt for an option that somehow collects the water at the bottom and then channels it into some container that holds a water pump.
For my plant wall, I deliberately added a pond, as it has many benefits. The first is that it holds as lot of water. I wanted a plant wall that was as hands-off as possible. This mostly means a plant wall where I do not always have to add water.
The pond itself holds a lot of water, which is great.
One big issue that you could run into is that your water pump starts to drain air when the water level is too low.
Especially in summer, the water will evaporate quickly, and your plants will be very thirsty. I sometimes need to top up the water twice a week in summer, even though there is a sizeable tank (pond) at the bottom, to ensure the water level is still higher than the water pump.
In addition, it allows you to house fish and aquatic plants (even more plants ;-). The main benefit is that aquarium or pond water is great for plants.
Not only will it have a great adjusted pH level, but will neither be too hard nor too soft. Along with the fish, you also get fertilizer for free, and you don’t need to buy it or remember to add it.
Your plants will be fertilized multiple times automatically.
The fish profit from clear water as the plants break down the nitrates.
So it is a symbiosis or a small ecosystem, if you will.
In addition, the pond will add stability to the overall construction and will make sure it doesn’t tip over.
To build the pond, you need to attach two side planes and one front panel and one bottom panel.
You can get my measurements in step 1.
Please don’t add a back panel as you want the water to run down the plant wall straight into the pond.
Step 6: Paint the wall
When working with water, you want to make everything as secure as possible. Water spillage and damage can become costly really quickly. This is why we use waterproof paint with a pond liner to ensure everything is 100% waterproof.
I painted the whole wall twice, inside and out, to ensure I had a strong layer of waterproof paint. I chose the color black as I think it looks quite nice and doesn’t take away from the beauty of the plants, and black works great with green. At least, that is what I think.

Step 7: Attach the pond liner. Go over the side frame
In this step, we will attach the pond liner to the plywood. For this purpose, we are going to use glue as well as a stapler.
For the pond liner, you must keep it in one piece. It can be a trick to fill in the pond at the bottom, as there might be several wrinkles in the beginning that you have to try to get rid of.
The pond liner itself is attached to the plywood using glue that is sticking both on the plywood as well as on PVC.
After gluing the pond liner to the wood, use a stapler to staple it to the back of the wall, the frames on the sides, and the top frame if you like.
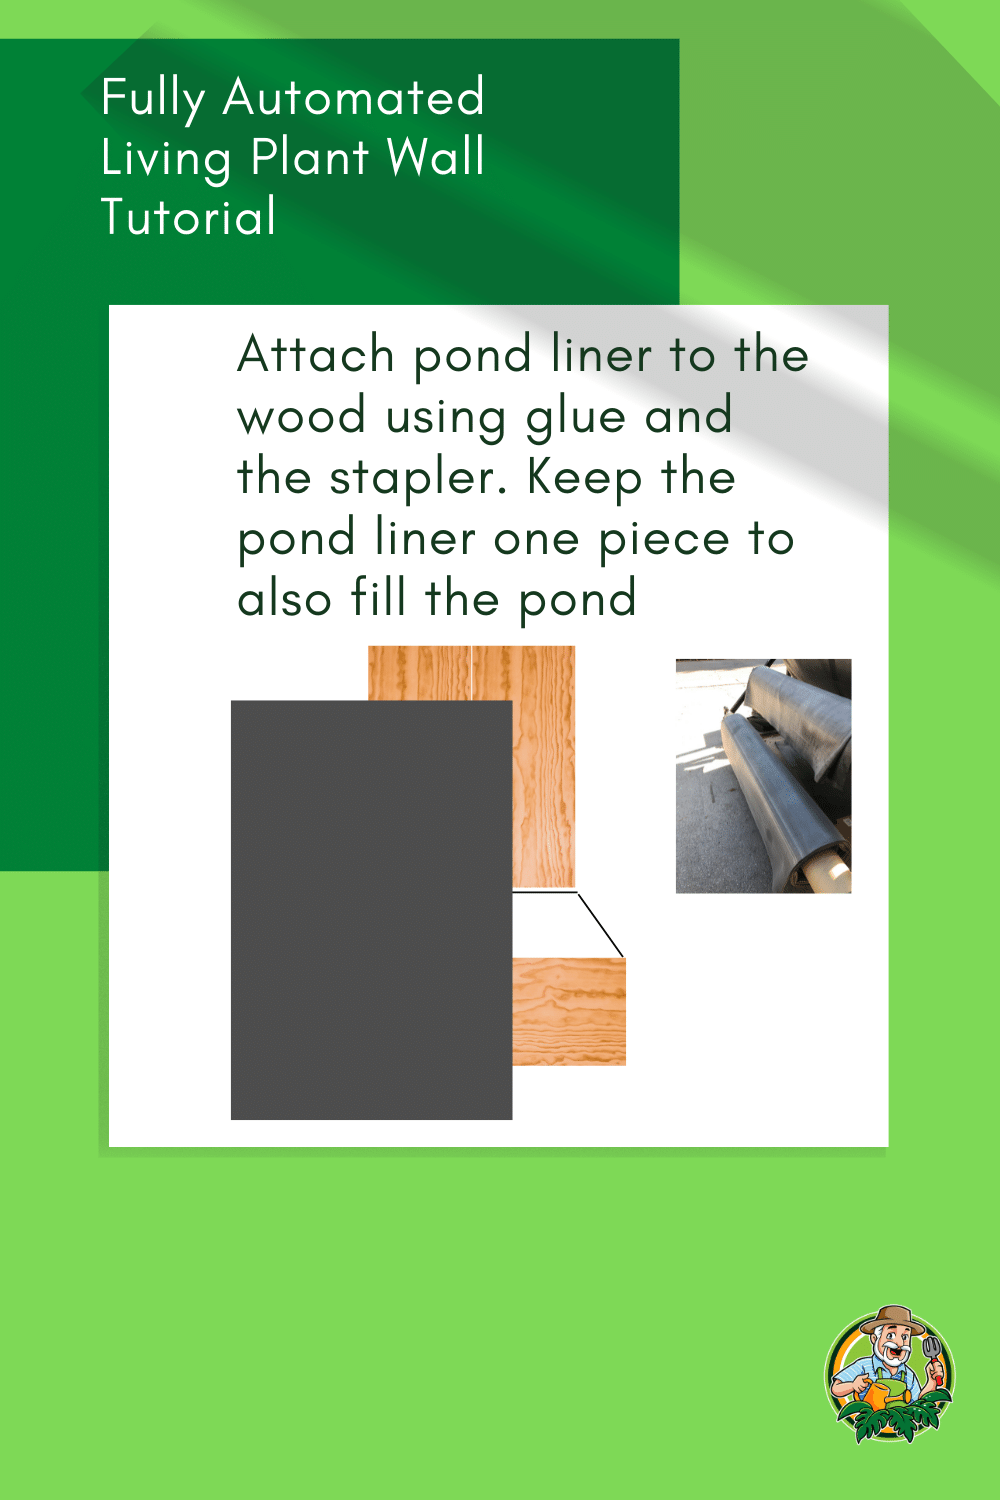
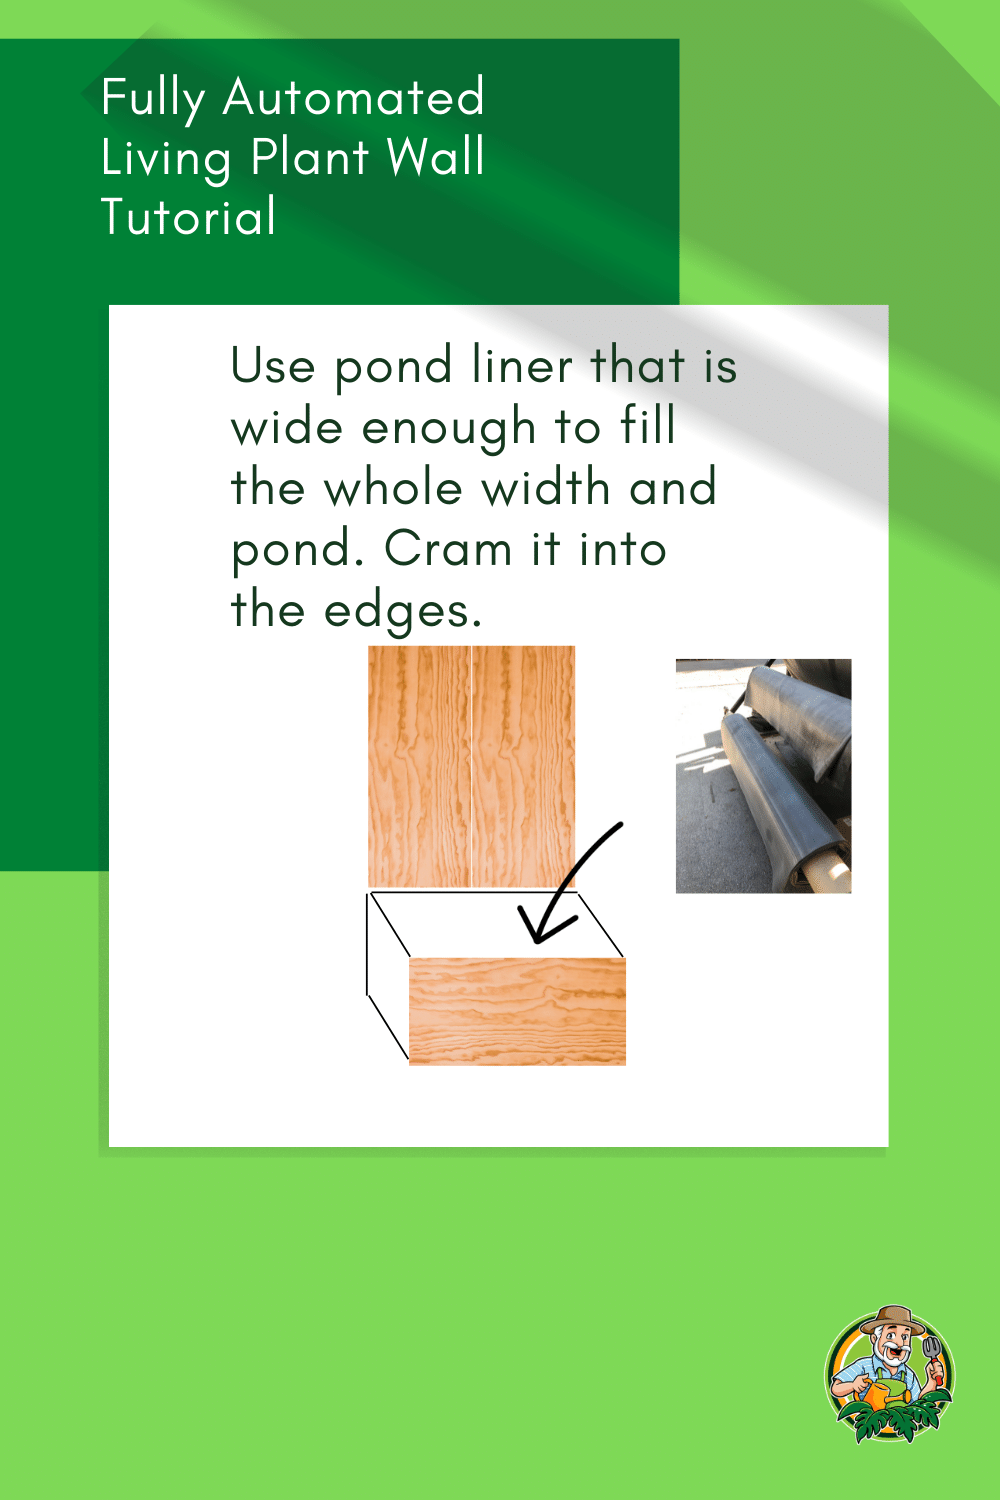
Step 8: Also Fill the pond with the pond liner (1 piece)
Remember to keep the pond liner in one piece, fill in the pond, and go over the sides of the frame.
Be careful not to staple below the waterline in the pond, as this might cause water leakage. I only stapled to several inches above the water line, just to be sure.
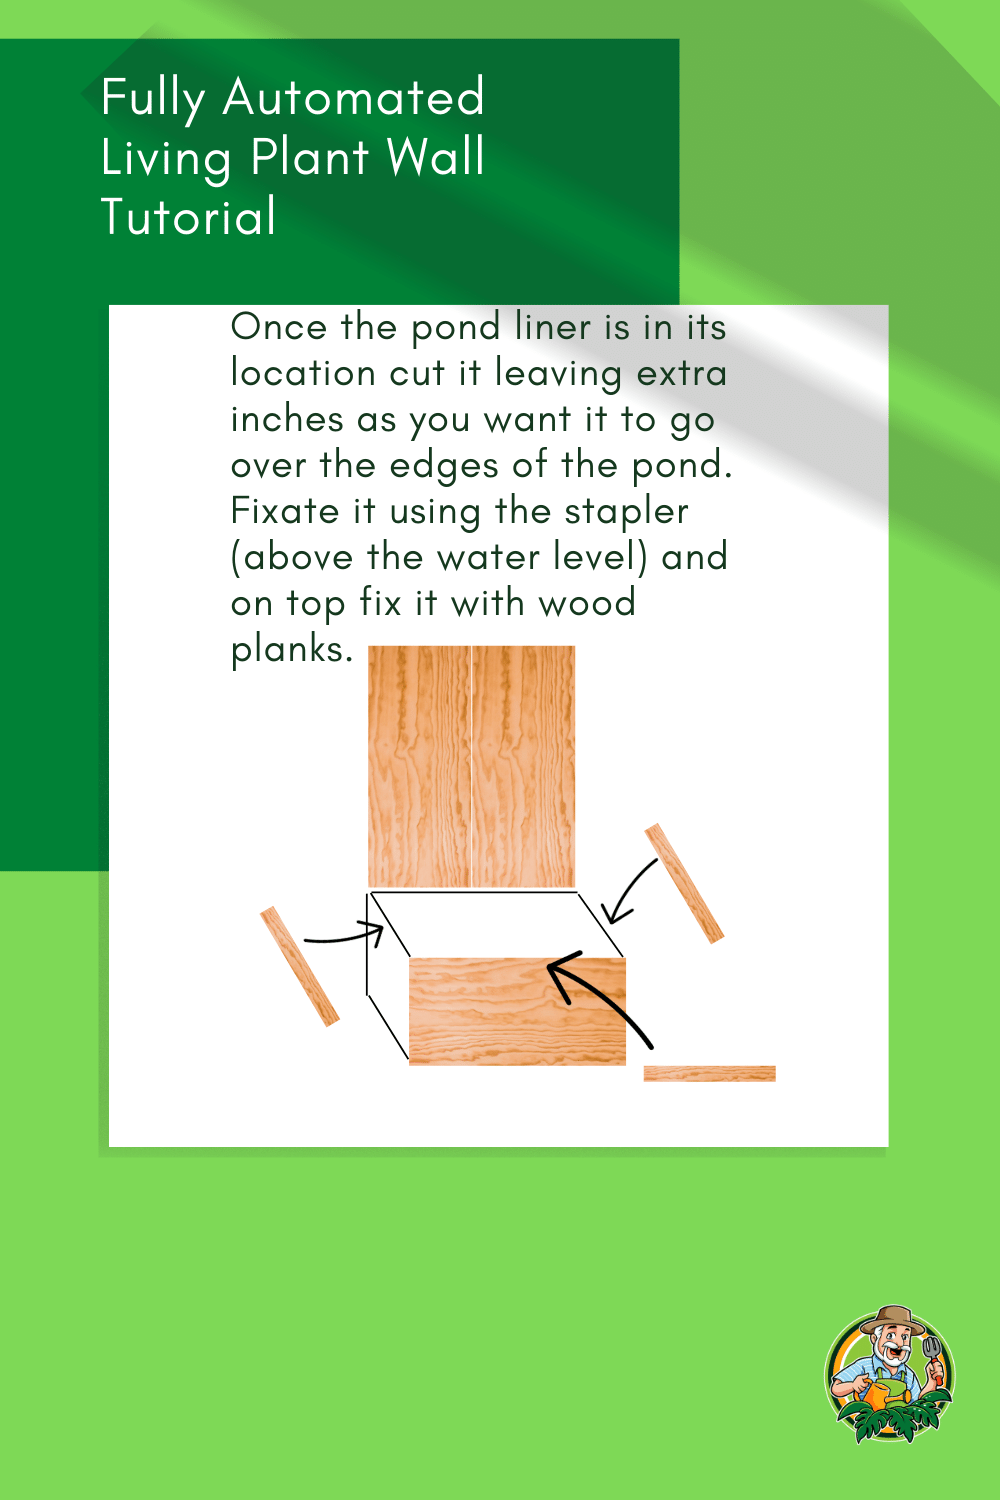
Step 9: Use glue, a stapler, and planks to fix the pond liner
After mentioning the glue and the stapler, it is also important to mention planks to fix the pond liner in its place. You can use some planks at the top of the pond once the pond liner has been placed and glued to the inner pond walls.
You can then add planks that you screw into the sidewalls. All the pond liner that comes over the edges can then be cut off.
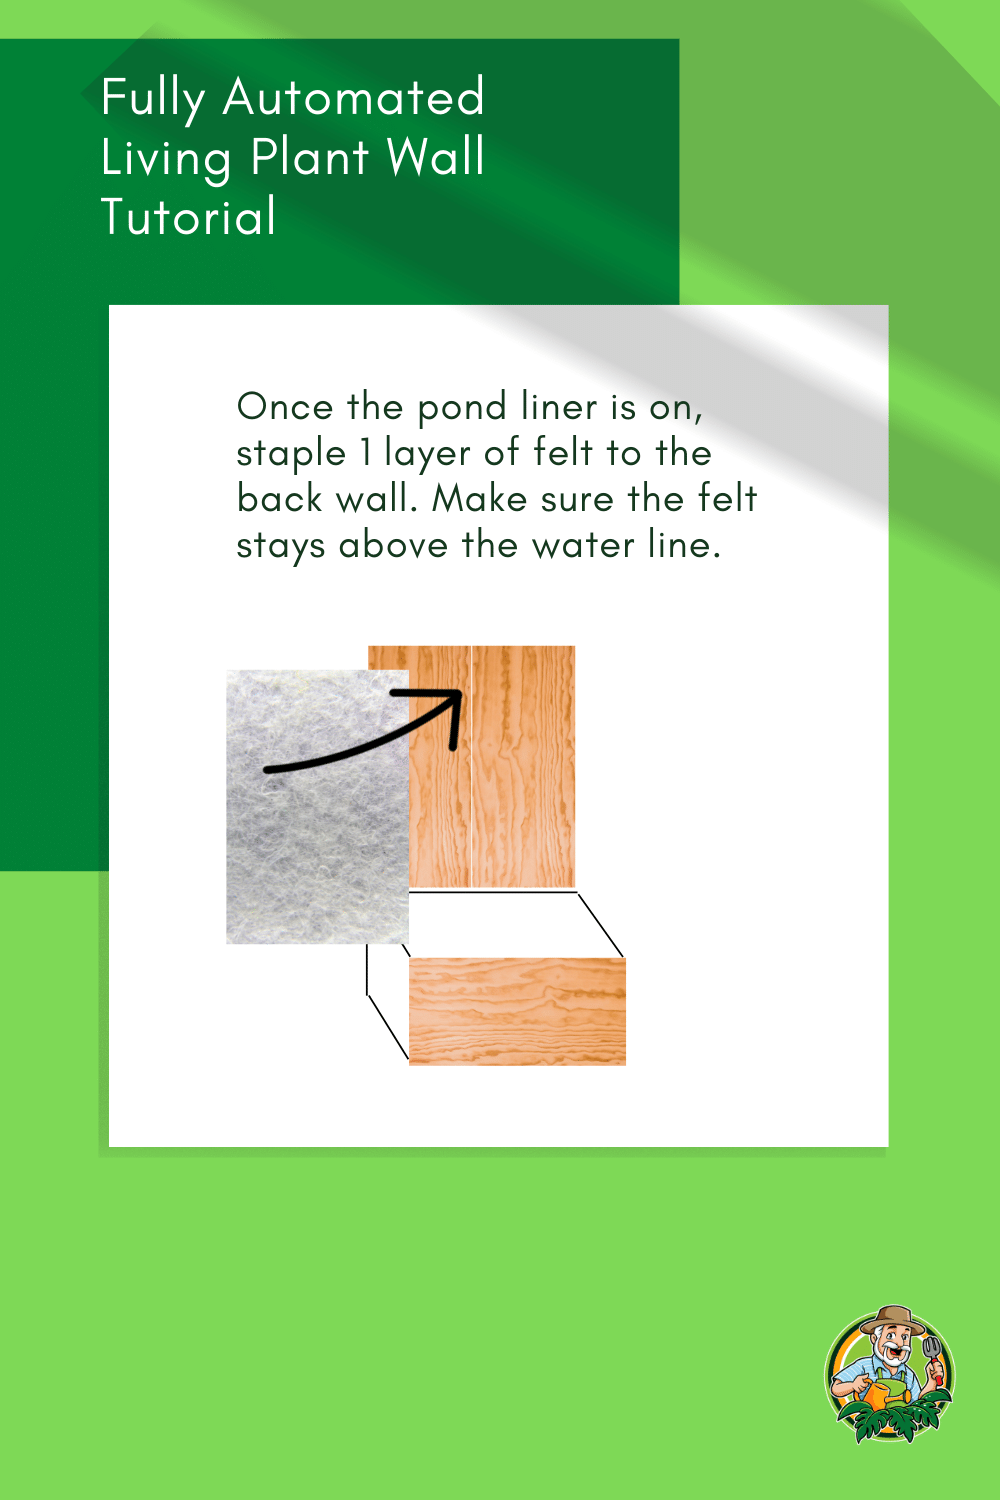
Step 10: Put on the first felt layer using the stapler. The plastic underside faces the wood board
Put on the first inner layer of felt using the stapler. The plastic underside needs to face the wood board with the pond liner on top of it. You want your plants to be able to root into the felt. The felt will also stay slightly humid between the waterings and act as the perfect water filter for the pond water.
Oh, make sure that the felt is above the water line, as otherwise, it will be drenched in water and might become too wet for your plants. It might also drain the pond.
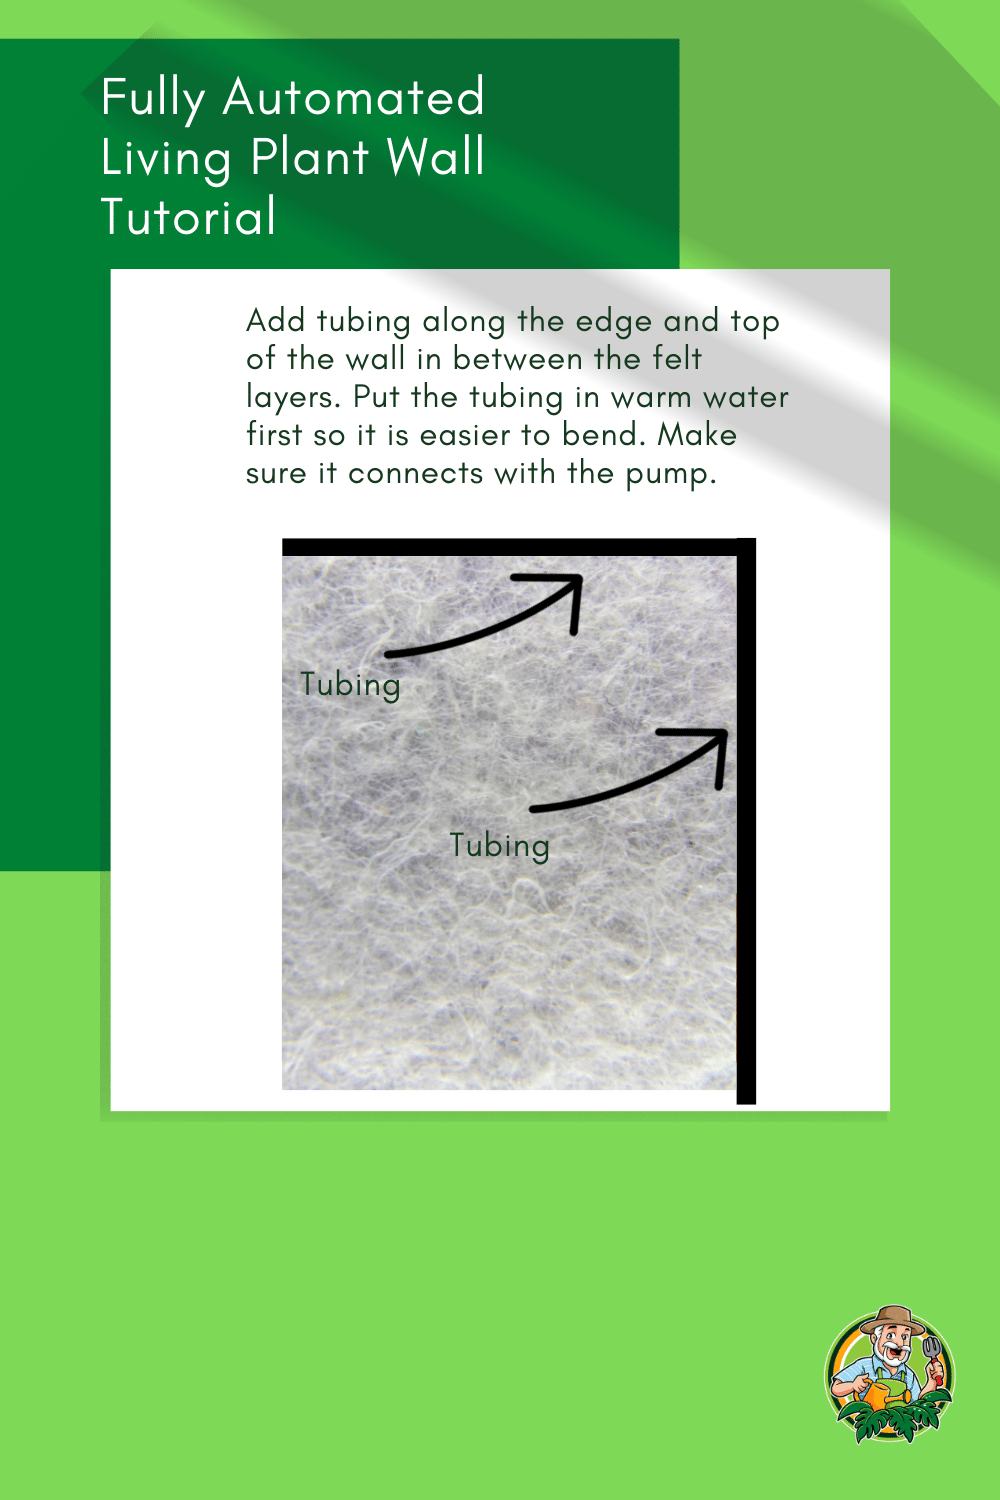
Step 11: Add the tubing
This part is exciting. You will now install hardware that will allow your plants and plant wall to be irrigated automatically.
The tubing itself can be a bit sturdy.
So, the best thing to do is to put the tubing into a container with hot water for about 30 minutes. It will become less sturdy and more bendable.
This way, you can bend it as needed. You can either use one piece of tubing from the water pump to the upper left or right edge of the plant wall or two pieces—one horizontally and one vertically.
If you go for two pieces, you will need an L piece in the corner, as the tubing needs to go along the edges of the plant wall.
I just used one piece of tubing as I could bend the tubing enough to manage the 90-degree angle.
I attached the tubing by cutting off some felt from the extra I had, then stapled it to both sides of the tubing.
This way, the tube will go nowhere.
The tube itself needs to be in between the two layers of felt, as this is where your water will meet the roots of the plants and will flow down the wall.
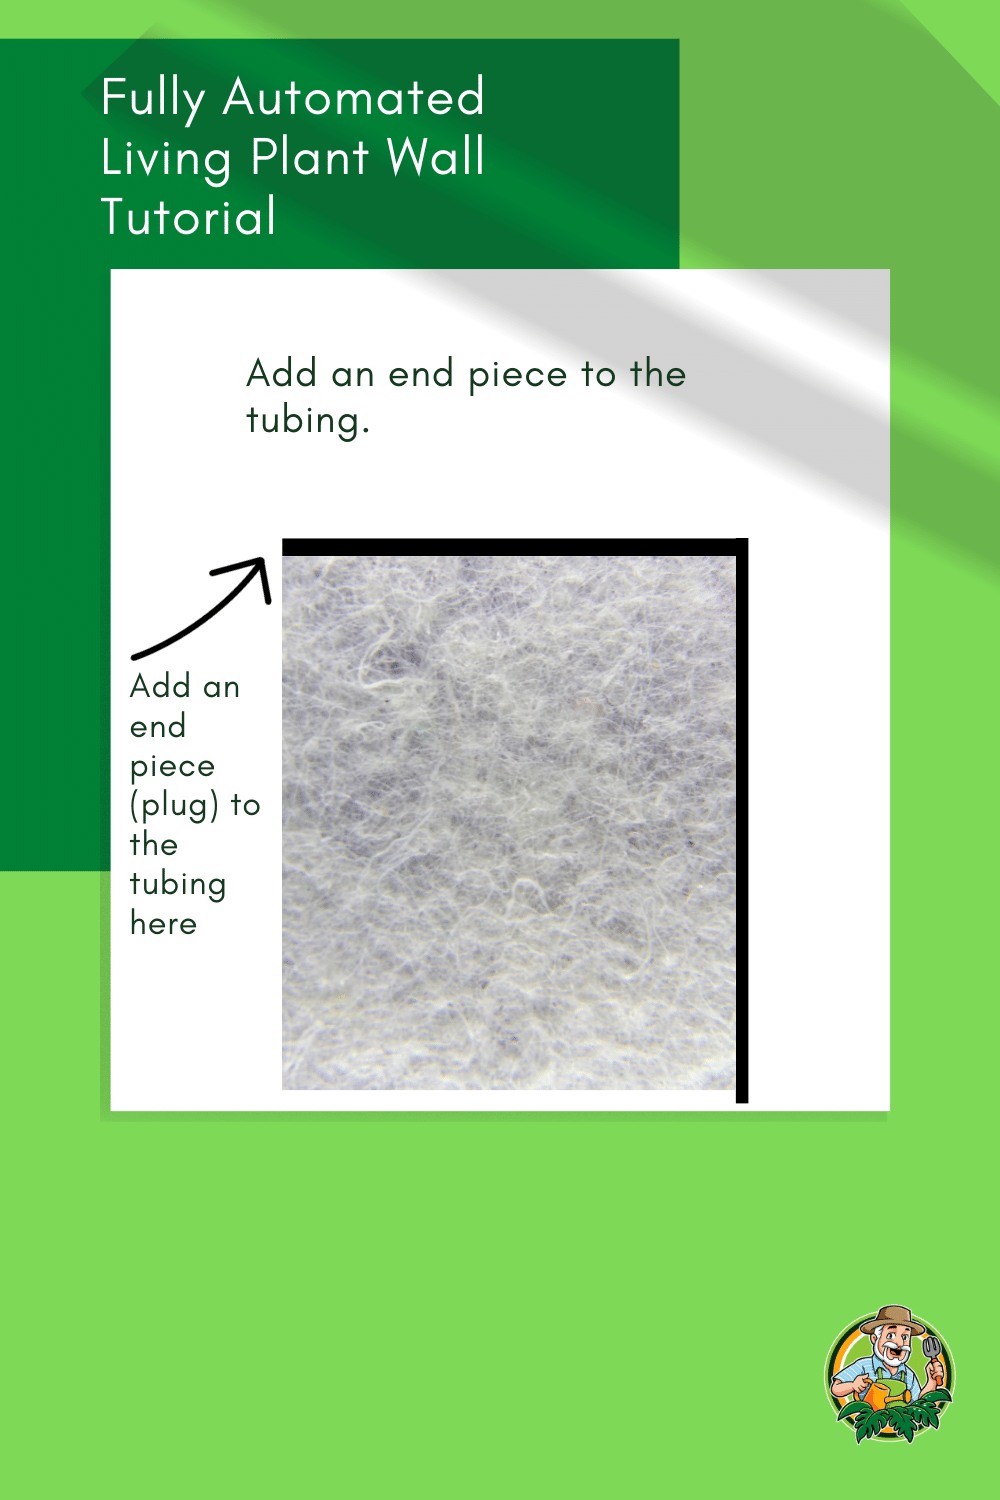
Step 12: Add an end piece to the tubing
Don’t skip this step. As you have seen on the shopping list, I added an end piece. This piece will ensure that the water will not run out at the end of the tubing but where you want it.
When using this plug, you will also have enough pressure so the water will drip out of the holes you will make along the horizontal tubing at the top of the plant wall.
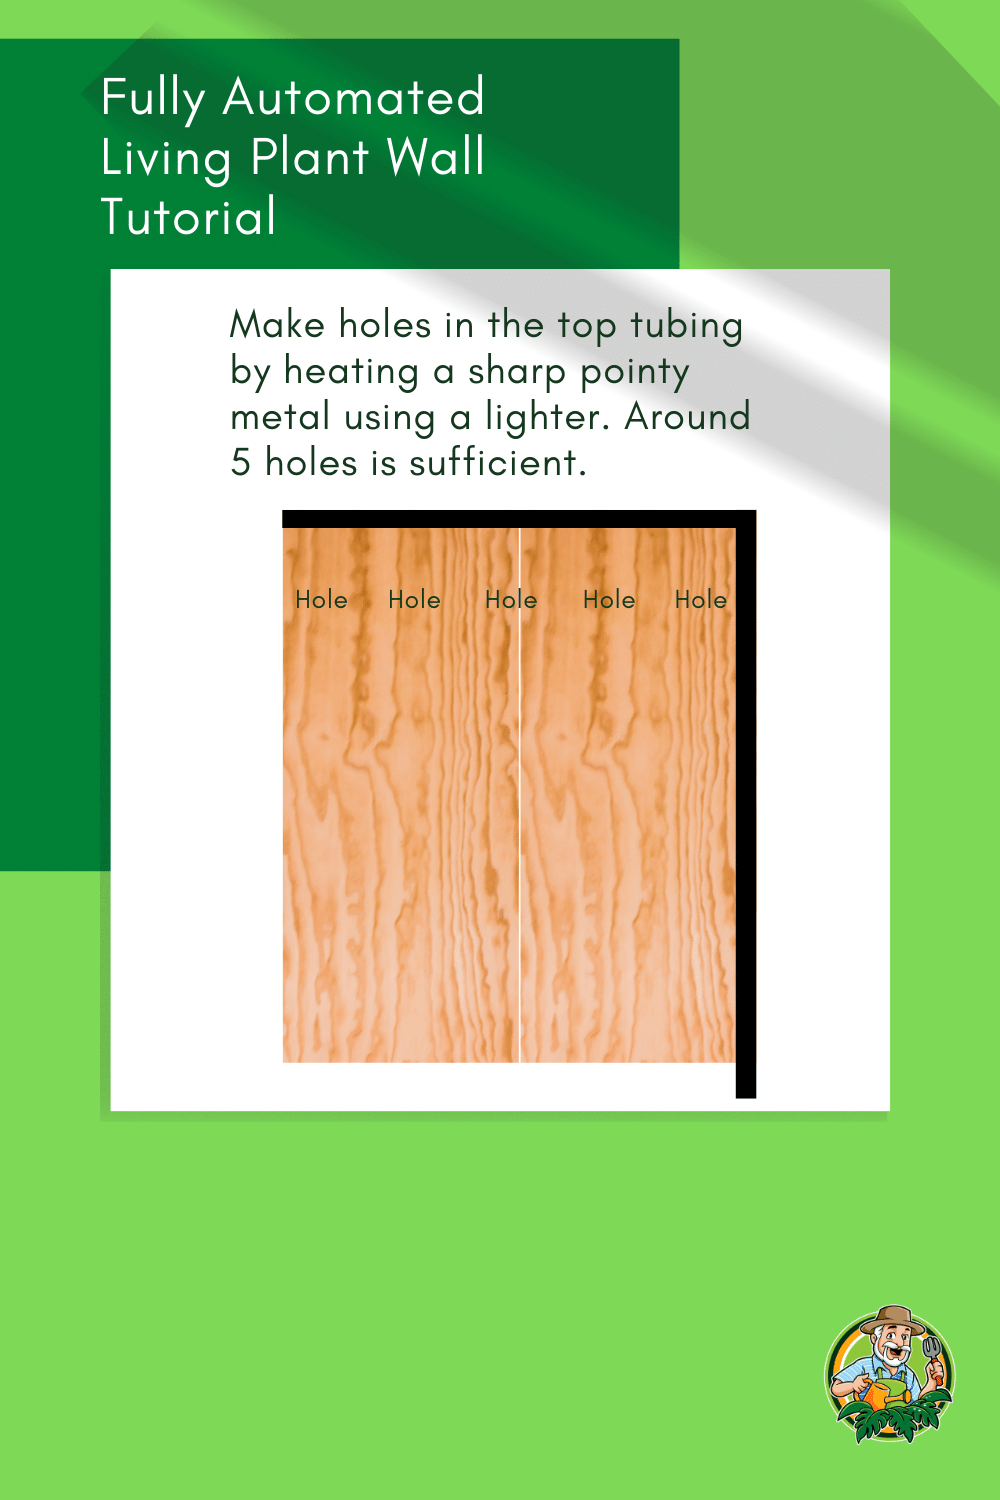
Step 13: Make holes in the tubing
As mentioned in Step 12, you will need small holes across the tubing to water your whole plant wall. You could also buy valves for each section of the tubing, but based on my experience, it is not necessary.
Just space your holes several inches apart to ensure that each wall section will be watered.
But how do I get holes into the tubing?
This is quite simple, actually. Heat a piece of sharp metal using a lighter or whatever you have. Once it is hot and starts to smoke, you can poke it into the tubing, and it will create a hole instantly.
Make sure the holes are neither too small nor too big.
One thing I want to mention here: Every couple of months or at least every six months, depending on the water you have available, you might have to redo this step as the holes become clogged from chalk in the water and potentially some debris.
Therefore it is best to check your wall and ensure it gets wet evenly.
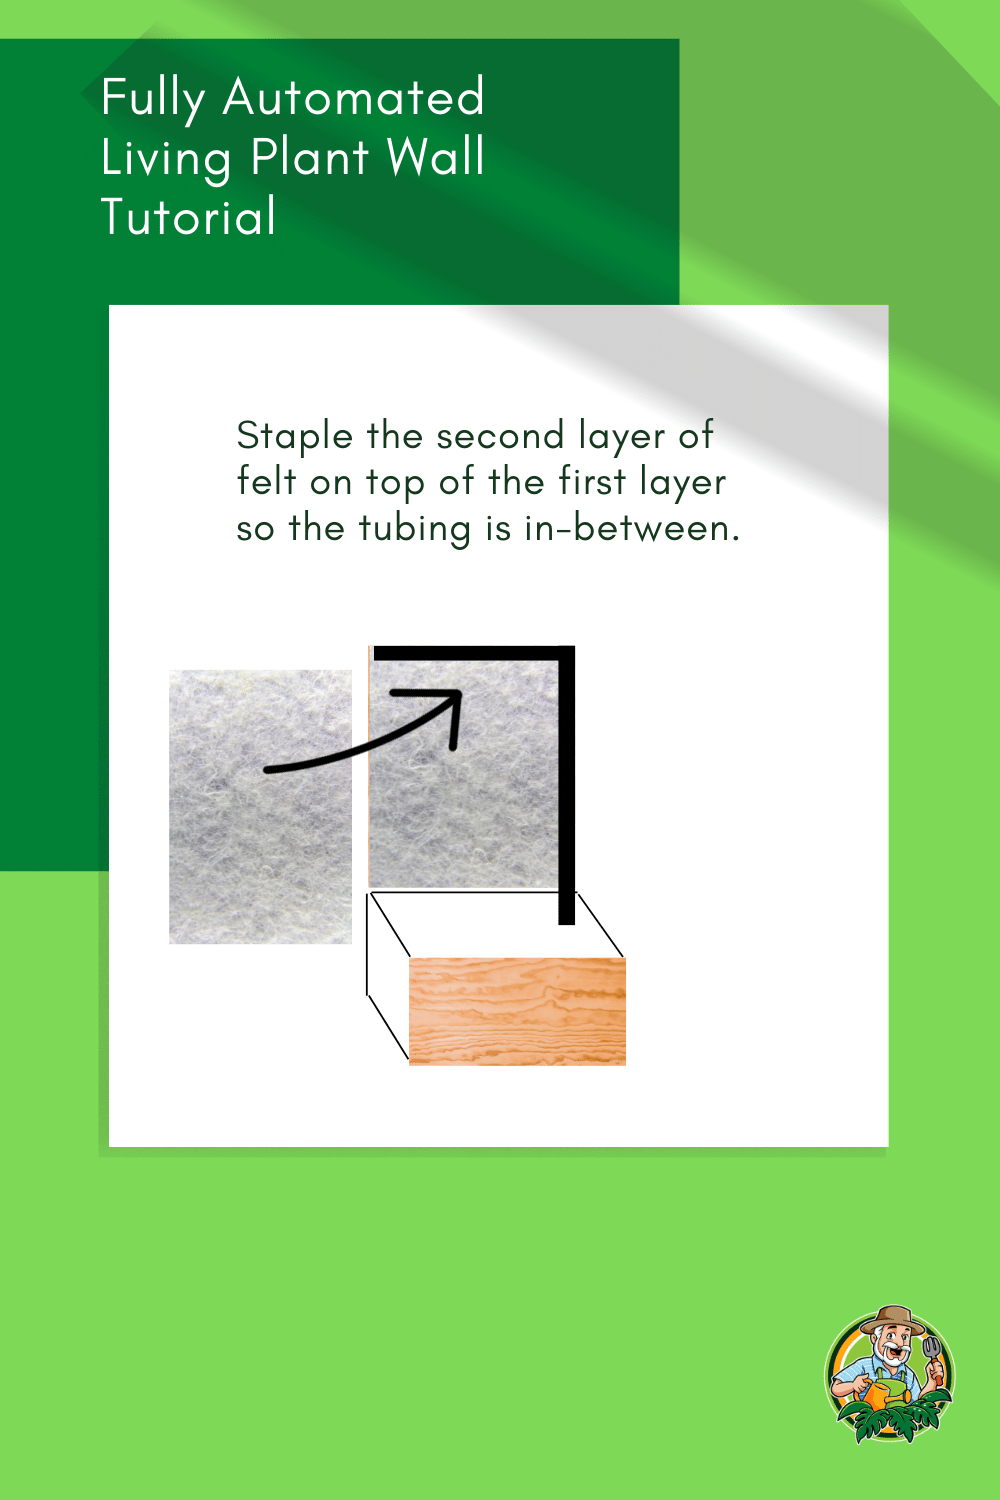
Step 14: Add the second layer of felt
Once the tubing is in, adding the second layer of felt is time. This layer can be attached to the wall using staples only. Make sure not to staple too much and too tightly as you want to add plants everywhere, and if the second layer of felt is stapled too tightly, there won’t be enough space for your plant and roots between the two layers of felt.
Also, don’t use glue; you want to attach the felt loosely to the rest of the wall.
Important: Make sure you don’t staple the edges of the felt to the plant wall. You want always to have access to the tubing so you can fix things. If you provide enough felt to go along the edges, it will neatly cover the tubing anyway.
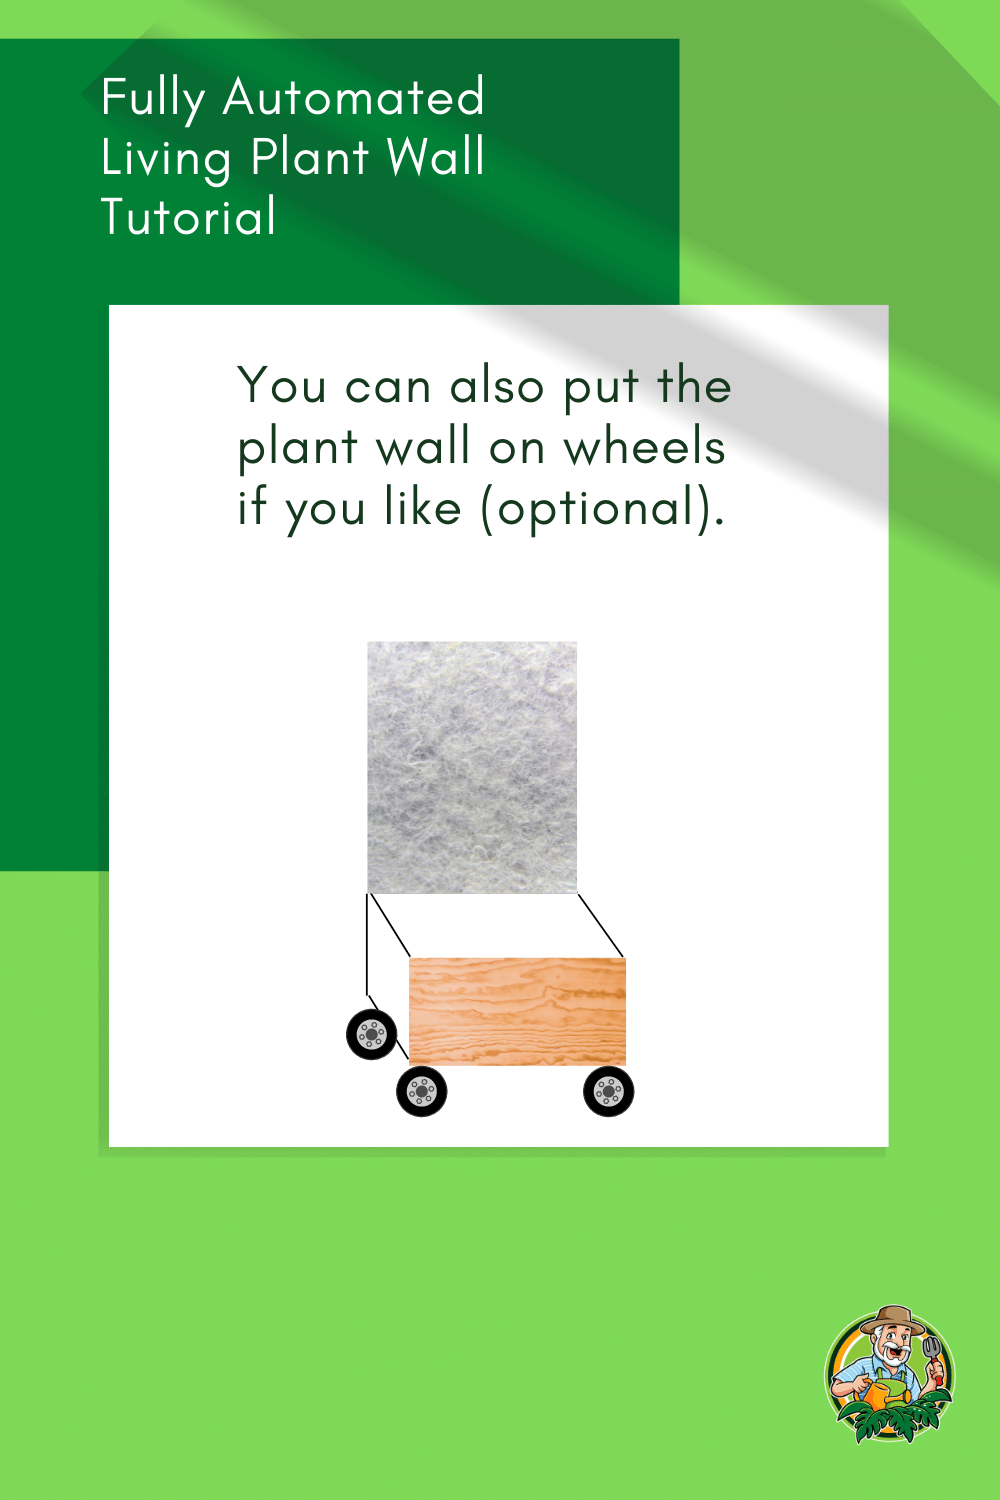
Step 15: (Optional) Add four wheels, so you have a mobile wall
One of the coolest features of this plant wall is that it is on wheels. You can move it wherever you want and also easily check for any leakage and water buildup below the wall (I hope there isn’t).
In addition, you can move the wall where the light source is best and probably have a different location for it in winter and summer or use it as a room separator.
In terms of wheels (I am using 4), it is important that you calculate the weight they need to carry according to the proportions and weight you are building your wall, including the plants and the water in the pond.
I also built additional reinforcements using wooden planks at the bottom of the pond to house the wheels.
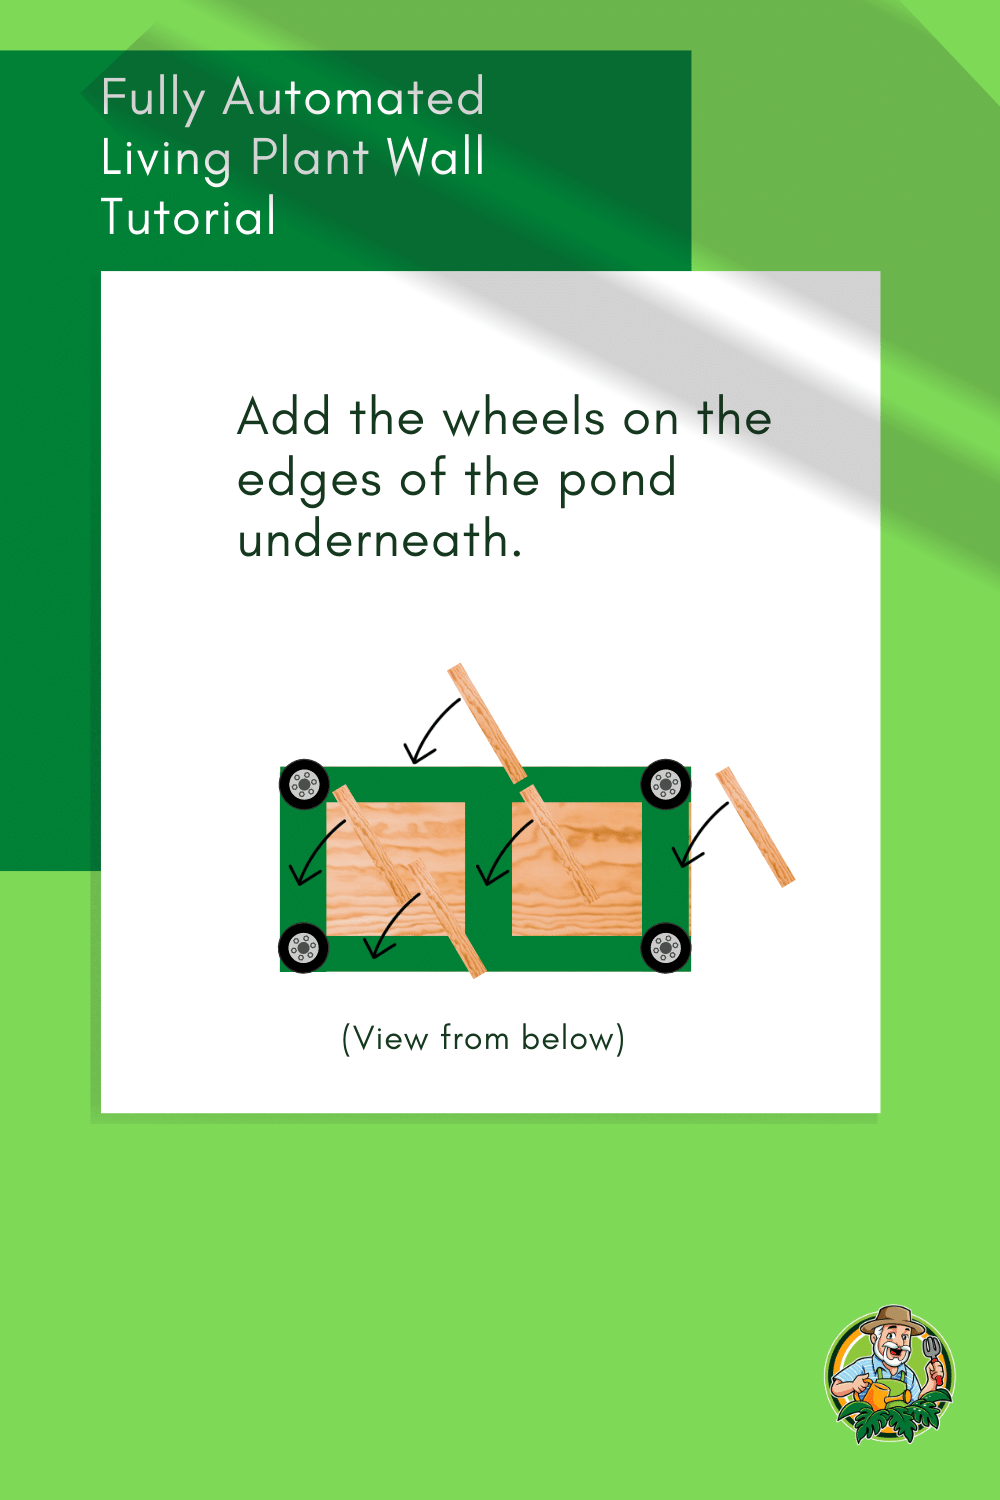
Step 16: Build a frame underneath the pond for the wheels
I am using four wheels and five planks for the base structure of the pond. Four wooden planks go along the edges of the pond, and one plank right through the middle of the bottom plywood piece.

Step 17: Add the wheels to the construction using screws for wood
The wheels are attached using wood screws that are not too long, so they do not go into the pond liner. The wheels I bought allow the wall to be turned 360 degrees and come with three holes so I could attach them with screws made of wood.
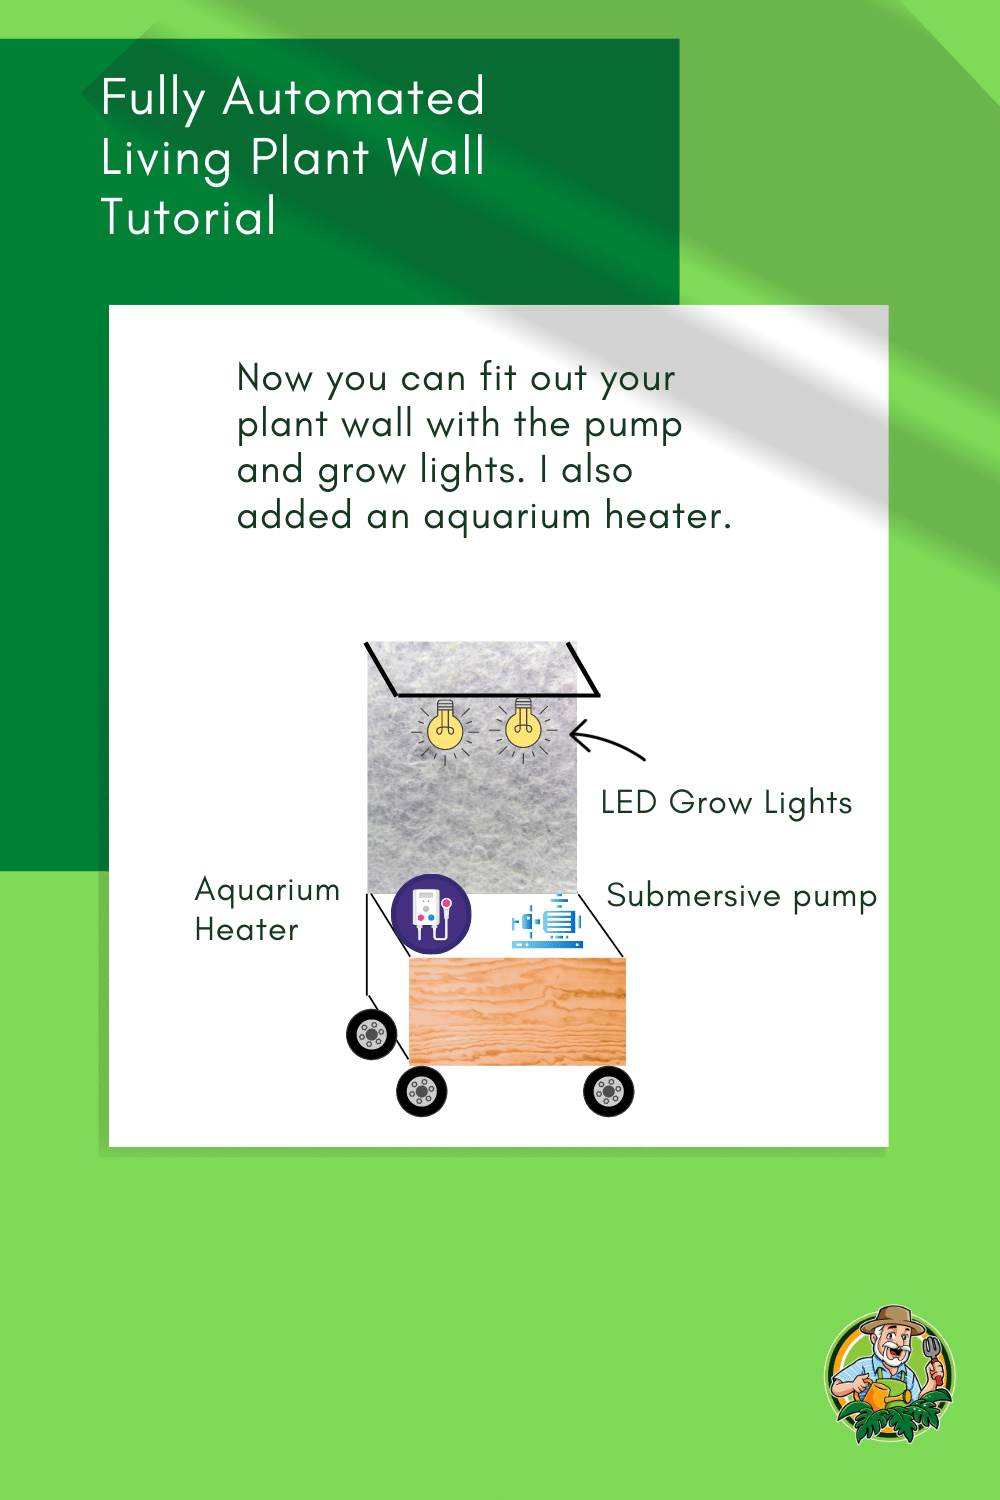
Step 18: Add the tech
Now, it is time to add the tech. I am using 2 LED grow lights and a water pump. I added an aquarium heater mainly for the fish and the plants in winter.
If you build a top frame for the LEDs, it will be pretty simple to attach them using a couple of screws. I bought a cheap model from China, but any LED grow light can be used.
The cables go through the top frame and then down the back of the wall. I mounted a powerstrip in the middle of the back wall, so I have just one long cable from the plant wall to the power plug.
Also, I can plug in all the appliances there.
They are moving on to the water pump. The water pump needs to be strong enough to pump the water up to the height of your plant wall. Most water pumps will have a remark on how high they can pump the water, so make sure your pump is powerful enough.
I added my water pump to one corner of the pond and the pond heater to the other side of the pond. One thing to consider is that generating a bit of water flow is great.
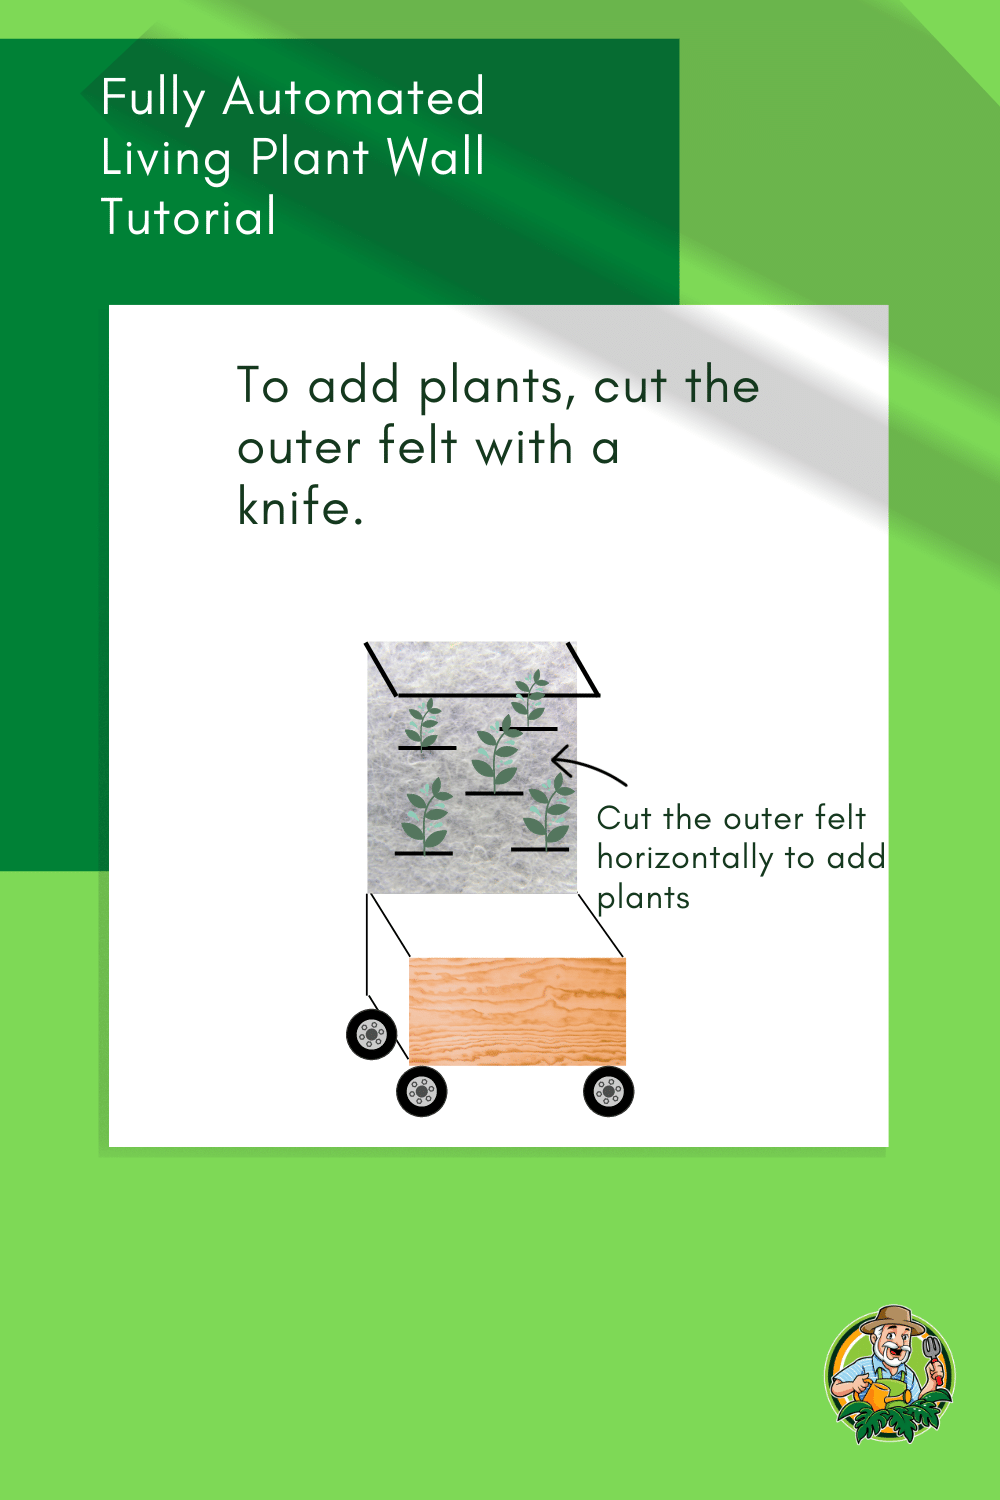
Step 19: Add the plants
This is a step you will do again and again. I guarantee you. It is just so much fun to add new plants to the plant wall and see them thrive.
The way you add plants is straightforward. You cut the upper first layer of felt and add the plant and the roots.
Before adding a plant, remove all the dirt as the plants go in bare-root. I also have some plants with Sphagnum Moss in there, mainly because I couldn’t remove all of them.
But as long as there is no dirt in the system, you should be fine.
Also, allow for some space between plants as they grow vigorously. Consider if you have a climbing plant or one that gets bushier, and choose a location suitable for the plant.
Top: More light
Bottom: More water (wetter), higher humidity
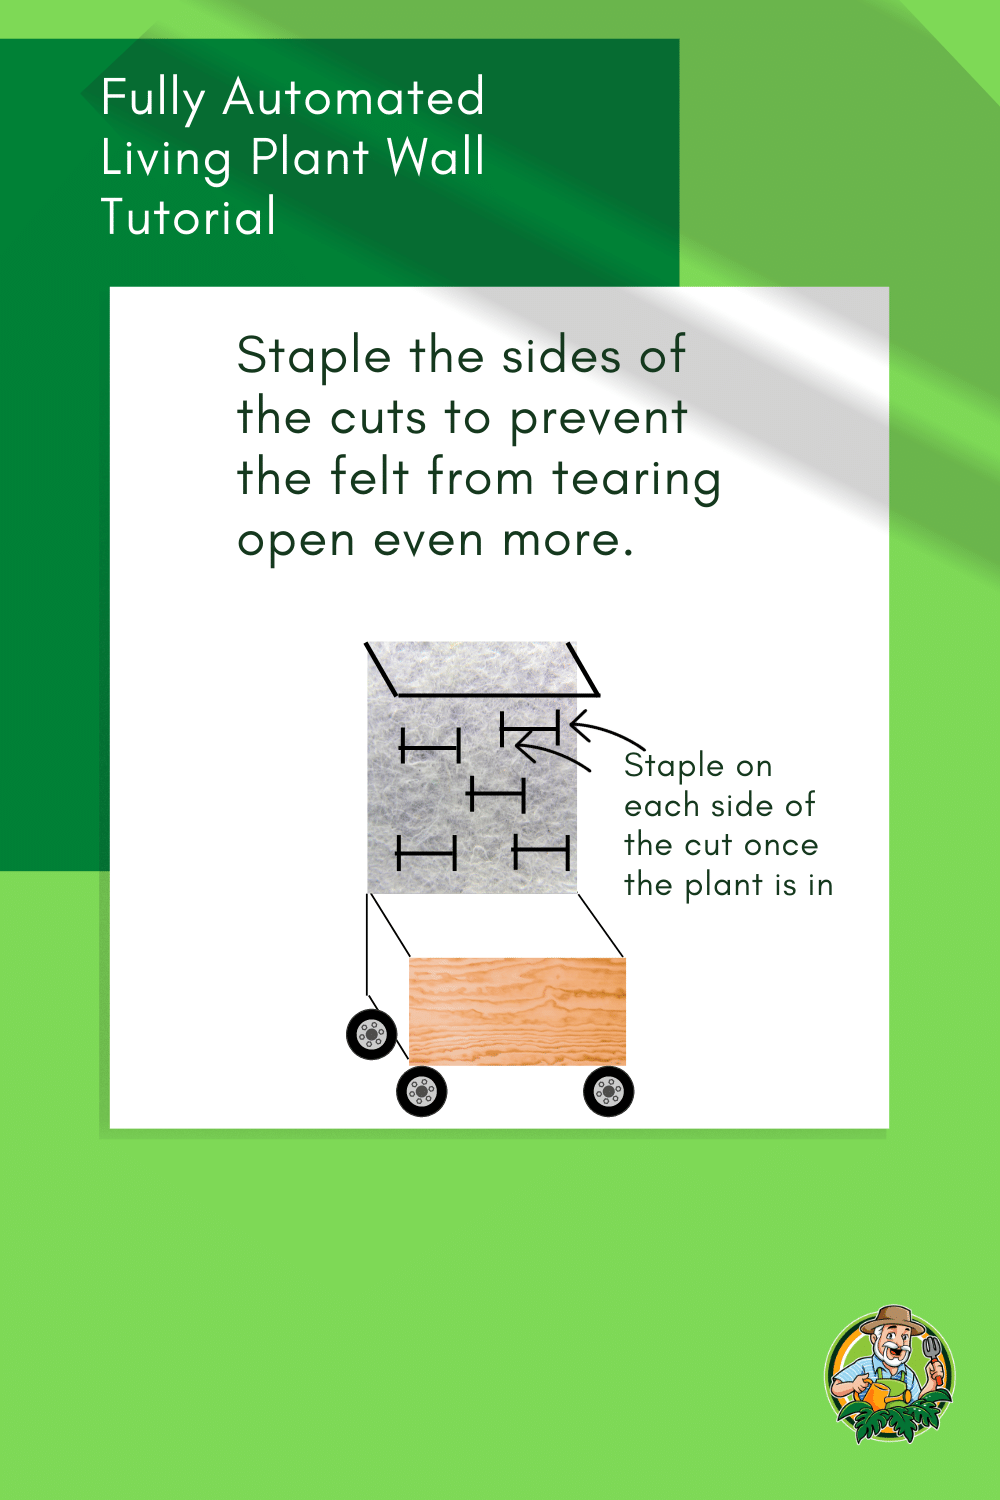
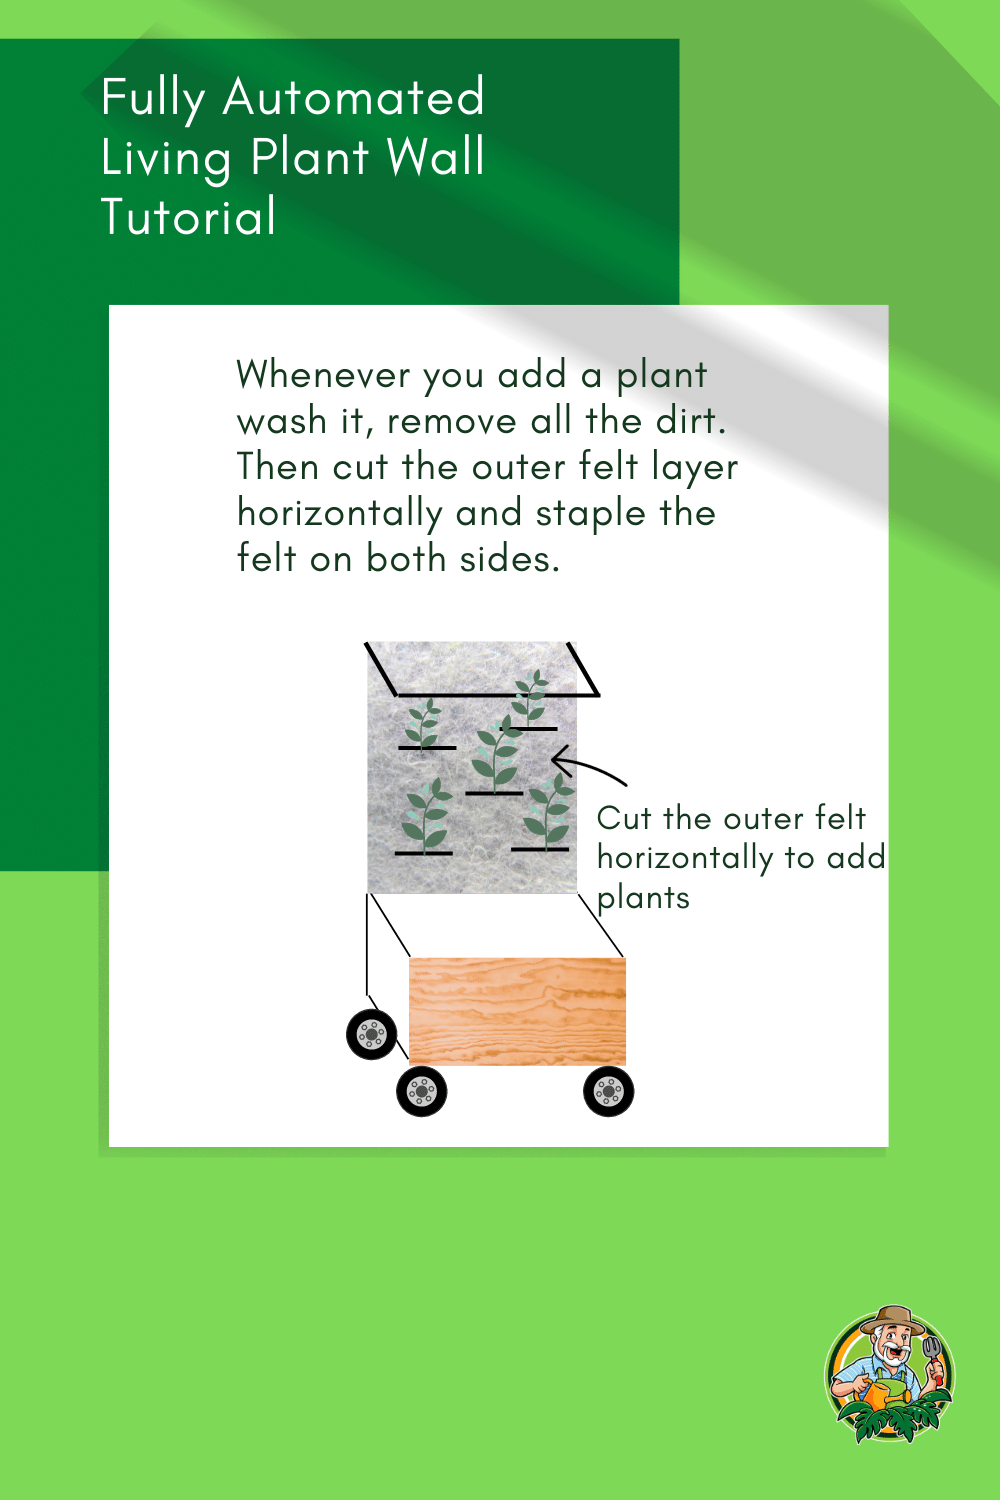
Step 20: Fix the felt after planting plants
Staple the felt on both sides of the cut to prevent the cut from getting bigger. This will ensure that your wall strengthens and doesn’t tear apart.
Also, stapling the sides of the cut ensures the plants are correctly fixed on the plant wall.
One tip: If you have big plants or plants with long petioles that you want to secure further onto the wall, cut a few felt strips and use them to attach petioles and stems to the wall. You have to staple the strips onto the wall on both sides. It is that easy!
Step 21: Prepare to add the fish
Let the plant wall and pond circulate for four weeks before adding fish. The fish will need suitable pH levels, and the water needs to cycle in and build up the necessary microbes to become habitable.
I also added water treatments to the pond.

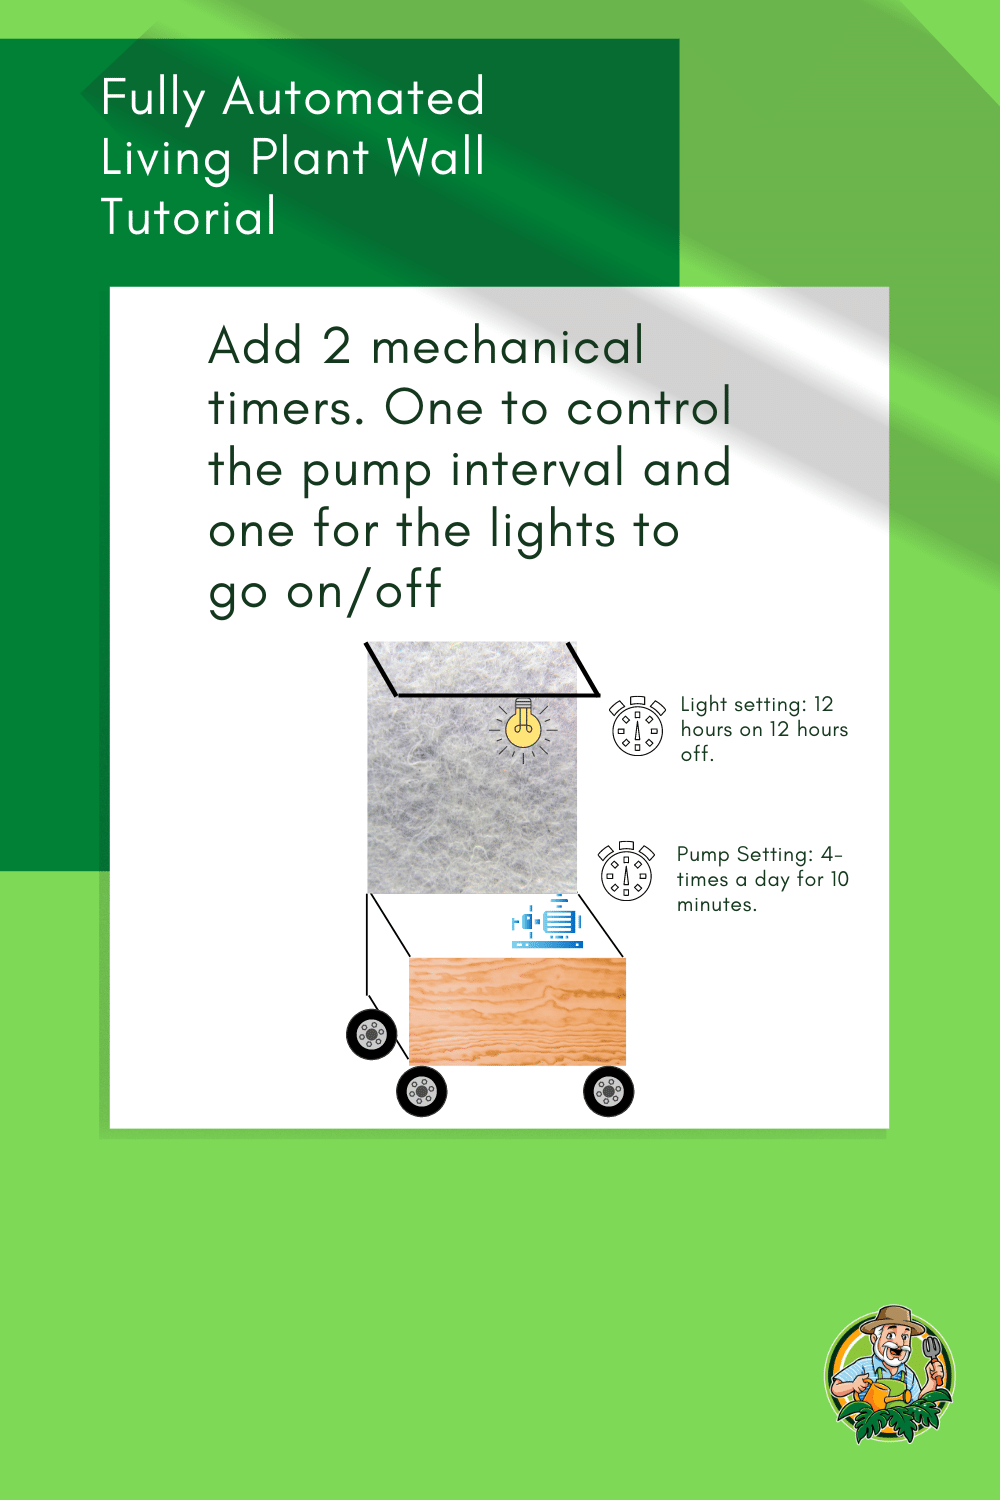
Step 22: Add timers to control the wall automatically
Now that your wall is ready, you can add the timers for the watering and light cycles.
I use two timers—one for the light and one for the water pump.
Pump settings: I let the pump run four times daily for 10 minutes each. This allows for the wall to stay slightly humid but not soaking wet. Running the water five or more times a day did not add any beneficial plant growth for me.
Light settings: My LED grow lights are 12 hours on and 12 hours off. My plants seem to love it.
Step 23: How to add plants moving forward
Adding new plants to the wall will become your new addiction. The plants grow just well, it is so little maintenance, and the wall looks better as it grows in.
Whenever you add a new plant, follow the steps mentioned. Wash the plant and the roots and ensure no more dirt is on the roots.
Cut a section of the outer felt layer big enough to put your plant at hand in it.
Make sure the cut is not too big, and staple the cut on both sides once the plant is in.
You can add as many plants as you want or at least as many as you can fit onto the wall.
Once plants are overgrowing, take cuttings, root them in the pond underneath, and put them back onto the wall to cover all these naked spots.
Automated DIY Living Wall Video
How to make a DIY living wall indoors
I started building the living wall system with a wooden structure underneath. Above the wooden structure, I am using layers of felt and pond liner.
When making a DIY living wall indoors, one important aspect is to make it completely watertight. I added a tubing system to the wall leading to a pond’s water pump.
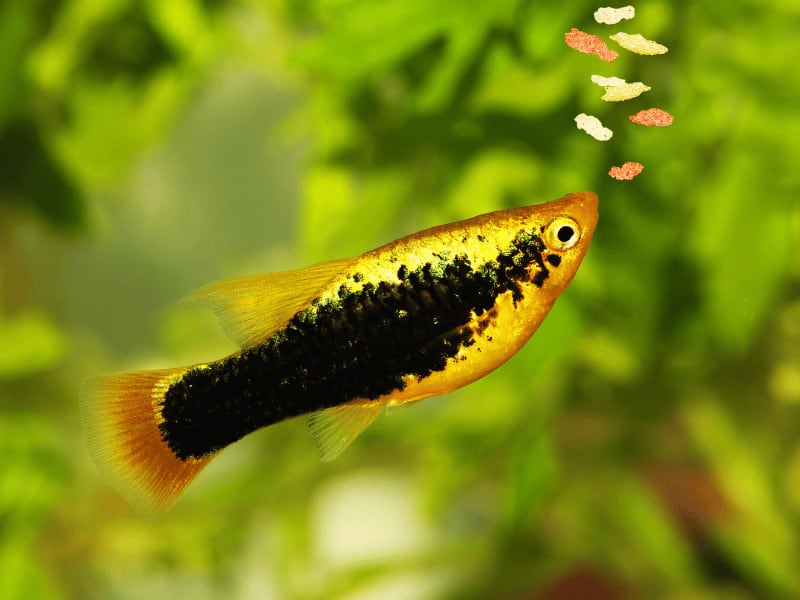
This pond houses fish such as black mollies and neon tetra fish. The fish produce fertilizer for the plants.
The plants themselves take in the nitrates and purify the water in conjunction with the felt that the water is running through.
I added grow lights at the top of the wall and along the pond for the fish and plants.
Lastly, I built wheels for the DIY living wall so I can put it wherever I want to and have better control and visibility to identify any leaking water quickly.
What you need to build an automated living plant wall
This is a full list of all the materials needed to build a fully automated plant wall. I will leave a link to Amazon to show you similar products I am using for my living wall:
- Hydro farm AAPW400 24 Watt Water pump – You will want a submersible pump that can lift the water to the top of your living wall. Look for a lift height of at least 6.5 feet if you are building your living wall 6.5 feet tall. This particular pump has a lift height of 7.9 feet. It doesn’t hurt to buy one with a bit more power.
- Tubing – To bring the water to the top, you need tubing along the side and at the top of your living wall. The tube has to fit the water pump outlet. The water pumps often come with nozzles to fit different tubing sizes. This is a 1/2” tubing.
- Barbed Valve – A barbed valve will help regulate the water flow. I put a valve right after the pump to regulate the water flow to prevent too much water from flowing through the tubing each watering cycle.
- End Cap for tubing – The water will be pumped upwards and then along the width of your wall. However, you want the water to drip out of the openings you will build, not at the tube’s end. This is why you need an end cap.
- Pond liner – You will need a pond liner to dry the wood and potential wall behind the plant wall. Also, if you decide to have a water reservoir/pond beneath the plant wall, you must fit it out with a pond liner so it holds the water.
- Aquarium Heater – As I have tropical fish in my pond (black mollys and neon tetra) I am using an aquarium heater to warm up the water and to keep a stable temperature. The plants will also love it.
- Felt – This is the most important part of the living wall. You want a felt that does not disintegrate and is thick enough. You will need two layers to cover the desired plant wall size. So if you are going for a plant wall sized 6.5 feet x 3.3 feet, you will need at least twice that amount (So the length of the felt should be at least 13 feet (get some more as you will need it) with a width of around 3.3 feet if possible). The best choice is a 5mm PET felt made from recycled plastic bottles. The water will be flowing constantly through this felt. It has to retain moisture and should not rot. Search on Google for recycled pet felt, or check what Amazon offers where you live. There is a PET felt available from FloraFelt. I add the link here as a reference here, but I think it is too pricey, and you will find a cheaper alternative where you live. You will also not need 25 yards. Another example here for vertical garden grow felt (Australian shop). Important: Do not buy paint felt. I made a mistake in the beginning. This is too thin, will not work, and will also disintegrate.
- Staple Gun – I used an electric staple gun to staple the felt and pond liner onto the wood. Also, I recommend buying a staple gun so you can use slices of felt and staple them anywhere on the wall to attach plants and fix leaves. It works great.
- Wood plates – As wood, I used multipurpose spruce plates (corrugated spruce wood panels or shuttering panels) that were already impregnated. The size per wood plate used was 0.78×19.69×59 inches (20x500x1500mm). I bought 4 of them.
- Wood Frame Boards – You might want to build a frame around the plant wall to minimize water spillage on the sides. In addition, a wood panel on the top can be used to mount some grow lights. For this buy
- Waterproof paint – Use waterproof paint on the wood to increase the protection of the wood.
- Wood Screws -Lots of them. You will need wooden screws to screw the wood plates and frames.
- Wheels – I use four wheels at the bottom of my plant wall so I can move it wherever I want to have it. I can also better see and control what is happening underneath the plant wall. (nothing, luckily). Make sure the wheels you buy can carry the weight of your plant wall, including the water and everything.
- Grow lights for top of wall – I wanted some cheap LED to grow lights that I can easily fix on the plant wall where I have full control of where they are pointing. I chose some to fixate on the wall and have them point downward. I bought them straight off Aliexpress and am using two at the top.
- Grow lights to illuminate the pond – I use 3 LED Bars on the pond’s edges to illuminate the pond for the fish, the plants, and me.
The Best Plants for a Green Wall
Here is a list of plants that do great on the plant wall based on my experience, including some suggestions of where to place them.
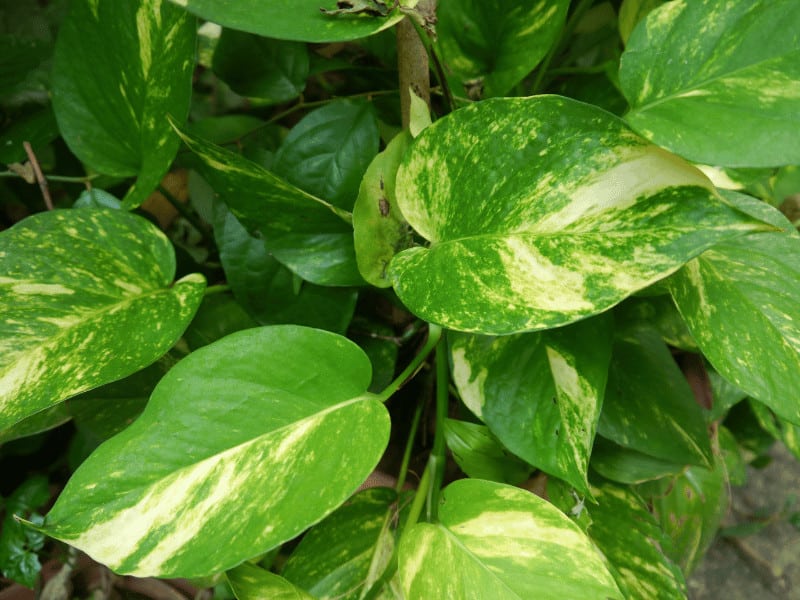
- Epipremnum aureum (Pothos) – This should be your go-to staple plant. It is easy to care for, grows quickly, and is affordable. Place it anywhere you like—also, it is a great plant to fill empty areas of your plant wall.

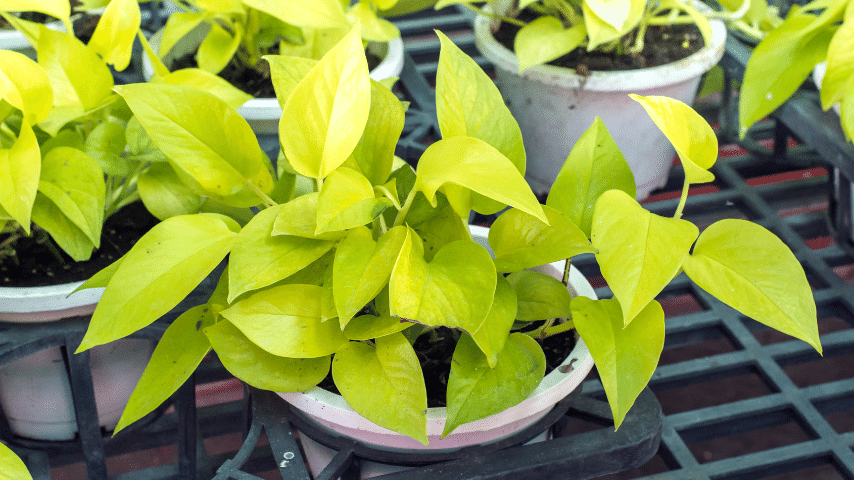
- Epipremnum aureum ‘Neon’ (Neon Pothos) – If you fancy neon colors, the Neon Pothos is for you. Easy Pothos care, great neon looks.
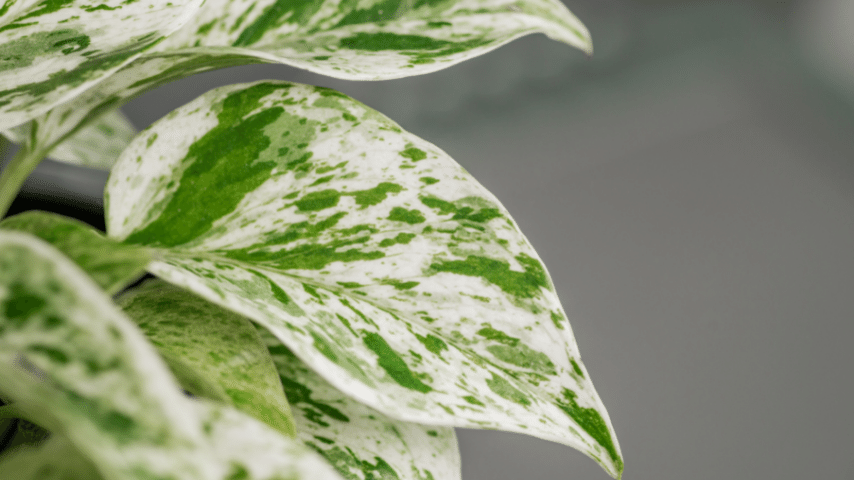
- Epipremnum aureum ‘Marble Queen’ (Marble Queen Pothos) – Great looking plant. Grows quite slow though but seems to be doing fine on the wall. Use it for accent on the wall but not the best cover as it is a slow grower.
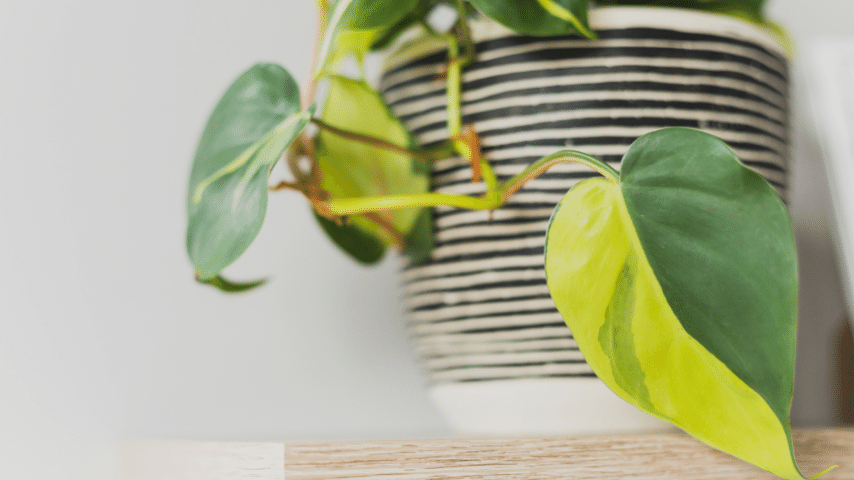
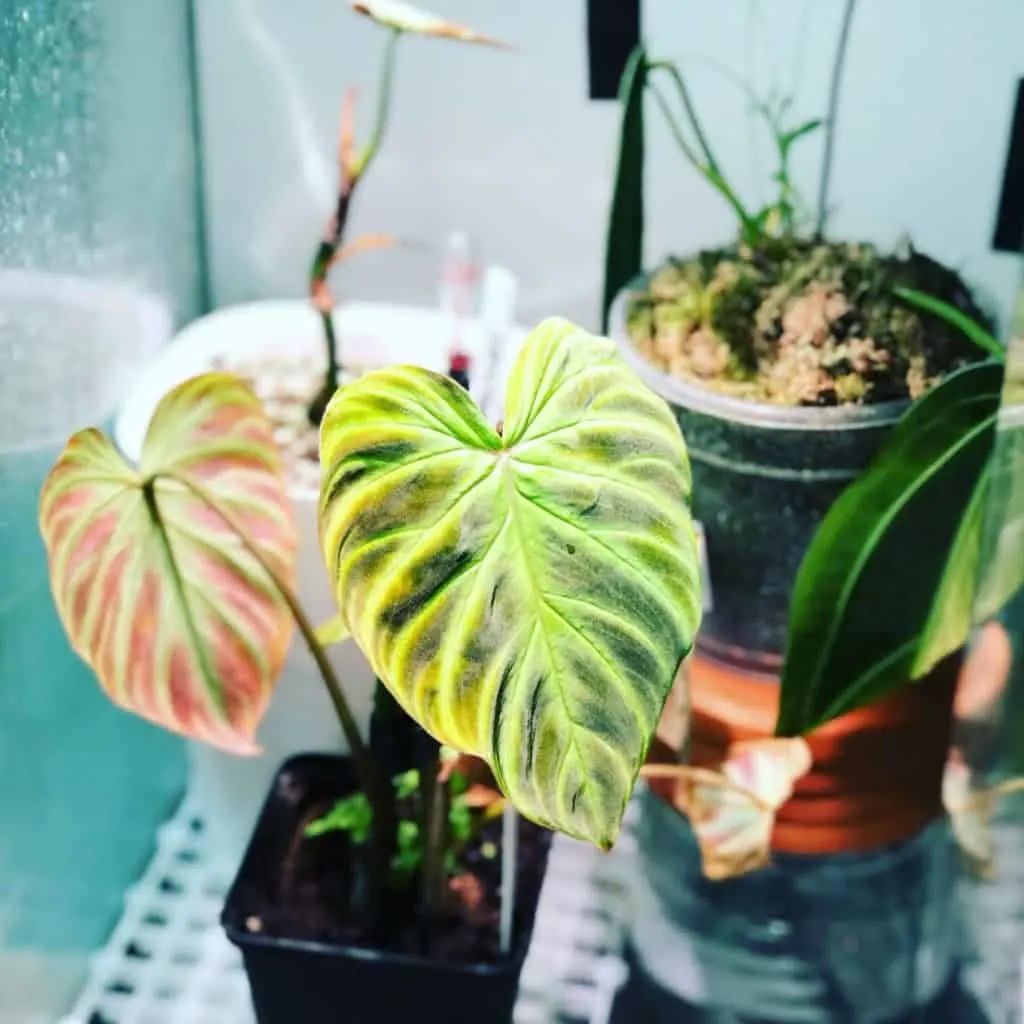
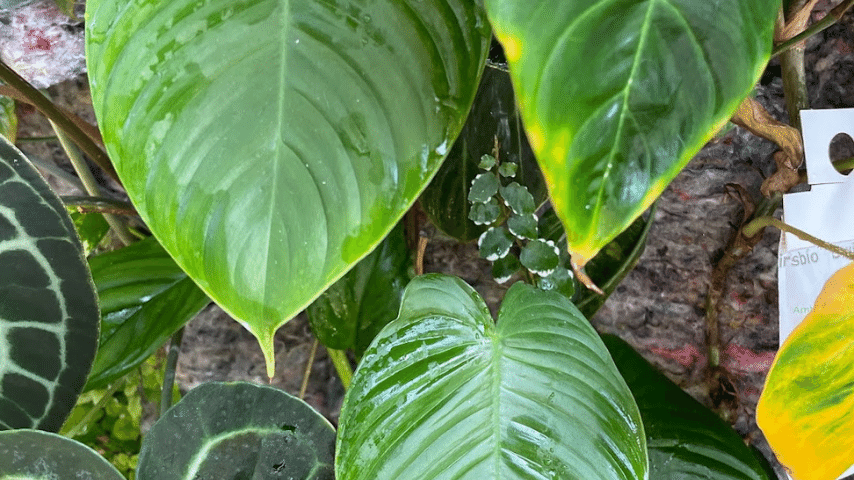
- Philodendron scandens Brazil – I was very surprised with Philodendron scandens Brazil as I didn’t expect much. The variegated leaves look so cool, and if you let them climb, they will get bigger and bigger leaves. Each leaf looks different from the other leaves.
- Ficus pumila (Creeping Fig) – A great little plant to attach to the background. It takes some time to acclimate until the Creeping Fig attaches. Once this phase is done, it thrives and builds a flat, dense mat on top of the felt. It can be placed anywhere.


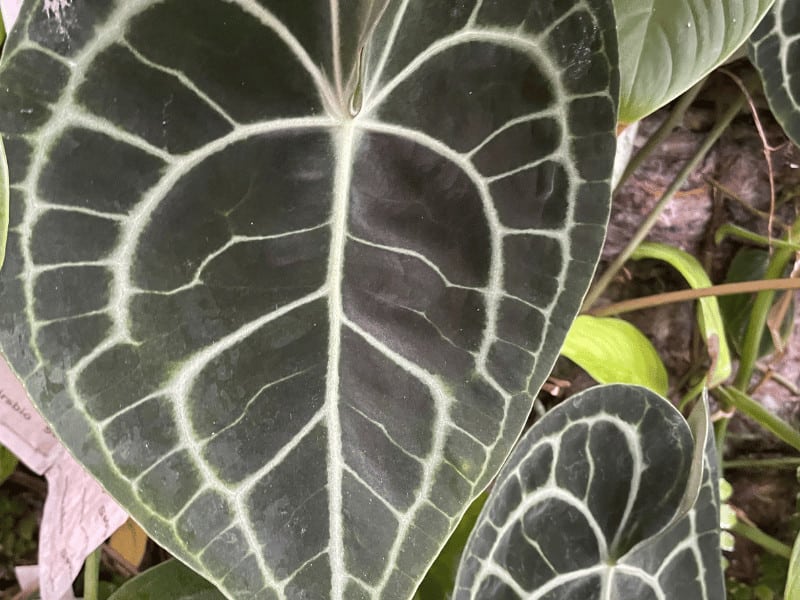
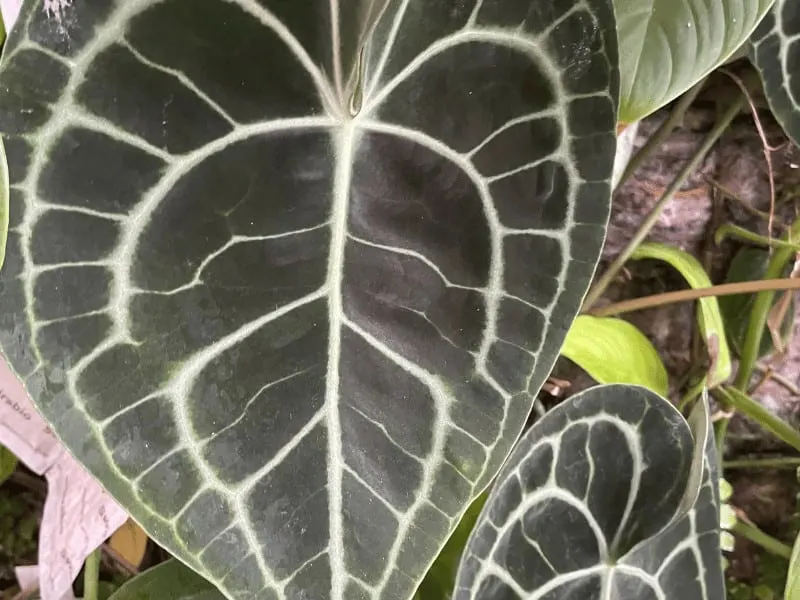
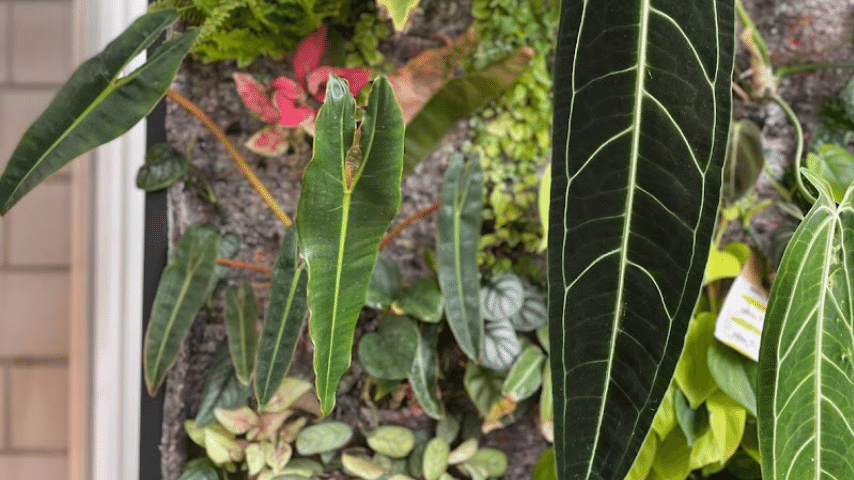
- Anthurium clarinervium – Very easy to care for. Sets a statement in the wall as it is not a climber. The leaves of Anthurium clarinervium will grow upwards/outwards. If you fix them with some felt to the wall, they will look great and do well on a living plant wall. Place in the lower half of the plant wall so this plant has sufficient space to grow.
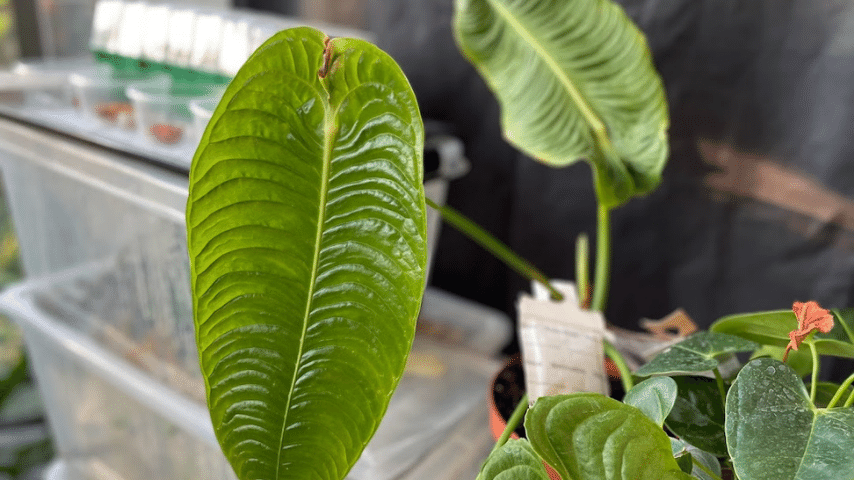
- Anthurium veitchii (King Anthurium) – I first brought the Anthurium veitchii to the blooming stage on the plant wall. It just loves to be attached to the wall. Since its leaves are pendent, put it in the top third of the wall but not too high as the petioles grow slightly upward, and you do not want its leaves to be burnt by the grow lights.
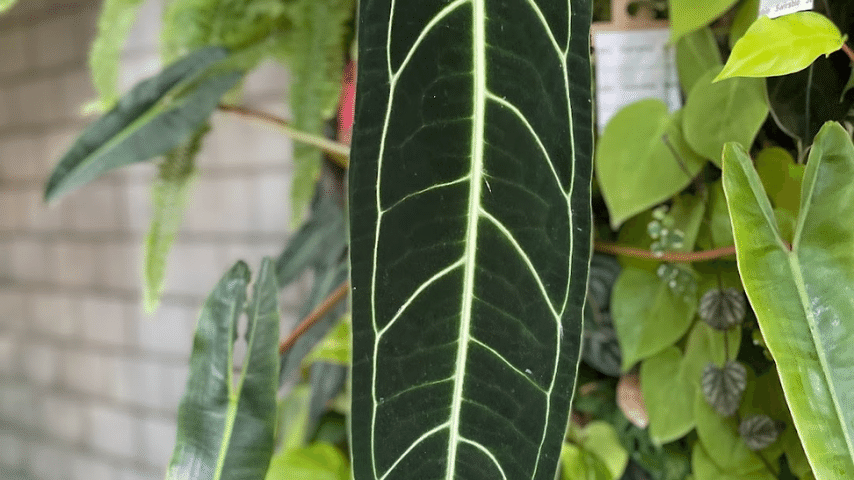
- Anthurium warocqueanum (Queen Anthurium) – It is hard to max out the size of the Queen Anthurium in a pot as it has pendent leaves and needs vertical space to grow. It is the perfect statement piece for every plant wall and can be placed on the upper half. The biggest leaf is almost 30 inches now. It is currently also blooming on the plant wall.
- Philodendron billetiae – Another show stopper on the wall. It grows slowly and needs time to settle. Mine did nothing for six months but now grows vigorously (at a slow pace ;-)). This is probably the one plant that has the potential to tip over the plant wall one day. Philodendron billetiae grows very 3-dimensional and outwards of the wall. Great for depth but not so great for space. But I love it.
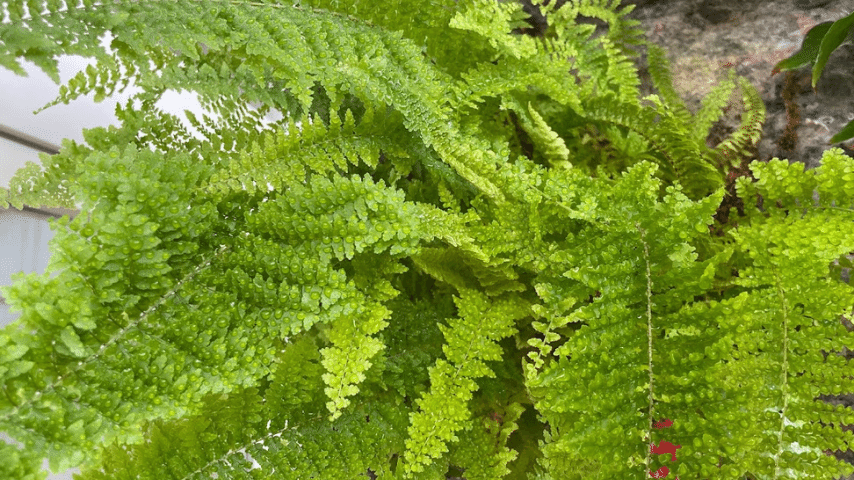
- Nephrolepis exaltata (Boston fern) – Most ferns are almost impossible to grow in pots indoors. But on the wall, they require almost 0 care. Place the Boston fern anywhere and watch it become bushier and bushier. You can place it near the pond at the bottom because it loves high humidity. I grow mine at the top of the plant wall without a problem.
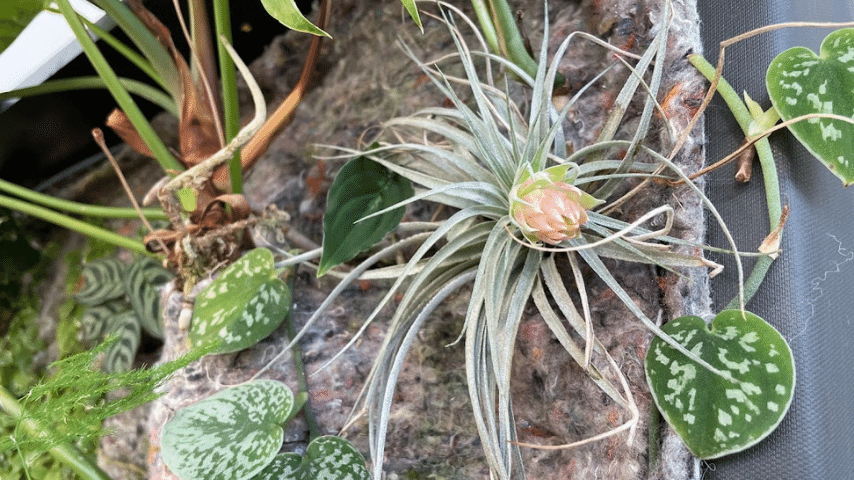
- Tillandsia (Air plants) – Tillandsia, such as the Tillandsia stricta can do well on the plant wall as long as they are placed in a spot that does not constantly stay wet. Because otherwise, they will rot and fall apart like an apple crumble. I have one blooming on the wall. It is in a spot at the very top of the wall on the side. I found out that the plant wall stays wet longer towards the bottom.
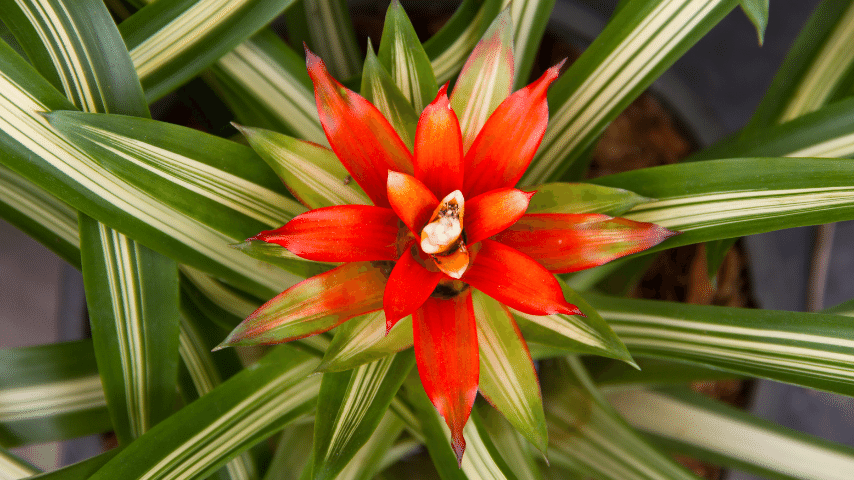
- Neoregelia Bromeliads (Bromeliads) – Great great plants. I haven’t one on the plant wall, but I had many in a terrarium. Just make sure that the center of the Bromeliad always has some water in it and that it is exchanged frequently. These bromeliads are available in crazy colors and are great eye-catchers in a sea of green.
- Monstera Monkey Mask (Monstera adansonii) – Vigorous grower, you can let Monstera Monkey Mask climb or hang from your plant wall. Does well on the wall.

- Swiss Cheeseplant (Monstera deliciosa) – Timeless foliage. The Swiss Cheeseplant ets huge if you allow it to climb. I currently have the small form (borsigiana) and the large form on the wall. I know I will regret it at some point in time. But it is one of my all-time favorites and needs to be everywhere. I let the air roots hang and grow into the pond beneath. This helps it grow even faster and absorbs the nitrates in the water for the fish in addition to the cleaning effect of the wall.


- Monstera Minima (Rhaphidophora tetrasperma) – Great foliage plant. Monstera Minima leaves won’t become huge. Let it climb from the bottom of the wall.
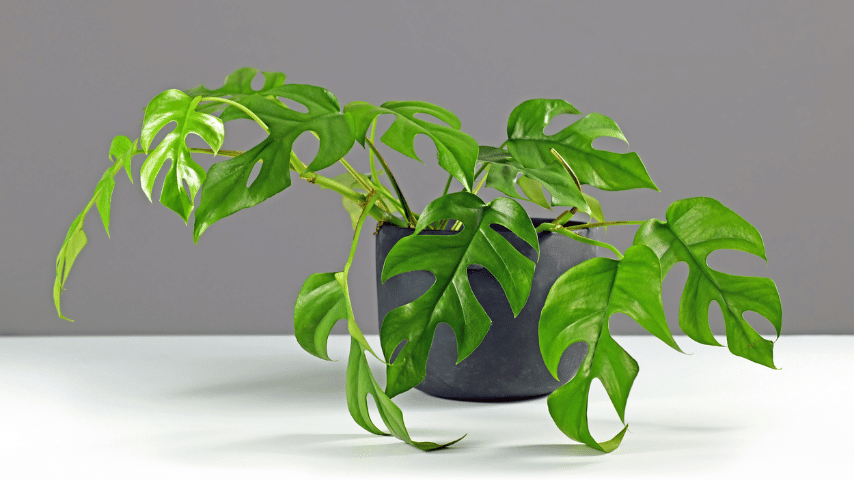
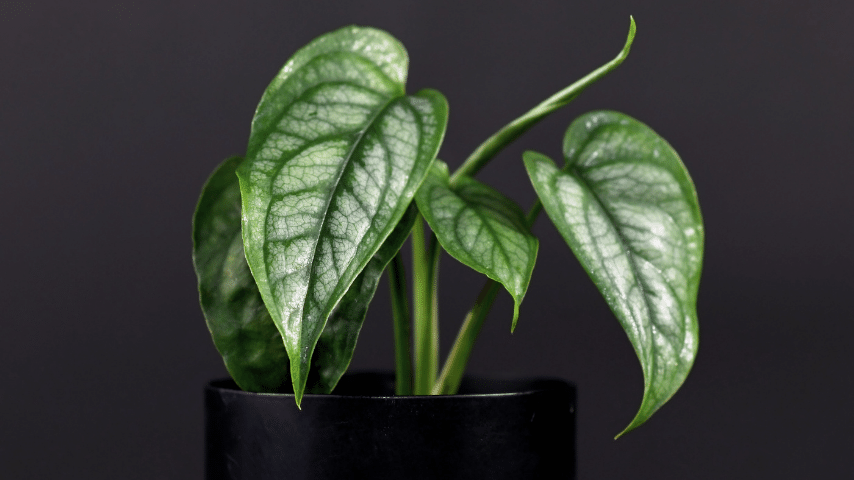
- Silver Monstera (Monstera siltepecana) – The Silver Monstera less common monstera that does well on the wall and is a fast and easy grower. Doesn’t grow dense.
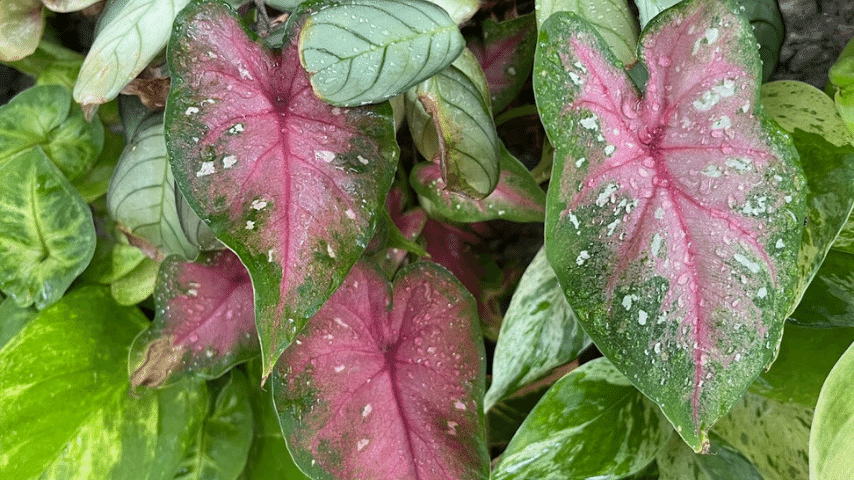
- Caladiums – Do well on the wall, but remember that these plants will lose their leaves and be present as bulbs in winter/spring. So plan wisely where to put Caladiums. Otherwise, you will have empty spots for parts of the year.
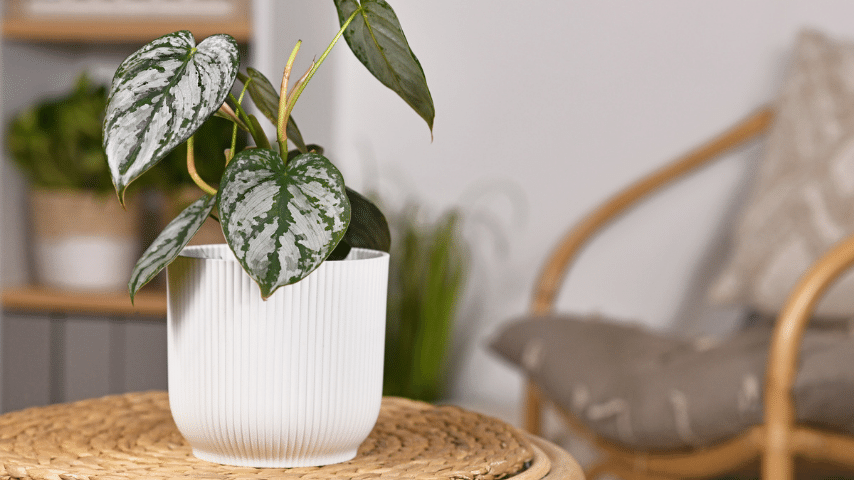
- Silver Leaf Philodendron (Philodendron brandiantum) – The Silver Leaf Philodendron does okay on the wall. Very slow growth. Would love to see the big foliage it can get (rarely seen), as a plant wall seems optimal. However, hasn’t done much after 1 year of growing. But it also didn’t die.
- Philodendron verrucosum – The Philodendron verrucosum okay on the wall but not great. I assume it would need more humidity to do great anywhere. I can’t recommend it.

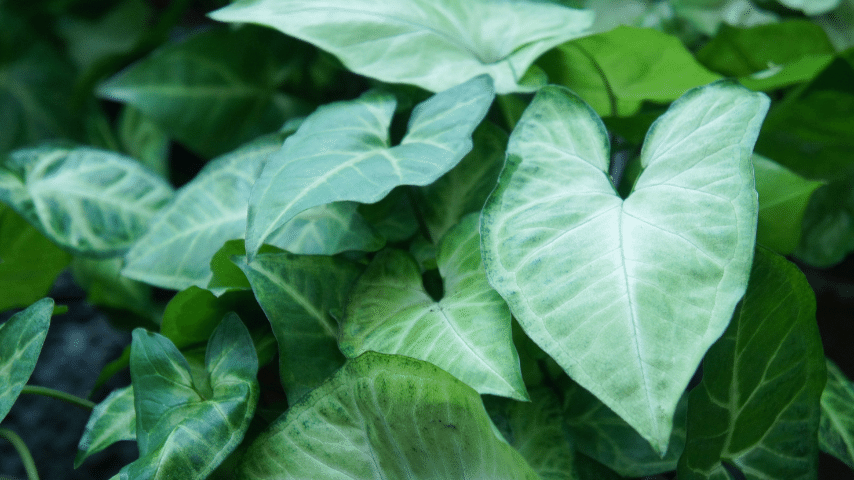
- Arrowhead plant – (Syngonium Podophyllum) The Arrowhead plant loves the plant wall and does great. Gets nice and bushy.
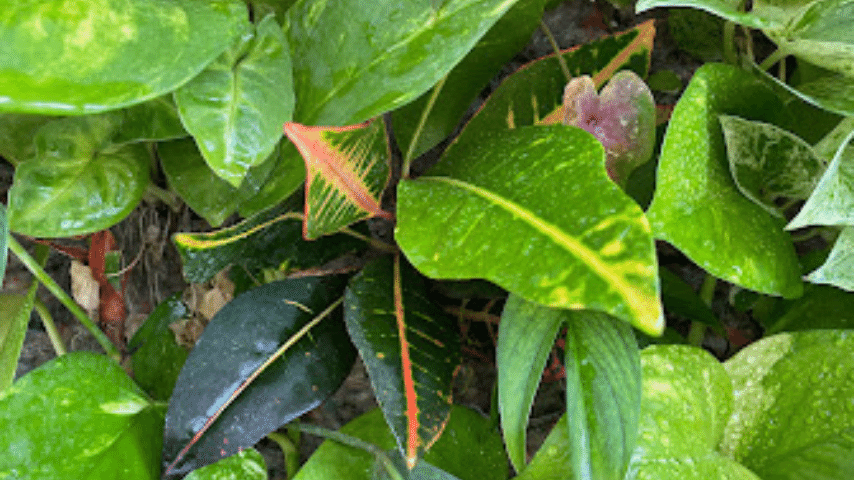
- Codiaeum (Croton Petra) – Croton Petra is generally a hard-to-grow houseplant and is a diva. It’s ok on the wall. It didn’t do much but it looks fine.
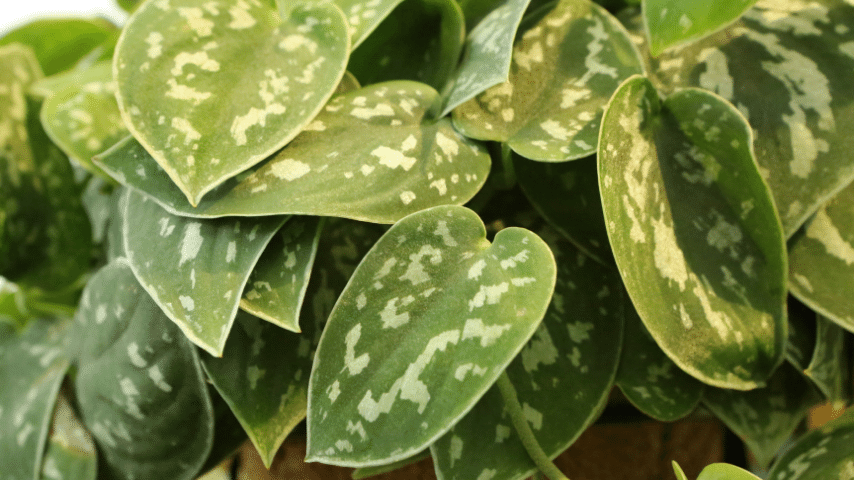
- Satin Pothos (Scindapsus pictus ‘Agryaeus’) – Satin Pothos does fairly well on the plant wall. Not great and not terrible. Grows at a slower pace.
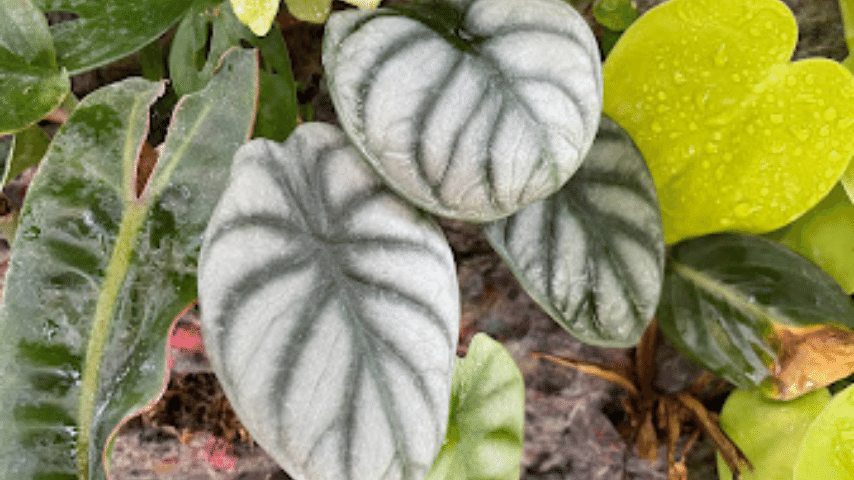
- Alocasia Dragon Scale – It seems to do fine on the wall. Alocasia Dragon Scale grows slowly but looks great. Minimal footprint. Not a great cover, but a great plant if you want additional space to put a lot of plants onto the living wall.
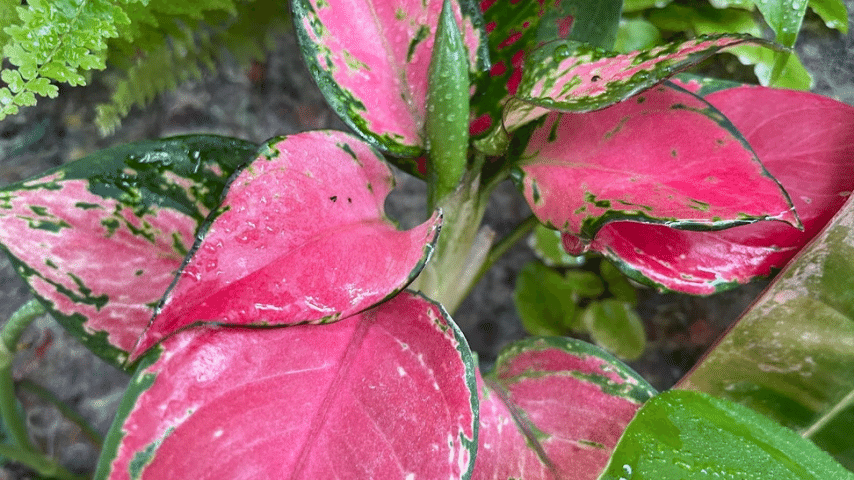
- Aglaonema Pink Princess – I haven’t seen this plant much anywhere. But it looks great and becomes pink/red if grown close to the grow light. It seems to love the wall.
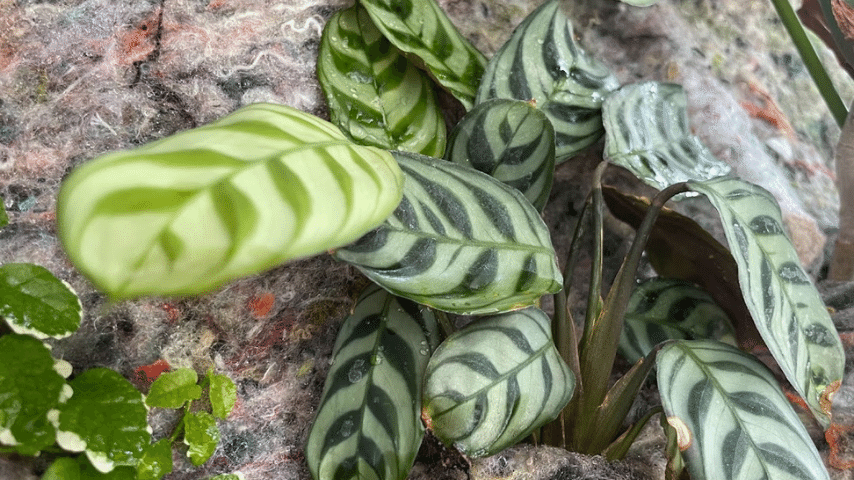
- Burle Marxii (Ctenanthe) – Burle Marxii (Ctenanthe) is a cute little plant. It grows well on the wall and becomes quite bushy.
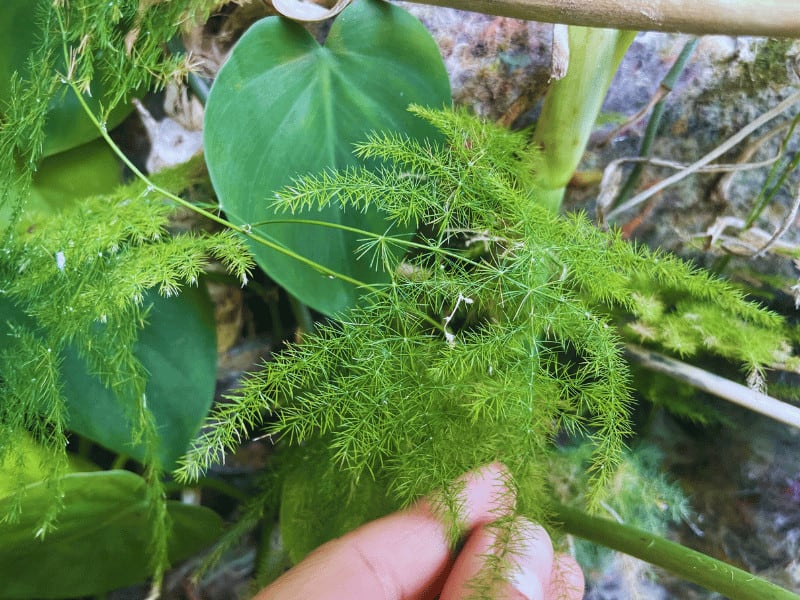
- Asparagus Fern – The Asparagus Fern oes well and is yet another fern to grow. However, it is tiny and very thin. Do not expect much of a presence.

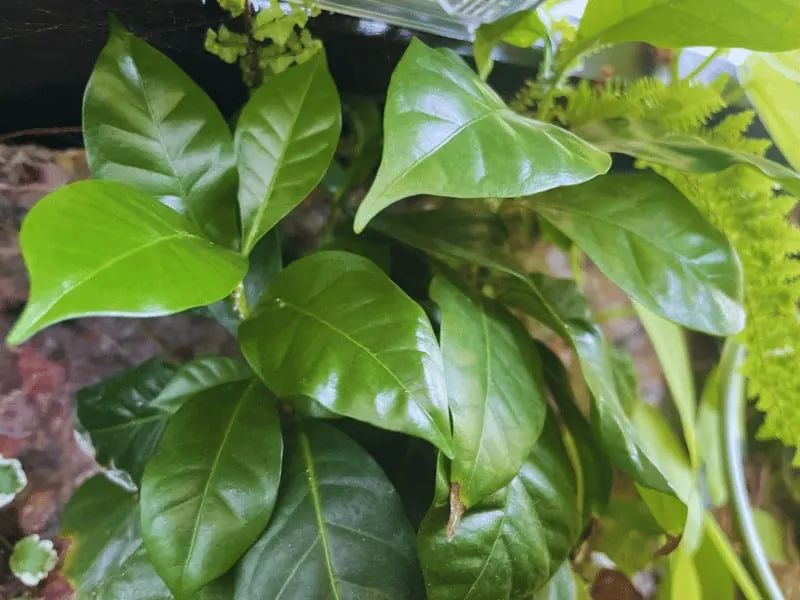
- Coffea arabica – Can you grow coffee on the plant wall? Yes, you can. Grows well so far.

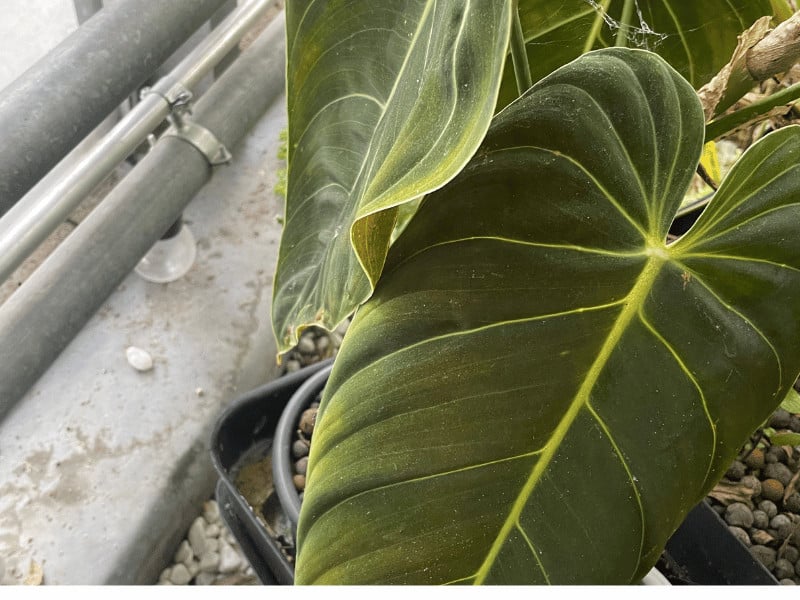
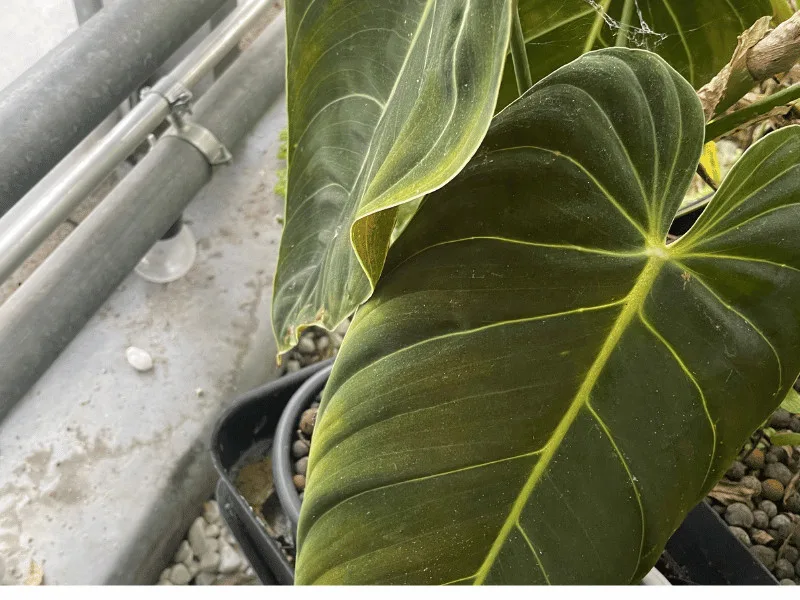
- Philodendron melanochrysum – Philodendron melanochrysum does well on the wall, but make sure it doesn’t get too much light as otherwise, its leaves will look very pale to reddish and not a nice green.
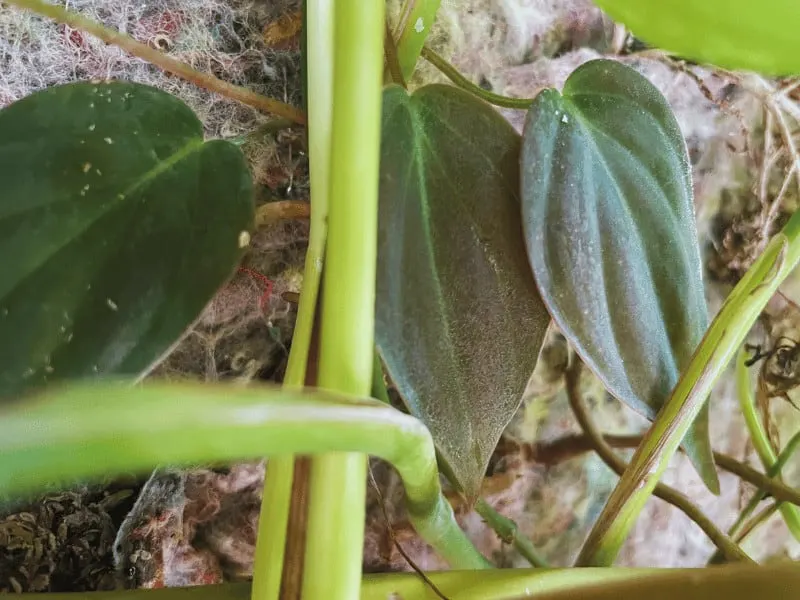
- Philodendron micans – I put a cutting on the wall, and it is growing fine. I let this one climb from the bottom up as it also can get bigger foliage. The ones you see and buy usually have really small leaves. Let’s change that.

- Philodendron tenue – You can’t buy this everywhere but it seems to do well on the wall. Delivers mid-sized foliage and grows upwards. Does not get bushy.
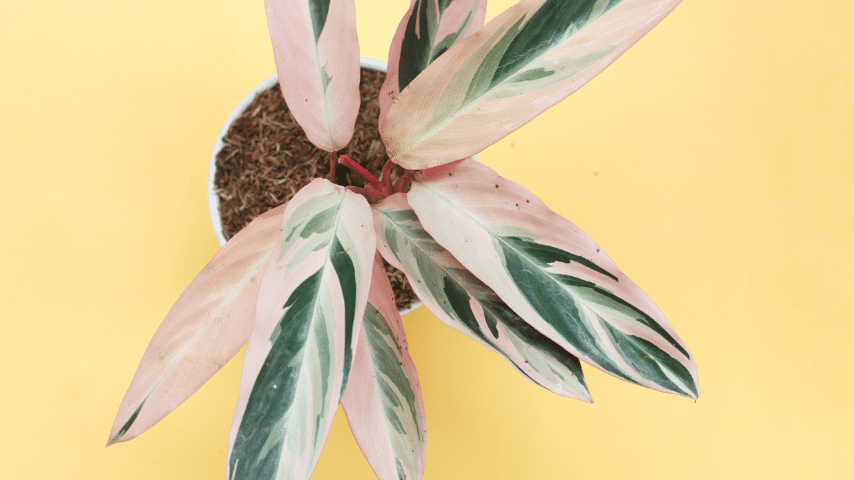
- Triostar Plant (Stromanthae Sanguinea) – The Triostar plant did okay initially, but then I lost it to the wall. It doesn’t seem to thrive on the living wall, at least for me.
- Heart fern (Arifolia hemionitis) – It would be the perfect little fern on the plant wall, but it doesn’t like it there. Becomes very crisp and dry despite it getting watered. can’t recommend it for the living wall.
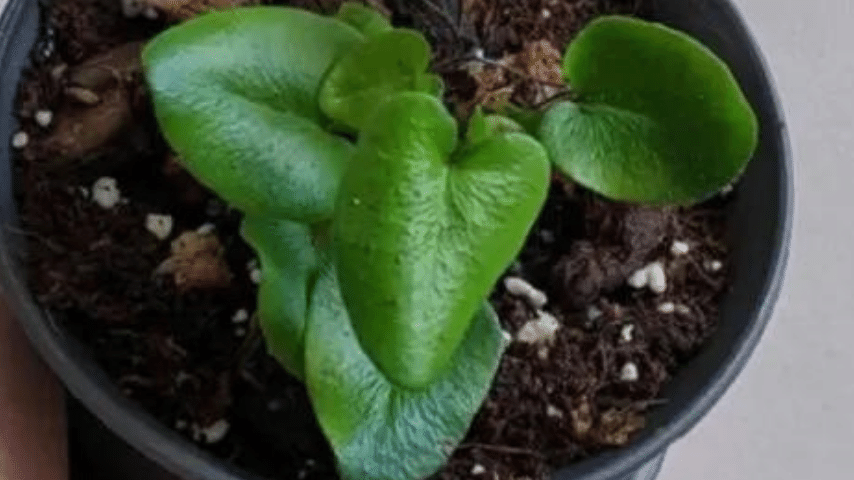
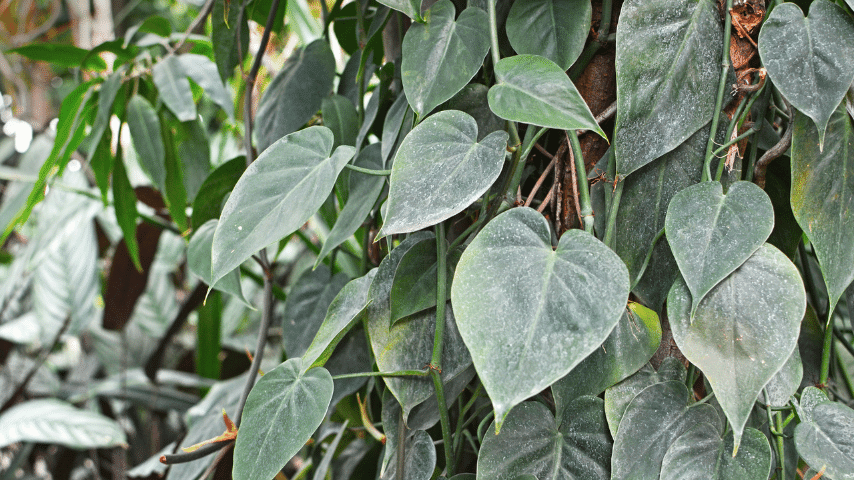
Image credits: IG @beth grows stuff
- Philodendron scandens – Philodendron scandens is the perfect plant to put on the wall. Not very flashy and shiny. It’s just a nice green plant to cover the wall.
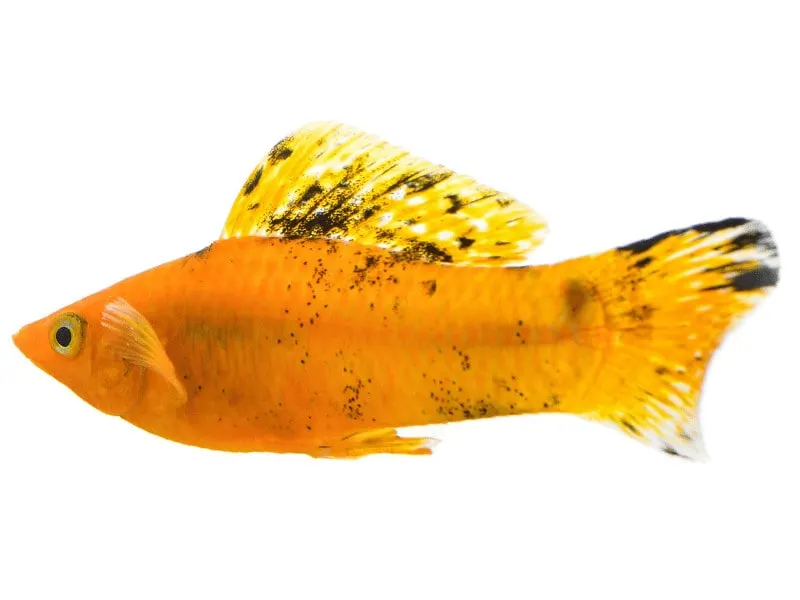
A Pond with Fish
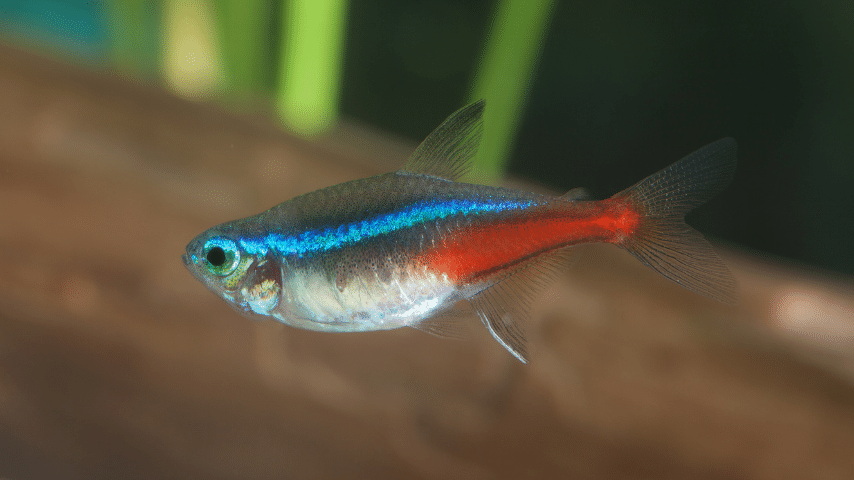
The fish I have in the pond are Orange Molly and Neon Tetra. The Orange Mollys are doing exceptionally well and started to reproduce as soon as I added them to the pond. The only thing to be wary of is that they are not getting too numerous.

The Neon Tetra also are doing well, but as it is with these fish they tend not to reproduce in captivity unless you really focus on reproducing them.
Both of these types of fish are doing well in the pond. I added an aquarium heater for a stable water temperature of 77 degrees F (25 degrees Celsius).
Originally I thought about adding goldfish, but I didn’t follow through as the pond size wouldn’t be sufficient. I suppose Goldfish can get quite big, and the water body wouldn’t be large enough.
But there are many other varieties you can choose from, so make sure that the fish you add have similar needs.
DIY living wall maintenance
The living wall I built is almost fully automated. The watering, as well as the lights, are on a mechanical timer. I do not have to water my plants manually. I never forget to water or overwater my plants.
Also, I don’t need any substrate. I do not have to fertilize my plants either. This is what the fish are for.
The only thing I am doing is checking for pests, removing dead leaves, and adding some water occasionally when the water level runs low.
And, of course, I feed the fish.
Plant Wall Maintenance
In this section, I am going to talk about plant wall maintenance. The good thing about maintaining a fully automated plant wall is, you guessed it that it doesn’t need a lot of attention.
Lighting, watering, and fertilizer will all be taken care of automatically. In addition, moss pole stakes and trellises are not needed.
If the wall is set up right and configured, you will see fantastic growth as the plants are watered and fertilized multiple times a day and can attach to grow bigger leaves.
Here is a list of chores that need to be done now and then:
Daily
Feed the fish

Feed the fish once a day and take a break once a week for 1 day when you are not feeding them. This is healthy for the fish.
Only feed as much as all your fish can eat within 15 minutes. If you still spot food after 15 minutes, you feed them too much.
Have a look at the wall
Have a thorough look at your automated living plant wall. Not only will you feel more relaxed and in sync with nature, but you will also have the opportunity to look out for pests and spot trouble early on.
Check the leaves’ underside well, as this is where most pests will sit.
Look for discolored foliage (brown, yellow spots, areas) and spots.
Once a week
Adding Water
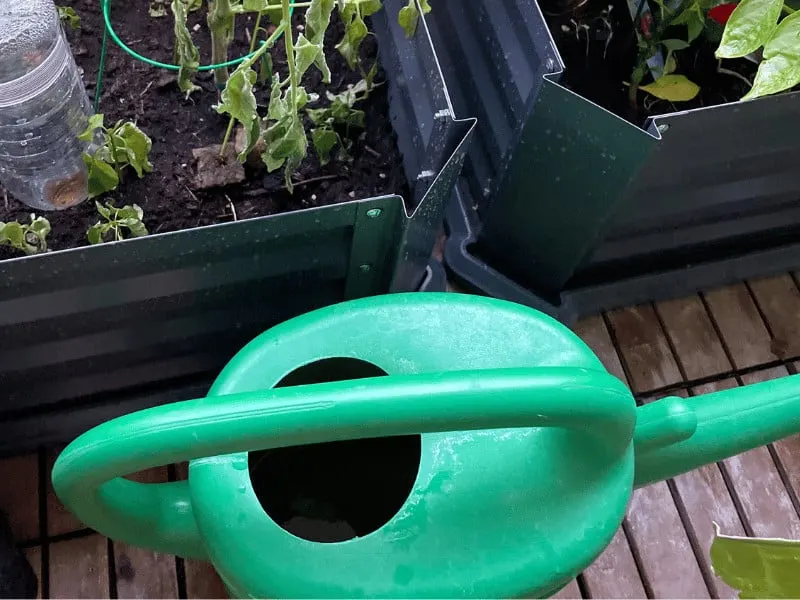
Yes, you read it right. Adding water still needs to be done, although not watering the plants. Your automated plant wall system will not be a perpetuum mobile. Water will be absorbed by the plants and released into the atmosphere.
To maintain the water level in my pond beneath the plant wall, I need to add water about every week.
Don’t get me wrong, the wall can go without adding water for two weeks or more. You can go on holiday without having to worry.
However, the changes are that the water level will get slightly lower by then.
The biggest issues with that are:
- Your fish. They need water to survive
- Your plants want to be watered
- The water pump. The water pump will be damaged or stop working once it sucks in the air and is run without water. Therefore, you want to ensure the water level is above the pump.
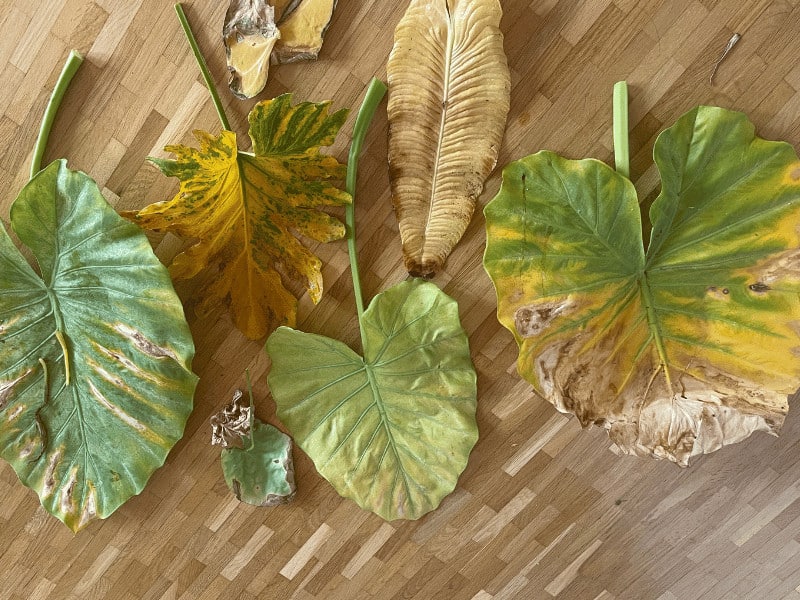
Removing foliage
Remove foliage that is brown and wilted from the plant wall. When leaves are still yellow, let them on the plants so they can get all the nutrients back out of the leaf first.
If leaves are crispy, remove them.
Leaves that are crispy on the edges or at the tip are best cut using scissors. Remove the crispy parts so the crispiness doesn’t continue on the rest of the leaf.

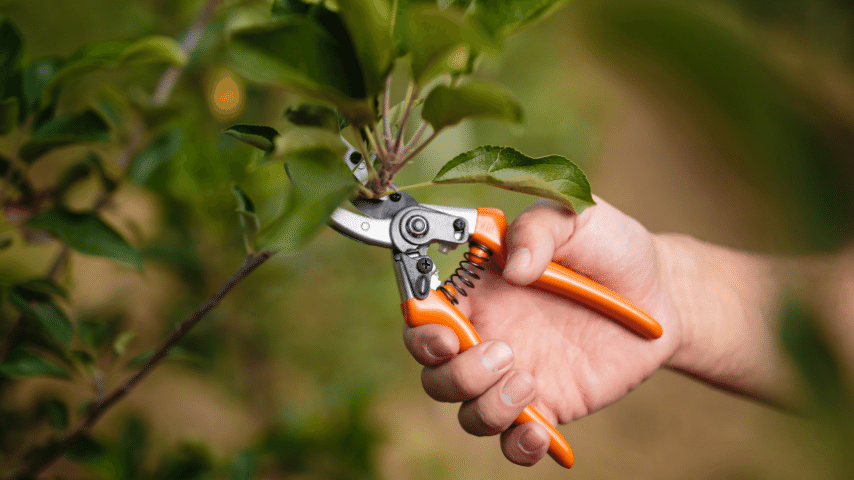
Pruning
Prune overgrown foliage and remove it or replant the cuttings somewhere else on the plant wall after cutting.
Check for plants that are given a hard time by foliage from other plants and prune around them so they get the sunlight they need to survive and thrive.
Check on Plant Health
Look at your plants on the wall and see how they are doing. Some might be struggling because they are acclimatizing, but that is fine. But if plants on the wall look bad for 2-3 weeks and are getting worse (yellowing & browning), decide to either move them somewhere else on the wall (depending on if they need it wetter or drier, more or less light) or remove them from the wall completely.
Sometimes, I have. to remove a plant, put it in a plastic container with high humidity, and let it grow healthy roots before trying it again on the wall. This happens!
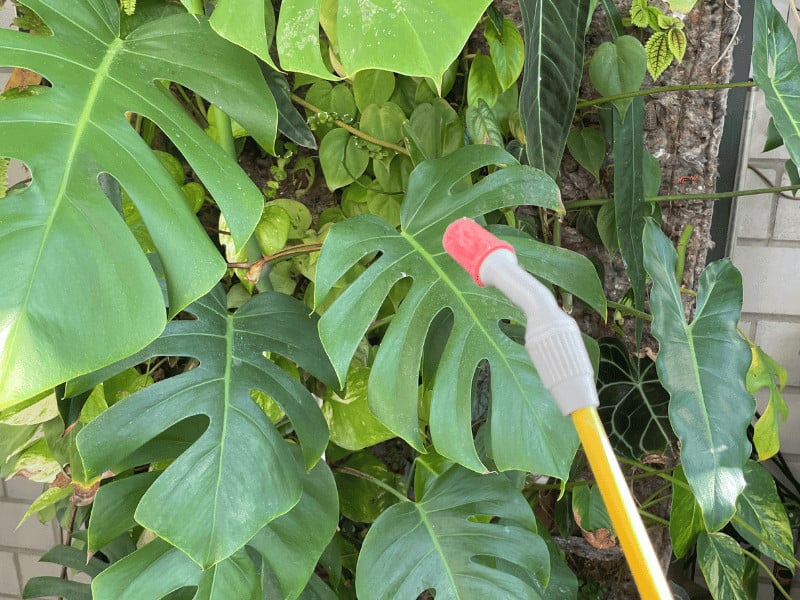
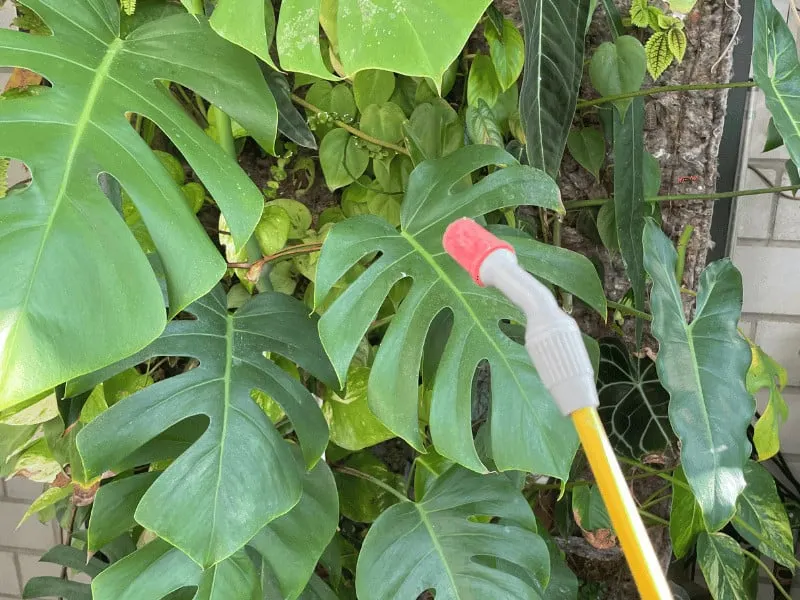
Preventively Spray the Plant Wall
Over the years, my tolerance for plant pests (it was never high) went close to zero. Some of these plant pests are so hard to eliminate that you never want them on your plants in the first place.
On the other hand, if you spot and eliminate them early on, they are easier to eliminate.
But the best play is to make sure plant pests don’t even settle on your plants.
For this, I am using a spray bottle that I fill with lukewarm water and 2-3 drops of rubbing alcohol and liquid dishwater soap.
This mixture is perfect against plant pests.
Just make sure that you are only spraying the wall and not the pond, as you do not want to contaminate the water.
Once a month (only if you do not have fish)
Fertilization

In case you have a pond with fish, the fish poop will take care of fertilizing the plants and no additional fertilization is necessary. The plants on the other hand will absorb the nitrates and make sure that the water is great for your fish.
But if you are not using fish poop, you will need liquid fertilizer for hydroponics. A good fertilizer is the Fox Farm Trio (although you will only need 2 for macro- and micronutrients. The one for blooms is obsolete if you are growing foliage plants mainly).
The goal is to hold an EC level of 0.8-1.2. As long you are within this range, the nutrient concentration is sufficient. If it gets lower than that, you can add additional fertilizer.
How I do it in my hydroponics system is to fertilize once I add the water. Then, in the future, adjust the fertilizer concentration to remain within 0.0-1.2, meaning adding more if it drops below.
After adding the fertilizer, you must adjust the pH level using pH up and/or down.
Don’t fertilize if you have fish in the pond!
Plant Wall Settings
In this section, I will discuss how to tune in your plant wall.
The settings on your plant wall will very much depend on the plants you are growing on the wall.
It is a lot of trial and error, but I am happy to share the best schedule for my plant wall.
Lighting
As for lighting, what works best for me is 12 hours on 12 hours off schedule. My plant wall turns on at 6 a.m. and turns off at 6 p.m.
I am using a timer for this, so there is 0 work involved after setting it up.
Timer: 12 hours on / 12 hours off
Water Pump
OK, this is an interesting one. I experimented a lot with the duration the water is pumped through the plant wall and how often it is done a day to optimize for plant growth.
I tried to set the pumping interval to 5 or even six times a day but saw no benefit in plant growth, but plant leaves started to yellow.
This indicated to me that I “watered” it too much.
At three times a day, I realized that there were some crispy leaves, and the felt became completely dry in-between waterings.
I also tried to water for only 5 minutes but found out that not all areas of the plant wall got wet.
After watering four times a day for 10 minutes, the felt stayed slightly humid, and there were no signs of overwatering.
Water pump schedule: 4 times daily for 10 minutes, spaced 4 hours between. So 6 am, 10 am, 2 pm and 6 pm.
Fertilization
I do nothing in terms of fertilization apart from having about 20 small fish (black molly & neon salmler) in the pond beneath.
The water from the pond is circulated four times a day, and the nutrients reach the roots of the plants on the plant wall multiple times a day, leading to great growth.
I am really happy that I have to use no other fertilizer as fish fertilizer, and aquarium/pond water is phenomenal for plant growth/watering plants.
If you are not going for a pond with fish, I recommend using liquid fertilizer and ensuring an EC concentration of 0.8-1.2 at all times.
The EC in the water remains at 0.8-1.2, which is optimal for growing Monstera, Anthurium, Philodendron, and other foliage plants. Anything above 1.2 would be too high of a concentration, and a value below would be insufficient.
pH Value
In terms of pH value, I aim for a pH of 7.5. This is optimal for my tropical fish (black molly and neon salmler) and the plants.
The ideal pH value for Philodendron, Monstera, and Anthurium is between 6.5 and 7.5.
This pH value is optimal for most foliar plants to take in as many nutrients as possible.
High pH values can lead to the inability of plants to intake macronutrients.
This can lead to iron deficiency and chlorosis. This will result in bright green /pale leaves and stunted growth.
Aim for a pH of 7.5 (or 6.5-7.5)
FAQ
How much did the living plant wall construction cost you?
I estimate that the total living wall built, including the tech, cost me no more than 500 dollars.
How long does it take to build the DIY living wall?
It took me almost a week to build the plant wall. But I think it can be done within two days. I spent a lot of time thinking about how to do it and what to do next. Also, getting all the material together took me a while.
What plants do best on the plant wall?
Plants that do great on the plant wall are Anthurium and any climbing Philodendron. Also, Monstera plants and ferns are doing fantastic. I created a whole list of plants that I tested and am growing on the wall in the course.
Conclusion on building a vertical garden
Building a vertical garden indoors can be done within a couple of days or weeks.
Instead of spending thousands of dollars, you can build a living wall with your bare hands, costing you only a few hundred dollars.
After one year of plant growth, I can honestly say that this is one of the most satisfying plant-related DIY projects and one of the most successful.
The plant wall is getting thicker and thicker and denser by the day.
I manage growing bigger leaves on my favorite plants, such as Anthurium veitchii and Anthurium warocqueanum which are both in bloom currently.
The best thing about having an automated plant wall is that it is almost fully automated.
Apart from adding some additional water now and then to the system, there is very little work needed to maintain it.
My plants love the living plant wall!


Daniel has been a plant enthusiast for over 20 years. He owns hundreds of houseplants and prepares for the chili growing seasons yearly with great anticipation. His favorite plants are plant species in the Araceae family, such as Monstera, Philodendron, and Anthurium. He also loves gardening and is growing hot peppers, tomatoes, and many more vegetables.