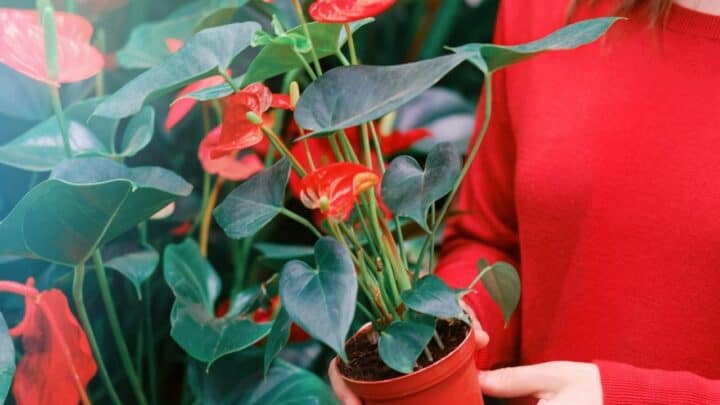

I’ve had my pink Anthurium, also called a painter’s palette or flamingo flower, for about five years now. And while it still flowers, it has become spindly.
Some roots are growing out of the bottom drainage hole of the pot too.
I asked my sister for advice because I think she is the Anthurium queen.
She knows everything there is to know about these pretty houseplants that bloom heart-shaped flowers and have heart-shaped leaves.
She told me I needed to repot my Anthurium. I quickly learned how, and now you can too!
Table of Contents
Repotting Anthurium Plants
To repot an Anthurium, first, remove any wilted flowers and brown leaves. Then prepare your potting soil, which should ideally be the same as the Anthurium’s current potting mix. Place this into the new pot, that’s 1-2 inches bigger in diameter. Remove the Anthurium from the old pot and transfer it into a new one. Ideally, you repot your Anthurium once every 2-3 years.

Your Step-by-Step Guide to Repotting an Anthurium
5 Steps to repot an Anthurium:
Step 1: Water the Anthurium
In its current pot, a few hours before I transplant the Anthurium, thoroughly water the plant. I actually want to see water running straight through the bottom drainage holes.
The reason for this is that a moist root ball is much easier to transplant, and it helps the roots more easily deal with the stress of being repotted too. This is healthier for the plant.
In this step, I also remove any flowers that have wilted or leave that have browned.
Step 2: Prepare the New Pot and Soil
The new pot I am transplanting my Anthurium it should be bigger than the current pot. Generally, I ensure it is at least one size bigger, which means it is about 1-2 inches larger in diameter.
For the soil, you need a potting mix that has a pH of 6.5, and it should be light and loose in texture. I try to use the same potting mix as what the plant currently grows in.
My go-to potting mix is equal parts peat moss, perlite, and pine bark. You can mix one part perlite with one part peat and add two parts orchid mix. I mix these in a bucket with a trowel.


Before I throw the potting mix into my new pot, I cover the drainage holes with a paper towel, so the soil doesn’t escape. You can also use a coffee filter or a piece of mesh.
With my pot ready, I fill the new pot with fresh soil up until about 1-2 inches from the top of the rim. I then water the potting mix thoroughly.
Step 3: Remove the Anthurium
To remove my Anthurium, I place the current pot it is in on its side, and grabbing hold of the center of the plant closest to the soil or its crown, I gently pull it from the pot.
I gently tease apart the root ball with my fingers. This is to release the roots.
Step 4: Place the Anthurium in Its New Pot
I dig out a little burrow of soil from the new pot with a trowel, then place my Anthurium into the pot. I then scoop the soil I took and place it around the plant stalk.
Now it is time to compact the soil, which I do with one hand by gently pressing down.
Step 5: Add Water, Shade, and Fertilizer
With my Anthurium in its new pot, I water it lightly. This is only to settle the soil. I sometimes find that I need to add a little bit of soil on top.
Don’t worry about the paper towel or coffee filter you’ve added. The paper towel will disintegrate when you add water, and the water will still be able to drain with the coffee filter or mesh.
I place my Anthurium in the shade for the first few days after transplanting; it may wilt a little, but I’m not worried, as this is just part of the process.
I also water it more than usual until I see new foliage growth.
I only add fertilizer once the roots have settled and established themselves in the new pot. This takes about 3-4 months, and after that, I fertilize my Anthuriums once a week at ¼ strength.
The Best Time to Repot Your Anthurium
The best time to repot this tropical houseplant is generally every 2-3 years or when your Anthurium has become root bound, meaning all the roots have filled the pot, and there is no more space for them to grow.
If you aren’t sure whether your plant is root bound, then look for the following:
- Circling roots near the potting mix surface
- Foliage that wilts, even though you’ve just watered
- Roots growing through the draining hole, like mine, was
- A pot that’s cracked or bent
- Water runs straight through the drainage hole
If your Anthurium is extremely root bound, immediately repot it. Waiting may mean that the plant will die.
However, if the root boundedness is still in the beginning phases, you can wait until spring and when it starts growing again to transplant it.
Read more about Anthurium plant care.
Frequently Asked Questions about Repotting Anthuriums
What kind of soil does an Anthurium need?
When repotting Anthurium, it is best to use the same type of soil as the plant was planted in. These flamingo flowers need light and loose soil that is well-draining and is at a 6.5 pH.
How do you transplant Anthurium plants?
If your Anthurium is root bound, you need to repot it into a pot that is 1-2 inches larger in diameter than the current pot. Water your plant a few hours before transplanting, and in the meantime, prepare the new soil and pot. When ready, remove your Anthurium from its current pot and place it into the new potting mix in the new pot. Water it and place it in a shady area for the first few days post-transplant.
Repotting Anthurium
It is important to repot an Anthuriums every 2-3 years to keep it healthy and growing. Repot it when it becomes root-bound. Repotting your Anthurium is easy. The most important is to water the current Anthurium well before you repot and to use the same potting soil for the best results.


Daniel has been a plant enthusiast for over 20 years. He owns hundreds of houseplants and prepares for the chili growing seasons yearly with great anticipation. His favorite plants are plant species in the Araceae family, such as Monstera, Philodendron, and Anthurium. He also loves gardening and is growing hot peppers, tomatoes, and many more vegetables.