
However, Monstera care guides cannot keep up with this increased interest. They are often out of date, inaccurate, or even worse just plain wrong.

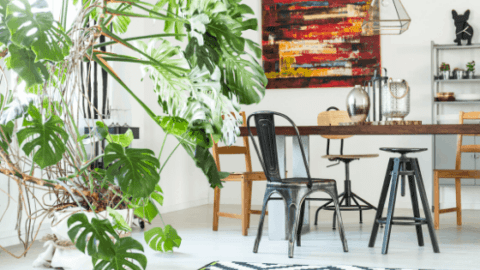
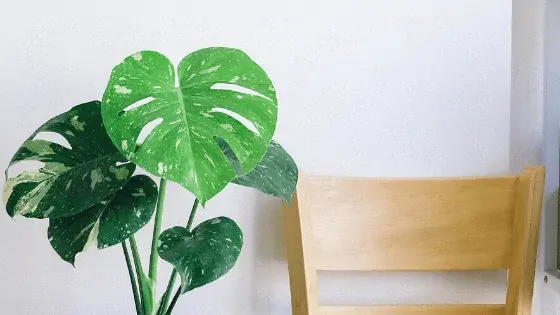
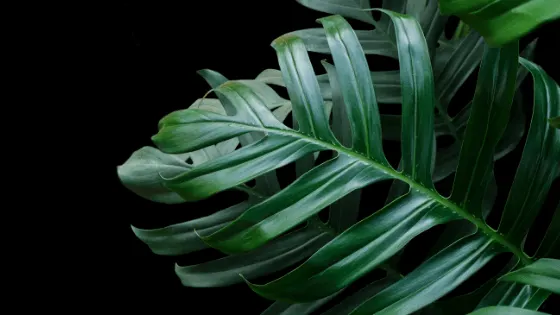
Monstera Deliciosa or Swiss Cheese plant with split leaves on a table
Monstera is my favorite genus, second to none. It is said that it consists of 50 different species but actually no one knows. This article is dedicated to the 13 Best Monstera care hacks to ensure your Monstera stays healthy and is thriving.
In addition to talking about the care for the Monstera genus, I created specific in-depth care guides for multiple described Monstera species below.
[toc]
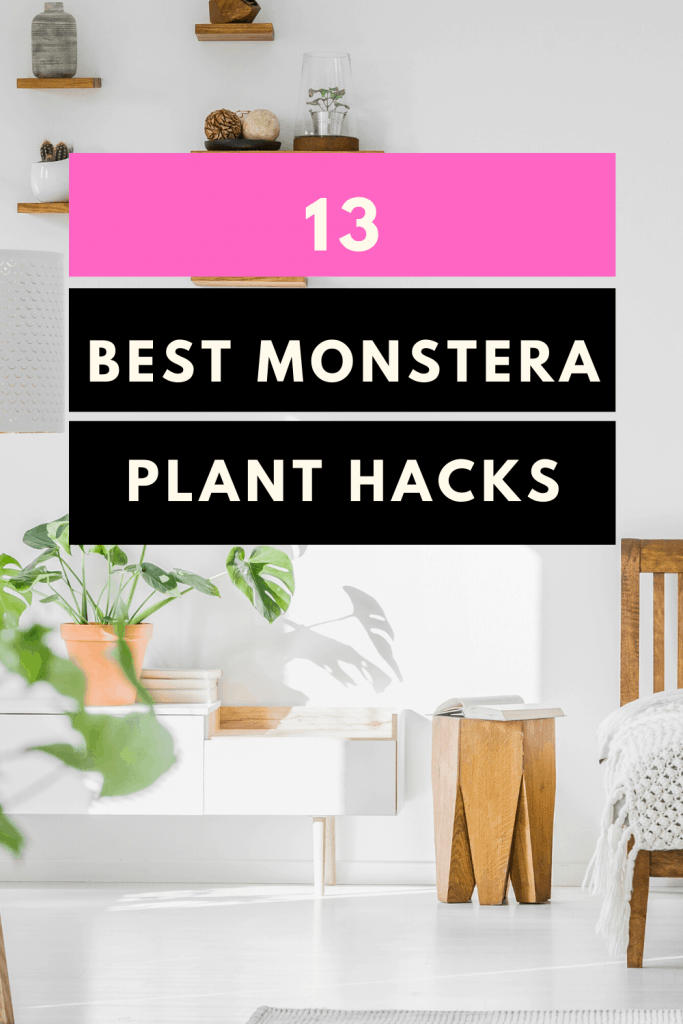

13 Best Monstera Plant Care Hacks
Monstera varieties
There are said to be 48 different species. Many of these are not commonly cared for in the houseplant trade.
In this article, we are going to look at the general Monstera care that these different species have in common. Monstera plants prefer bright indirect light, should be watered about once a week, and need to be in well-draining soil.
Please have a look at the specific Monstera care articles I have already written for different Monstera varieties:
- Monstera Deliciosa
- Monstera Deliciosa Variegata
- Monstera Deliciosa Variegata Care
- Monstera Adansonii
- Monstera Adansonii var. laniata
- Monstera Adansonii Variegated
- Monstera Siltepecana
- Monstera Epipremnoides (Eskeleto)
- Monstera Obliqua
- Monstera Thai Constellation
- Monstera Dubia
- Monstera Standleyana
- Monstera Karstenianum
- Monstera Subpinnata
These are some of the additional Monstera species that I own and that I am about to write Monstera care articles for in the near future:
Monstera Thai Constellation is a stunning Monstera. It is the bigger sized Deliciosa species that have been tissue cultured
- Monstera Pinnatipartita
- Monstera Subpinnata
- Monstera Karstenianum
- Monstera Accuminata
Let’s now dive into the general Monstera care tips&tricks that help you to avoid yellowing leaves, root rot, and many of the other problems that arise from improper plant care.
Choose the right substrate – Aroid Mix
I cannot stress how important this point is. The right potting soil is crucial. Most of the problems that might arise in your Monstera care journey result from having the wrong soil mix.
Aroids in general and Monstera plants specifically need something called an Aroid mix. This is a soil mixture that is very airy. Airy means that pockets of air can form in the soil.
Air pockets can only form if there is free space in the soil. This is created by chunky bits that are part of the soil mix.
If the soil is dense, no air pockets can form and the soil mixture is therefore not airy.
Aeration in the soil is crucial as it enables roots to take in oxygen. If the soil is too dense, roots can be chocked to death.
A general houseplant potting mix will not do it for your Monstera care. You will need an aroid mix. If you do not have one at home either buy one or mix. your own. I cannot stress how important this point is.
I had several Monstera Deliciosa, Monstera Adansoni and even Monstera Epipremnoides (now Eskeleto) that started to from root rot. The reason has always been incorrect soil mixtures where the ratio of dense ingredients such as houseplant soil was too big.
This lead to constantly wet soil, yellowing leaves and sever root rot. The only thing that helped was changing the potting mix.
A good aroid mix consists of the following ingredients and ratios according to the Exoticrainforest website:
- Potting Soil 30%
- Peat Moss 20%
- Bark 40%
- Perlite 10%
- Charcoal (a handful)
Read our full article about everything you need to know in order to create an airy potting mix.
When and how to water a Monstera
One thing that took me a while about Monstera care was to get the watering right. You read a lot about watering frequently and when you water the plant that you should almost soak it in it.
The most important thing however is that you get the substrate right first as described above. When the substrate is too dense, watering a lot will lead to a Monstera that stays in soggy soil.
This will directly lead to root rot down the road. We wrote an extensive article about how to spot root rot and how to treat root rot once discovered.
With an airy aroid mix, you can water as much as you want when you water. The water will drain quickly and the soil will never get too wet for too long.
So when you water a Monstera, let a lot of water flow through the soil. This mimics their natural habitat in the jungles where rainfall can be intense.
I tend to water in the mornings. At night plants need time to rest and excess water will dry up slower. This is specifically the case if any leaves get wet.
That is why most people if not all people recommend watering plants in the mornings. This is not only the case for Monstera care but for general houseplant care.

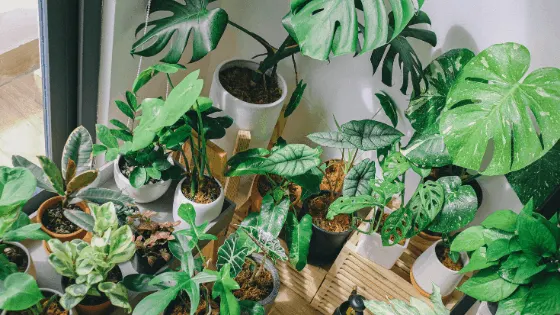
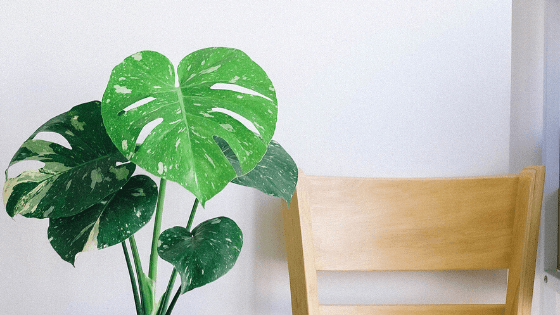
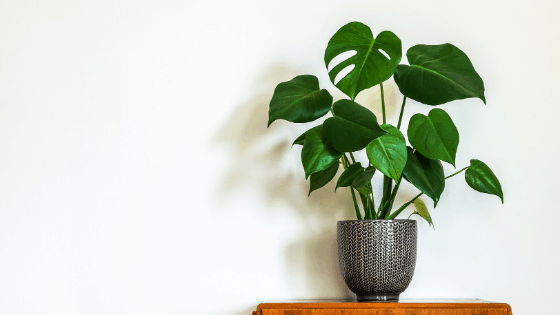
Multiple Monstera species amongst other houseplants
The best water for a Monstera plant
Water does not always equal water. There are many different types of water you can water your Monstera with.
There is tap water, rainwater, reverse osmosis water, distilled water, water from an aquarium with fish increments.
But what water is best for Monstera care?
Tap water is just fine. However, it most likely contains chloride and other nasty chemicals that are not ideal for your plant.
Depending on how demanding and fragile your Monstera is, the more careful I would personally be about what you water your plant.
For a Monstera Obliqua as an example, I would only use the best and certainly no tap water.
Whenever you are taking care of your Oblqua in a terrarium, your choice should be either distilled or reverse osmosis water as tap water will leave nasty stains on the glass.
Furthermore, in terrariums, there is usually no way for contaminations to leave the enclosure ever again. That is why you are using reverse osmosis or distilled water.
You can read everything you need to know about caring for plants in a bioactive vivarium in this article.
Let’s get back to the subject. Most types of monstera will do just fine with tap water but rainwater is certainly a better choice as it will contain fewer contaminations.
If you do think tap water is not all that bad, use a distiller and distill some tap water. Have a look at the contamination that is left in the distiller after the process.
You will see some brown and nasty residue left that lets you think twice about whether to use it for your indoor plants or not.
The perfect light levels for Monstera care

Bright indirect light is best for Monstera care
Get the light right is an important part of Monstera care and it is honestly not all that difficult with a few exceptions.
The right light level I have found out is bright indirect light for most Monstera plants. But what does bright indirect light actually and where can this be achieved?
If you are interested in getting to know the ins and outs of different light levels and window directions and such I recommend you consult the following article I wrote some time ago about the right light for indoor plants.
For the sake of this article lets get into what bright indirect light is all about. Well for starters, it is not direct light. Direct light is when the sun rays hit the leave of your Monstera directly.
Some bright direct light is fine for Monstera care. But it shouldn’t exceed 2-3 hours and it should. be morning light as it is much less strong than afternoon sun.
If your Monstera gets lots of direct light for multiple hours in the afternoon you risk that the leaves are getting burnt.
This is specifically the case in an apartment where the sunrays are intensified due to the glass in windows that act light magnifying glasses.
I will show you the following pictures of my Monstera Deliciosa Variegate that got sunburnt.
Take away the lesson that you should be careful with direct light. So as mentioned indirect light is best.
Since the sun goes up in the east, an east-facing window is optimal as it gets a few hours of direct sunlight in the morning and loads of bright indirect light for larger parts of the day.
You will hear people recommending partial or even full shade when talking about Monstera care. As this might be true outside where plants still manage to get sufficient sunlight it is not ideal.
Your Monstera will not die but it will grow significantly slower than in bright indirect light. That’s the reason why we can conclude with confidence that bright indirect light is the right light level for a Monstera plant.
The right temperature
From my personal experience, the temperature is usually the easiest aspect to satisfy in terms of Monstera care.
As long as you do not have extreme temperatures that are neither extremely high nor low, your plants are going to do fine.
General room temperature in the 65°F-72°F (18°C-22°C) is great for a Monstera plant. The ideal range lies between 68–86 °F (20°C-30°C).
50°F-68°F (10°C-20°C) is said to be the perfect temperature range where photosynthesis is possible at max capacity according to Sciencing. Therefore room temperature around 70°F ( 21°C) is perfect.
Humidity requirements
I am not going to lie to you here. The higher the humidity the more your Monstera will thrive. There are at least one species here that absolutely need the humidity to be above 80%, it is the Monstera Obliqua.
For most of the other species, the best humidity range for Monstera care is between 60-80%. Make sure to not go lower than 40%, as this might harm your plant.
It can be especially tricky in winter months to ensure a sufficient humid environment for your Monstera.
There are different ways to increase the humidity of a Monstera. You can either use a tray with stones beneath the pot of your plant. Fill the tray with water.
This will help to increase the humidity of your plant. Another option is to mist the leaves of your plant frequently with water. A good rule of thumb regarding misting a Monstera is to spray once a day in the morning so the leaves have sufficient time to dry again.
The third and most costly option is to use a humidifier. I am personally not a big fan of it as I would hate to see mold building up due to the increased humidity in my apartment.
And lastly, option number 4 is to put plants close together. This is my preferred option as this way you naturally increase the humidity around all your plants.
In my conditions, the humidity in the living room is around 50% which is not very high but also not extremely low.
A Monstera can do pretty ok in these conditions but it would certainly thrive more in higher humidity.
Monstera Pinnatipartita is no exception when it comes to its love for high humidity.
Allow your Monstera to climb
My main goal when growing Monstera plants and the joy of Monstera care is to get bigger and bigger leaves on your Monstera Deliciosa, Monstera Adansonii, and any other Monstera.
You might be no different in this regard. In addition to the joy of having bigger leaves and showing off on Instagram and Facebook there also is another reason why you might strive for size.
Some Monstera plants such a the Monstera tuberculata, Monstera Dubia, and others look very different in their juvenile stage compared to the adult form.
The only way to ever see how the adult form looks like is to help your Monstera to grow bigger. As Monstera are mostly climbers, you will need to offer your plant a way to climb.
A moss pole, a trellis or even just a stick can be sufficient. The more humidity you can provide your Monstera the better.
Humidity is will make it easier for your plant to attach to a piece of wood a trellis or a moss pole.
I suggest using a moss pole. Humid moss is optimal as it encourages roots to grow that will help your Monstera to attach to the pole.
You can read my tutorial about how to make a moss pole if you are looking for a DIY one.
The better your plant attaches to the pole and the higher it climbs the bigger and stronger it will become.
When looking at the Monstera Deliciosa and also Monstera Adansonii I have in my apartment you can clearly see the stem getting thicker and the leaves getting bigger the higher the plants climb.
Once the Monstera reaches the top of your moss pole you will need to find a way to extend it or exchange the pole by a longer one.
The other option would be to cut your plant and use the cutting to propagate a new plant. However, this way you will achieve significantly smaller leaves on the mother plant.
It will not revert completely to the juvenile stage but it will set the Monstera back in terms of reaching maturity and size.
So we can summarize by saying that letting your Monstera plant climb is the way to get a bigger plant and a plant reaching maturity at some stage.
A few examples of exceptions to these rules are Monstera Obliqua that is rarely climbing as a houseplant as well as the Monstera Thai Constellation.

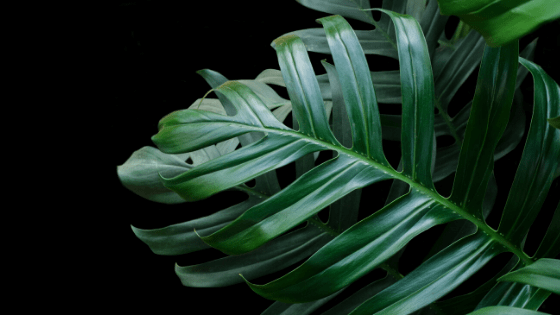
Provide a moss pole or any other way for a Monstera to climb and produce bigger split leaves
Monstera Plant Food: Fertilize the right way
This is a tricky one. How to get Monstera care and specifically your Monstera plant food right. One thing needs to be said in the beginning. Never overfertilize. Overfertilization might kill your plant.
I lost a few Monstera plants over the years because I overdid the fertilizer part. It is not for nothing that a general rule of thumb recommends to use fertilizer always at half the recommended strength.
The challenge with fertilizing houseplants is that they are usually in pots. Once you are fertilizing the fertilizer isn’t going anywhere and sits in the pot.
It is just slowly draining away when you water your Monstera plant or it is taken in by your houseplant.
Another thing you need to be aware of is what a fertilizer contains. Every plant has very specific fertilizer needs. The strengths of the different nutrients are indicated by different ratios.
An NPK fertilizer with 10-10-10 contains equal ratios of Nitrogen, Phosphorus, and Potassium.
On the other hand, a fertilizer containing a ratio of 20-10-5 contains twice the amount of Nitrogen compared to Phosphorus and 4 times the amount compared to Potassium.
But what is the best nutrient concentration for the best possible Monstera care?
Use a balanced fertilizer for Monstera care with a ratio of 20-20-20 for your Monstera Plant. Fertilize once a month in summer and spring and stop fertilizing in autumn and winter.
There are basically two main ways of how to apply the fertilizer. Either you are using slow-release fertilizer that you put into the soil or you are using liquid fertilizer.
I suggest that you are using liquid fertilizer. Monstera plants are epiphytes and their roots are best suited to intake nutrients with a liquid fertilizer. However slow-release fertilizers will do as well.
One important remark. In case you have planted your Monstera in pure Sphagnum Moss, do not use a slow-release fertilizer. It happened to me once that I used slow-release fertilizer on wet moss.
The fertilizer diluted immediately and killed the plant at hand as it was way too strong. The plant became pale yellow and the the stems just kind of melted and the plant fell over.
Never use slow-release fertilizer if you have your plant in a very wet medium. It may sound obvious, but I wasn’t aware of it, unfortunately.
How to pot a Monstera
Monstera care without talking about how to pot a Monstera plant wouldn’t be complete.
The best pot for your Monstera is a pot with drainage holes. Do not use a pot without them as excess water can not drain and will lead to soggy soil.
What kind of pots you prefer is largely up to your preference. I have tried anything from terracotta to plastic pots.
Every pot type has its advantages and disadvantage. For example, a terracotta pot will help to take in excess water due to it being porous. This can be beneficial as it reduces the chances of overwatering.
On the other hand, soil might dry up too much due to that effect. However, terracotta pots worked fine for me.
A different option is to use plastic or ceramic pots. Both options work fine as well. I recently started to use more and more transparent plastic pots as you would use for an orchid.
A great advantage is that you can see the roots this way. You will also see when it is time to water the soil as y0u can observe the wetness and water drops on the inside of the pot.
In addition, these pots often have a lot of openings at the bottom for excess water to drain. You can also add in additional holes on the side of the pots by using a scredriver that you heat up with a lighter.
This way you can burn holes into it on the sides. This will help to oxygenate roots and will reduce the chance of root rot.
While this might work well for smaller monstera types such as Monstera Karstenianum but you will hardly come across a transparent plastic pot that is able to host a large-sized Monstera Deliciosa.
The biggest mistake I have made in the beginning is choosing a pot that is too big.
The biggest disadvantage of a big pot is that the roots are not filling larger parts of the pot. This way it gets extremely difficult to water your Monstera with the right amount of water.
The potting mix will stay too humid and not dry out quickly enough and might lead to lots of problems along the way.
Therefore always choose a pot according to the size of your Monstera. Small Monstera, small pot. Once you report, only go one to max. two sizes up in pots.
Anything more and you will find yourself in troubled waters sooner than later.
Propagate your Monstera plant
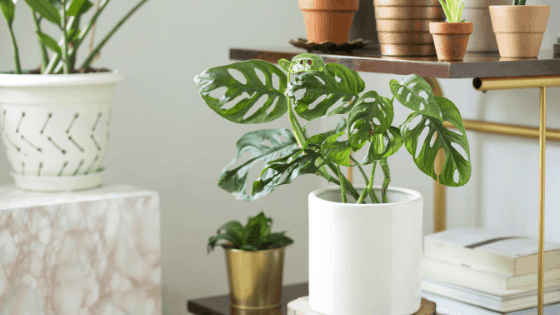

Monstera Adansonii has split leaves similar to Monstera Deliciosa
If there is once aspect I love most about the Monstera care, it is for sure propagation. It is such a straightforward process even with a Monstera Obliqua and the rate of success is extremely high.
So how do you propagate a Monstera?
Let me guide you to the different steps as they are the same no matter if it is a Monstera Pinnatipartita or a Monstera tuberculata.
What you need is a node. I repeat it once again, you will need at least one node as a leaf alone will not do it, unfortunately.
Ok, one node at least, and I would say between 1-3 leaves will considerably speed up the process. I usually just take a cutting with a node and if possible a leaf as propagating without a leaf is possible but it will take significantly longer.
The Monstera cannot do photosynthesis without the leaf and it will have to produce a leaf and roots first to get things going.
Let me explain successful Monstera propagation in a step-by-step approach:
- Have a look at your plant and identify the area that you want to cut. Remember you need at least one node.
- Get your printing shears or scissors
- Let’ get professional here and disinfect the blades first with rubbing alcohol and then hold the blade under a flame for a couple of seconds. This way you will get rid of all contaminations.
- Take a cutting with a node and one leaf if possible. Top cuttings usually will do best. But any other cutting will do as well as long as you got a node on it.
- Make a clear cut. Some will recommend taking it at an angle as the cutting will have it easier to take in water when placed in a rooting medium. I can’t confirm whether this makes any difference or not. I usually don’t do it.
- Alright, you have now taken the Monster cutting. Two important things. Let it callous over. This is the process of having the plant sap dry out and protect the wound. This is as important for the mother plant as it is for the cutting
- Once the cutting dried. This can take a few hours or a day or more depending on the thickness of the cutting, usually, a couple of hours will do.
- Let me share a great hack here. Go into the kitchen and find yourself some cinnamon. Put it on the wound of the cutting and the mother plant. It is said to have disinfectant abilities. It worked wonders for me.
- Then you have the choice between different rooting mediums. The most common are water, soil, sphagnum moss, perlite.
- I first rooted all my plants in water as this was what I had at hand. I then switched over to Sphagnum Moss as I had never seen any other medium where roots developed more vigorously. The advantage of moss over water is that your plant develops soil roots instead of water roots that first have to be adjusted to the soil.
- Let’s now proceed and have a look at the different propagation media. For the water method just use water temperature water and put it in a clear container. Put your plant in it and make sure the leaf is above the water level and is not in contact with any liquid. Exchange the water every couple of days so it stays fresh. When you decide to use Sphagnum Moss make sure it is wet but not soaking wet. Whether if you are using live moss or dry moss, put it in water first and let it soak a minute or to. After that grab it an press it really hard in your fist at least 3 times. This is the level of humidity you want. Be careful: If the moss is too wet it will rot your cutting in no time. Happened to me several times. The soil method is the easiest but you have the least control over it. You basically just need to make a hole in potting soil (aroid mix) and stick your cutting in it. Gently push the soil against your cutting. Water your soil sparingly and never let it dry out completely. But here as well. Your cutting has no roots whatsoever, so very little water is needed. For the perlite, method use perlite and put it in a clear container. Stick your cutting in it and fill the bottom two inches with water. The water should not touch your cutting. The wicking effect will bring the water upwards and keep the cutting humid. Once all the water is gone in the reservoir refill the two inches of water in the bottom of your transparent container.
- Alright, the waiting game has started. This may easily take 3-4 weeks and this would be fast. It can also take months.
- Once your cutting has produces roots that are at least several inches long you can move your cutting over into its own container with aroid mix. A tip for the soil method. After 3-4 weeks you can gently pull on your cutting. If your cutting resists, then you can be pretty sure that the rooting process has started.
A few general remarks. Propagate in Spring and Summer as this will speed up the process tremendously.
Winter and Autumn propagation can take 2-3 times as long as there is less light and also less warmth and the Monstera cutting somehow seems to know that it is not Spring and Summer.
Check out the best-kept secrets regarding Monstera care and propagation check out the Monstera Care Secrets. It is definitely worth it.
Common Monstera Problems
Overwatering
A sign for overwatering is several leaves turning yellow, also the young ones. Check your soil by sticking your finger into the soil.
If it is soaking wet, there are chances you watered too much. Observe the soil, if it stays soggy for several days you have to completely remove it and report your Monstera plant.
Underwatering
Underwatering can be detected by – you guessed it – check your soil once again. If it is is crumbly and not sticking on your finger when testing your Monstera needs water.
Monstera care is all about providing the right amount of water which is not always easy. Water your plant slowly so the roots can absorb the moisture.
Pests
Monstera care as the care for most houseplants is also about caring for your plant in all circumstances. Having to deal with a pest infestation is a common one, unfortunately.
Personally, it took ma while before I had any plant infested by a pest. But the more plants you get the bigger the chance is that you are bringing problems home.
I had to deal with mealybugs and spider mites before and it is no pleasure to be totally honest. These pests are so hard to get rid of entirely.
Let’s have a look at all the different pest infestations that your Monstera plant can get:
Aphids
These pests look like small grasshoppers and have sizeable back legs. They are a plant sap-sucking species. The good part about Aphids is that they are clearly visible.
Once you spot them you can pick them by hand. Use gloves if you don’t feel like touching them directly. Remove all of the aphids from your Monstera as they can kill your plant entirely.
Read our article about spotting and getting rid of Aphids.
Thrips
Thrips are fat longish little creatures with wings. They suck the plant sap from your Monstera and can leave considerable damage. They can also transmit viruses.
Your Monstera can turn pale and silvery as well as discolored and patchy due to the infestation. Your plant will die if you are not taking any countermeasures.
Mealybugs
I personally despise mealybugs. They are extremely difficult to get rid of. They are white cotton-like animals that very prolific and sooner than you know a big colony of mealies has spread on your Monstera.
Actually they are pink and waxy and the cotton-like structure is covering and protecting their bodies.
Our mealybugs article has got your covered. Consult it to et to know about the best remedies.
Whiteflies
These are white insects with wings that have a soft body. They have white powdery wings and striking antennas. They prefer to stay and feed off the underside of your Monstera plant leaves.
Whiteflies are also a plant-sucking type and this is never a good thing in terms of Monstera care. They can damage your plant and stunt the growth.
Fortunately, they are easy to spot. Once you get close to your Monstera and touch its leaves they will swarm out and fly.
Fungus Gnats
Fungus Gnats look like mosquitos. These pests are not a huge problem for your Monstera to deal with.
They indeed can attack the small tender roots of your plant but the bigger problem is that they are annoying to deal with.
They are more a hazard for the humans that have to deal with small little mosquito-sized insects flying around in the apartment.
Fungus Gnats are attracted by humid soil. This is also where the adult ones lay their eggs in. The eggs will be close to the surface.
These animals are harmless to both the humans and the plants about they are pesky and if you are anything like me you want to get them out of the house as fast as possible.
Scale
Scale is a hardly ever moving insect with a soft or hard shell-like brown, red or black body that likes to attach to leaves and leaf joints. They are plant-sucking bugs that suck away essential nutrients from your Monstera.
Yellow leaves
Yellow leaves as a part of Monstera care are mostly a sign of overwatering. However, it can have a bunch of different reasons from overwatering to underwatering, to a pest infestation or sunburns.
It can also just be natural as older leaves will yellow and will fall eventually off. The important point is to have a looks at which leaves yellow exactly.
If it is the oldest leaf at the very bottom of the plant it is most likely natural. If multiple leaves are yellow it is probably one of the mentioned reasons above.
If you want to know about all the different reasons why leaves on plants yellow I suggest you read our in-depth article about yellow leaves on plants.
Brown leaves or spots
Brown spots on your Monstera indicate that you are doing something wrong in terms of Monstera care. The most common cause is overwatering and thus roots that have started to rot.
A different reason could be dehydration. You can easily tell which one is the case by checking the soil of your plant.
In case the soil is soggy you most likely have to deal with root rot. I dedicated a whole article to root rot but will quickly elaborate here what you can do about it.
Step by step guide to save a Monstera from root rot:
- If you spot black spots and the soil is soggy remove all the soil from your plant
- Inspect the roots and check if they are brown, soft and mushy
- Gently squeeze and pull on the roots. If they come off easily you have root rot on your Monstera
- If that is the case rinse the roots under running lukewarm water and remove all parts that are rotten
- Use scissors to cut off rotting roots just above where they are rotten
- Disinfect the scissors
- Disinfect the pot the plant was in and remove and throw away all the potting mix
- Get a new aroid mix and report your Monstera
- Repot your plant but do not water for the first 2 days since repotting might have damaged the roots and by cutting away the rotten areas the roots have wounds that need to callous first
- You saved your Monstera from root rot, congrats!
6 Things you should never do with your Monstera


Mature leaves on a Monstera Deliciosa
Let’s have a look at the biggest mistakes you can make in terms of Monstera care. There are a few things you should never do. This is a handy list:
- Choose the wrong potting soil (eg. regular houseplant potting mix) as it will lead to root rot
- Put your Monstera plant into direct sunlight. Leaves will get crisp and burn.
- Overwater you Monstera. This is especially bad in combination with the wrong potting mix
- Overfertilize. Err on the side of caution. It is much less harmful to under fertilize than overfertilize. I am talking from experience here, unfortunately.
- Put your Monstera in a dark corner. These plants need bright indirect light.
- Neglect your plant. Many of the problems such as root rot, pests, and other problems are not as severe if you spot them early.
Monstera Care Secrets
Soil
Do not use a regular potting mix. You wouldn’t believe how often I had to fight to keep a Monstera alive with rotted roots just because it was in the wrong substrate.
Too dense a substrate will stay soggy and will be no god for Monstera care. You can avoid a lot of drama and disappointment if you either buy an aroid mix or mix it yourself.
Propagation
I am going to tell you my best-kept secrets regarding Monstera propagation. This will up your Monstera care game, I guarantee it.
Some of the things might sound obvious but it is not before you actually try these suggestions out that you realize what difference they make to Monstera propagation and Monstera care in general.
Hack #1 Plastic container
Use a plastic container. People tend to lament about mold building up and airflow and such. But let me tell you one thing.
This usually doesn’t happen. Sure air can become stagnant if there is no airflow. But if you open up your container every few days that is more than enough to prevent air from becoming stagnant.
I keep my containers almost 100% sealed where I propagate my cuttings in. Let me tell you exactly how I do it step by step:
- Get a clear acrylic plastic container with a lid
- Fill it with moist sphagnum moss at the bottom as this will make it very easy to keep humidity very high if not 99%. You can also do without it, but it will certainly be easier to hold humidity up. You can also do without it as a closed box will stay pretty humid and if you are spaying water you can see it dripping form the top and fall down like rainfall. You will have some sort of mini ecosystem in a box. Isn’t that great-
- Spray some water using a water sprayer. I only use distilled water as it will not leave any residues in the box and the box doesn’t get contaminated with any chlorine and other toxins.
Hack #2 Use a Heatmat. This is a gamechanger
You want to speed up the propagation by x2 and want more roots faster? Well be my guest and use a heatmat. A heatmat for seedlings is best from my point of view as they keep your cuttings nice and warm.
As an alternative, you can use a terrarium heatmat. This will work as well.
Read the instructions as every heatmat is different and not all heatmats can be put underneath your container or pot, as this is where you want to have it. Roots love it warm and will grow much faster.
Once I started to use a heatmat my propagation success just got much higher and cuttings were growing way better and faster.
Hack #3 Do not put your cutting into the darkest corner of your house
It is true fresh cutting need less light and should not be exposed to direct light as they might dry out quickly. But putting it in a dark corner of your house will certainly not help either.
Choose a spot with bright indirect light that is warm. If you are using a heatmat you are going to be covered in this regard anyways.
If you follow my advice and use Spaghnum Moss, a heatmat, and a transparent box you are all set. Spray in your container a few times and then check if the water is building up at the sides and the top of your container.
If this is the case you can pretty much sit back and relax. Open up the box every couple of days to let fresh air in and only spray water if you feel a lot of water has evaporated.
Since you have created a mini-ecosystem it will water itself and you can pretty much sit back and relax.
You just need to add in more water into the cycle every couple of weeks as very little water will evaporate and disappear.
Light
Use grow lights (in winter)
Plants need lights to grow. We all know that. Specifically in winter months where it not only gets colder but also darker plants to get less sunlight.
Without using any grow lights Monstera care can get quite bland and boring. You will hardly see any new leaves developing and the growth will be significantly slower.
Whenever autumn starts I start to switch to grow lights. I keep them 16 hours on and 8 hours off. All-day every day.
The best thing is that grow light doesn’t have to be expensive. Neither the lights itself nor the energy they are consuming.
I am using Växer plant lights form IKEA. They cost around 16 dollars where I live and let me tell you they are strong and intense.
They work very well for my Monstera Deliciosa Borsigiana Variegata. But you need to make sure that you have them at a distance.
I would keep a minimum of 20 inches (50cm) away from your plant (the closes leaf) as you are risking to burn or bleach your plant. Leaves tend to get very bright green and dull.
This is a clear sign that the grow lights are too close to your Monstera plant.
Just for the record. I am using grow lights all year round in addition to natural sunlight.
Once I started using grow lights I have hardly seen any difference between spring/summer and autumn/winter in terms of growth. Sounds great, doesn’t it?
Frequently asked questions about Monstera care
When do monstera leaves split?
Monstera leaves split when Monstera plants get more mature. It takes a Monstera Deliciosa around 3 years before the leaves are fully split.
Juvenile plants do not have split leaves. Once the plant matures, the leaves get more split from leaf to leaf.
The right amount of nutrients, water, soil, and the right potting mix as well as providing a Monstera a way to climb leads the plant to mature and produce split leaves.
Why do new Monstera leaves curl?
Underwatering is the most likely reason why Monstera leaves are curling. Increase the amount of humidity and give your plant a good rinse. Keep a regular watering schedule of once a week depending on the amount of light and the temperature your Monstera is living in.
Why is the new Monstera leaf floppy?
New Monstera leaves are floppy as they need time to harden off. It usually takes 3-5 days before a Monstera leave is hardened off.
How to make a Monstera grow faster?
A Monstera is growing faster when you are able to provide ideals conditions in terms of potting soil, temperature, light, and humidity.
An airy aroid mix using chunky material as well as temperatures between 50°F-68°F (10°C-2°C) is ideal.
Bright indirect light is essential for your plant to grow well. A trellis or moss pole will further help to increase the speed by how a Monstera grows.
Can I keep a Monstera outside in summer?
Monstera plants can be kept outside as long as the temperature stays in the range of 50°F-68°F (10°C-2°C) and does not fall below 50°F at night.
Is Monstera poisonous?
The Monstera genus is mildly poisonous to humans and toxic to humans and cats. It can lead to oral irritation and pain in the mouth area. Ingestion of large amounts will lead to vomiting, drooling, swelling of tongue and mouth as well as difficulties swallowing.
Conclusion
Monstera is my favorite genus by far. I made it my personal goal to own as many different Monstera species as possible.
Monstera care is no only fun because of these amazing looking pinnate and holey leaves that cry jungle, it is also quite easy compared to other plants. It is very hard to kill let’s say a Monstera Deliciosa.
Even if you over or underwater once or twice. You will hardly lose your Monstera over it.
And yes apart from the regular forms there are the Variegated Monsteras such as the Monstera Deliciosa Variegata and the much more rare Monstera Adansonii Variegata.
Tell me in the comments what your favorite Monstera is and why. Happy Monstera care!


Daniel has been a plant enthusiast for over 20 years. He owns hundreds of houseplants and prepares for the chili growing seasons yearly with great anticipation. His favorite plants are plant species in the Araceae family, such as Monstera, Philodendron, and Anthurium. He also loves gardening and is growing hot peppers, tomatoes, and many more vegetables.